The Lenovo A536 phone is one of the most interesting mobile gadgets today. Its reliable operation is guaranteed by timely updating of applications and software platform. Firmware for smartphones is used specifically for this purpose.
You can use the standard version of the firmware, and if it supports the self-updating function, this may be enough for full operation. But if an independent update does not occur or there are some system failures in the operation of the gadget, it is quite appropriate to replace the firmware version yourself with some other one.
There are two ways to install new firmware on the Lenovo a536: either through an additional program from a computer, or through the Recovery system on the phone itself. You will be pleased with the results in both cases if you follow the instructions below.
Why do you need to update Android on time?
Before you update your Android tablet, you should understand why the update is needed. The fact is that the update makes the gadget faster, safer and more modern.
Global system updates add new features, install new anti-malware protocols, and implement various techniques to improve performance. Plus, it fixes past errors, bugs, and comes for free. In addition to all of the above, new firmware often solves local user problems. For example, a non-working camera may work after updating the operating system. This solution is much simpler than reinstalling the firmware or resetting to factory settings. Updating the system or using the old version is everyone's choice. You are not required to install new versions of the operating system.
But I recommend two things: update the Android version on your tablet on time, and not install unofficial firmware.
The last tip is addressed to those who want to download the new Android on a device that does not support it. Even if the old device is equipped with powerful hardware and can definitely handle the new OS, it is not worth installing.
Why? Because the operating system is not optimized for the old model. Namely, optimization determines how well the firmware will work. Not from the power of the components.
Conclusion
Before you start flashing the firmware, you need to understand exactly the reasons that prompt such actions. It's worth noting that this process, although not complicated, deletes all data. And it will be impossible to return them. Therefore, it is recommended to keep everything that is most valuable and personal securely. A memory card is great for this. In addition, you can create a backup copy so that in case of failure you can return to the previous version.
In general, for Lenovo s6000 firmware is no different from this process on other devices from the same manufacturer.
Smartphone improvement: firmware for Lenovo p780 Lenovo a328 firmware using a PC Lenovo S660 firmware: features and procedure Lenovo a 800 firmware: instructions Lenovo a 916 firmware
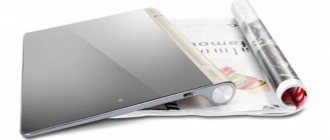
pleased her fans with a ten-inch tablet. Although the device was released in 2013, it will have something to surprise the world. Undoubtedly, the S6000 tablet is suitable not only for games, but also for work.
Preparing to update the tablet firmware
Despite the fact that updating the operating system is not as categorical as flashing or resetting to factory settings, I advise you to prepare the tablet before updating. First of all, you should back up all user data.
The new Android will not delete the user's files, but if the installation is unsuccessful, there is a risk of data loss.
You can make a backup to your Google account; to do this, open the settings, then select the “Recovery” section (“Restore and reset”, “Privacy”) and click “Backup”.
Backup in Google settings
Or you can manually copy important files to an external storage device, be it a PC or a memory card. Next, check if there is free memory. At a minimum, there should be 500 megabytes of memory on the internal storage, since the updated firmware is in most cases installed in the system memory. And lastly, charge the gadget to at least 90%.
If the device is old and the battery discharges very quickly, then leave it connected to the charger when updating.
Backup function.
The operation of creating a backup of system data and files will take only a few minutes - for this purpose, Android has built-in tools that are in plain sight even for those who are making a copy for the first time.
You should sequentially follow the following path: “ Settings ” - “ Backup and reset ”. Next, enable recovery in the “ Data backup ” item.
If the update is unsuccessful, you will have to roll back to factory settings, but if you perform a backup, all personal data - photos, documents, application configurations - will remain in place. Data can be transferred to your computer’s hard drive, to cloud storage, or to removable media.
Where to get the latest version of Android
Before you look for how to update your Android version to the latest version, you need to find out whether this version is available specifically for your model.
To do this, simply enter the request into a Google or Yandex search engine: android (version) on tablet (device brand and model).
For example, “Android 9.0 on the Samsung Galaxy Tab S6 SM-T865 tablet.” If you find that your gadget supports new firmware, then feel free to install it. The file from the latest version of the operating system for Android tablets can be found on the websites of some manufacturers.
Many brands do not post files or archives with the latest firmware, but they are easy to find on the Internet, for example, on the 4pda portal.
Most manufacturers offer to update the Android version automatically or using a proprietary PC program.
Leading brands have both of these methods: Samsung, Huawei and Lenovo. Asus, instead of a proprietary PC program, offers an archive with the operating system.
Using third party programs
In addition to the methods described above, there is another one - using third-party programs. Let's look at how to do this using the AnyCut application as an example.
We start by downloading the program to your device. The easiest way is to find and download it through the Play Market.
- After installation, launch it, go to the “System Information” section, and then check for new updates.
- AnyCut will run a scan and as soon as it detects the presence of new software not yet installed on the tablet, it will offer to download it.
- We agree and wait. In just a few minutes the device will turn on with completely updated firmware.
How to update the Android version on your tablet
Updating the operating system on Android is quite simple. In addition, there are several ways to do this: use automatic updating, download the installation file on the manufacturer’s website, use an external drive (SD card), use a computer program, update third-party software. I have described each of these methods in detail below. I recommend trying all the options in the order in which they are written.
Automatic update
The most popular way to install a new version of the operating system is automatic updating via the Internet. Usually, when an update is released and if the device supports it, a notification about the release of new firmware appears on the display. All that is required from the user is to agree to the download and leave the device alone for a while. A situation may arise when the notification is not displayed, for example, because the “do not disturb” mode is turned on or you manually turned off system notifications. You can update the gadget yourself through the settings menu by selecting “Software Update”.
Update algorithm
If there is a new version of Android, then the message “Update system” will be active at the bottom. Click on it to start downloading the new firmware. When the download is complete, the device will automatically reboot and the installation process will begin.
It is very important not to turn off the tablet during installation, otherwise the device will become a dead brick. Therefore, you need to have a charged gadget.
Another important detail is a fairly fast Internet speed (at least 4 Mbit/sec). Despite the fact that the system data package will first be downloaded and only then installed, some part of the OS will be downloaded during the installation process (but lately developers have refused to download over the Internet during installation). In very rare cases, the new OS version will not be in the settings. For this, the following options exist.
Via the manufacturer's website
On the websites of some manufacturers, for example, Asus, there are installation files for the new version of Android. This is not a single executable file, but a .zip archive. Step-by-step instructions for downloading and installing the update via the manufacturer’s website:
- Open your device's brand website through a mobile browser. Above I gave Asus as an example and gave the corresponding link.
- Find the “Support”, “Support” or “Software” section on the website.
- Enter the full name of your device into the search or find it using sorting (if it is on the site).
- Download the installation archive to your tablet. Preferably in the gadget's memory in the root folder.
- Turn off the device.
- During startup, call up the recovery menu by holding down the power and volume down (or up, depending on the device) buttons. Sometimes this combination is different, for example, the combination of the “Home” and “Shutdown” keys.
- The Recovery text menu will appear. You can move the selection slider using the volume buttons, and select with the power button (or “Home”).
- Select “Apply Update”.
- Select the directory where the installation archive was downloaded. In this case, the archive is in the root folder (on the tablet’s memory), which means click “internal storage”.
- Find the name of the installation archive and select it.
- The operating system update will begin, after which the recovery menu will reappear.
- Click on “Reboot system now”. The device will reboot after being updated.
Follow the instructions carefully and enjoy your new OS.
Using SD card
The method using an SD card follows from the previous one, since it implies everything the same, only the installation archive is downloaded to the memory card.
This method is suitable for those who do not have free space in the tablet memory. The only difference in the update instructions is to download the archive to the SD card and when selecting in the recovery menu, instead of “internal storage” open “sdcard”.
You can also download an archive from a PC or any other device to a flash card.
Using a computer
The method of installing Android through a computer is as simple as automatic updating. You just need to download and install the appropriate proprietary program on your PC, which will scan the device and find all the latest firmware versions.
You can find the software on the website of the corresponding manufacturer. Especially for you, dear readers, I have collected links to pages with programs from all popular tablet manufacturers, except Asus, since they do not have their own software.
Links to programs:
- Samsung, Smart Switch program;
- Huawei, HiSuite program;
- Lenovo Smart Assistant program.
All three programs have Russian-language localization, and the links above contain not only the software installation file, but also step-by-step instructions. Don't forget to connect your gadget to your computer via a USB cable!
Through third party programs
Previously, it was possible to update the firmware through some applications in the Google Play Market. Now such applications no longer exist (at least in the Play Store), because almost all of them worked poorly and contained malware.
But there are third-party programs on a PC with which you can not only install a new OS, but also reinstall the firmware completely. One of the most popular programs is Odin. It requires a complete operating system installation file.
You won’t find this on the manufacturer’s websites, but on portals like 4pda it won’t be a problem. Installation of the new firmware version occurs through Odin. There is a lot of similar software, but I advise you to use it only as a last resort, since this update method requires some knowledge. One incorrectly specified command can make a “brick” out of a gadget.
How to fix if the computer does not see a phone connected via USB - additional methods
If your phone does not connect via USB to the computer with data capability, but only charges, try the following methods to fix the problem.
Checking the operation of the phone (MTP device) in Device Manager
- Open Device Manager on your Windows 10, 8.1, or Windows 7 computer while your phone is connected. To open Device Manager, you can press the Windows + R keys on your keyboard, type devmgmt.msc and press Enter. Windows is a key with the OS logo.
- See if there is a device named MTP (MTP Device) or your phone's name in Device Manager (may be in the "Portable Devices" section).
- If there is, double-click on it, go to the “Driver” tab, click “Update driver” - “Search for drivers on this computer” - “Select from the list of available drivers on your computer” and look at the list. If there is more than one compatible device, try selecting a driver other than the one currently installed, usually you should select "USB MTP Device".
- If no new devices appear in the manager when you disconnect and connect the phone via USB, this is another argument in favor of problems with the cable, connector on the phone or computer.
For more information on this topic, if the device appears in Device Manager with an exclamation mark, see the separate instruction The service installation section in this MTP INF file is incorrect.
Camera
Photography is not the strong point of any tablet. The Lenovo Ideatab S6000 was no exception. The manufacturer installed a 5 megapixel “eye” as the main camera. The resolution, as in most similar matrices, is 2592 by 1936 pixels. Actually, you can’t count on quality. Photos come out faded and without small details. Slightly blurry outlines of objects also hurt the eye.
If you don’t have a more advanced device with a camera at hand, the S6000 will do, but the result will be the same. Particular difficulties arise when shooting distant objects. The approximate distance at which the camera shows good results is 1-2 meters.
The device also has a front camera. The owner has access to a “peephole” with the usual 0.3 megapixels. The photo quality is simply terrible, so it's best to forget about this feature. The only thing the front camera can handle is video calls.
Display
The Lenovo Ideatab S6000 had a 10-inch screen. The diagonal hints that the tablet is perfect for working with documents and for entertainment. The sensor, which accepts ten touches, is also pleasing. Although, most likely, five will be enough for the user.
The resolution is fully consistent with a budget device and is 1280 by 800. The number of pixels would look good on seven inches, but on a large screen they are noticeable. At 149 ppi this is not surprising. The image is acceptable, although the user will notice the “cubes”.
The Lenovo Ideatab S6000 matrix uses IPS technology. This solution makes the display significantly brighter and improves its behavior in the sun. Of course, the screen glares a little due to bright lighting, but the situation is not critical. The technology has also increased viewing angles. You can view the screen in any position without significant distortion.
For a budget device, the display turned out to be very successful. Good resolution and matrix make themselves felt. It will be difficult for a fastidious user to detect flaws.
Positive reviews
The model attracts attention with its huge display. The well-balanced screen appealed to many users. Naturally, there are minor complaints about the resolution and behavior in the sun, but the advantages outweigh the disadvantages. A significant viewing angle and brightness ensure comfortable work, and a sensor that accepts 10 touches is still relevant today.
The hardware also delighted Lenovo fans. There are not many devices with four cores among state employees. The processor is also not bad, because everyone already knows and trusts MTK products.
Installing a 6300 maH battery was an excellent decision. Most of the owners chose the device because of its operating time. Users want to avoid being dependent on recharging, and the S6000 tablet provides that opportunity.
Surprisingly, the main advantage was the price and the capabilities of the device completely justify the cost. The budget nature of the device attracted most of the owners.
Design
The device turned out to be quite inconspicuous and very large. The Lenovo Ideatab S6000 is suitable for users who are not picky about design and size. Although at 10 inches the length is 26 and the width is 18 cm - quite expected parameters, with a thickness of 8.6 mm there is a clear overkill. The user will definitely need a carrying bag, because this giant is unlikely to fit into a pocket.
In addition, the device does not have a wide range of colors. The buyer will be offered exclusively Lenovo Ideatab S6000 Black. The manufacturer does not provide other colors. The limited number of colors greatly affected the overall impression of the appearance. The tablet is inconspicuous, and the usual black color does not give it much solidity.
The device is made entirely of plastic, which is quite expected from a budget employee. The rear panel material is corrugated, which is made to improve operating comfort. The tablet feels confident in the hand, which is surprising considering its weight of 560 grams. Ease of use is entirely due to the grooved back.
The manufacturer took care and the protection allows you to avoid minor scratches and, more importantly, fingerprints. If they were large, hand marks would be a real nightmare. However, the device's drop protection is far from the best.
The tablet is assembled well, but squeaks in some places will still bother the user. There are no noticeable gaps, which is very good. An unpleasant moment was the slightly sagging rear part. For a budget employee, in principle, the device looks good, although with minor flaws.
The front part is reserved for the front camera, a large display, sensors and, of course, the company logo. The main camera, a glossy company sign and speakers were placed at the back. At the top there is a jack for headphones, as well as a power button. The manufacturer has noticeably overloaded the side panel on the left side. A USB connector, volume control, HDMI port, SIM card slot and space for a flash drive are located here.
A strange decision to place most of the nests on one side. Considering that the right side is completely free, the arrangement of the elements causes only bewilderment. Overloading the right side should not affect the comfort of use, but it does create an unpleasant impression.
Autonomy
Everyone knows that it is very gluttonous, and the manufacturer decided to improve the situation. A battery with a capacity of 6300 maH was installed in the device. The duration of work has increased significantly.
The maximum load on the device will drain the battery in 4-5 hours. We can say that this is a record for a public sector employee with such characteristics. Economical use increases the lifespan of the device up to 9 hours.
The main “eaters” of energy are the display, the system and Wi-Fi. By reducing the screen brightness, turning off unnecessary programs and the wireless network, you can slightly increase the operating time.
Equipment
The device comes in a branded white box. In addition to the Lenovo Ideatab S6000 H, the kit includes instructions, a warranty, a USB cable, an AC adapter, and a removable plug. The equipment is quite expected, but we should not forget about useful little things.
A case for a Lenovo tablet made of plastic will reduce the amount of damage. It will also be useful to purchase an HDMI adapter. Of course, such a cable is not essential, but it is still useful. You will need to supplement the package with a flash card. A protective film will also not be superfluous. The oleophobic coating can protect against scratches and fingerprints, but the display is not immune to drops.