- The easiest way to delete a contact
- Using third party programs
- How to remove duplicate contacts?
Over time, the phone book becomes filled with contacts, the need for which gradually disappears. As a result, a lot of unnecessary contacts are stored in the device's memory. It is clear that all of them are not needed in the phone book. In this regard, a completely reasonable question arises: how to delete a contact? Not everyone can do this on Lenovo.
What to do if there is nothing on the link or they are different?
If the web page is empty, or something is wrong, you need to connect a suitable account. At the top right of this site there is a profile management menu; by clicking on it you need to log in to the account connected to your smartphone. This menu is labeled “Login” or someone’s name will be there.
You can check your account through your phone in the settings, there is a “Google” menu, it shows the current profile with all the user’s connections. Once you recognize your account and connect it, contacts will appear and you can delete them without any problems.
Recovering contacts on PC
To recover deleted contacts without logging out of your Google Account on your PC, do the following:
1. In the “Contacts” section (page - contacts.google.com/preview/all), in the vertical menu on the left, click “More” (a list of additional functions will open).
2. Select "Restore...".
3. In the additional window “Restore... in the old version...” click “go to the previous one...”.
Note.
At this point in time, the “Recovery” function only works in the old version of the Google service.
4. After returning to the previous interface, click “More” at the top of the list.
5. Click the “Restore…” function in the catalog.
6. Specify the state at which point in time you want to restore (an hour ago, yesterday, etc.).
7. Click "Restore".
8. Refresh the page: press the "F5" key. All deleted addresses and numbers will appear in the list again.
Once the operation is complete, you can return to the settings panel of the new version of the service by clicking “Try new version...” in the menu.
Deleting contacts with third-party programs
Still haven't learned how to delete contacts on Android? Does the program for working with the phone book cause any difficulties? Then you need to remember that what you have in your hands is not an antediluvian telephone with a rotary dialer, but a modern smartphone with enormous capabilities. And what you don’t like here can be easily replaced.
If your current contacts program is causing you problems, download another program. To do this, you need to visit the Playmarket application store and enter the word “contacts” into the search. Here is a list of good applications:
- Contacts + from the developer Contacts Plus team;
- PixelPhope by Dorado Apps;
- ExDialer – Dialer&Contacts from Modoohut.
These are proven and very powerful applications for working with the phone book and contacts, and in Russian. The latest program has the largest number of settings - thanks to them, the contact list can easily be adjusted to your own needs
.
Recovery
Many users of mobile phones that run on the Android platform do not even think about the fact that sooner or later the SIM card will be full and in this case they will need to transfer contacts. For example, if you have updated the firmware on your device, then after you visit the Google Play service, automatic data recovery will begin. All contacts will be duplicated. If there is already not enough space, then some of them will simply disappear. We'll talk about duplicates a little later, but, however, deleting them is as easy as deleting regular contacts on your phone.
Disable synchronization with contacts
During synchronization with communication applications, contacts from them are added to the phone book. You can remove them like this:
- Open your phone settings
- Go to the "Other Accounts" section
- Select the application whose contacts you do not want to see in the phone book
- Turn off contact syncing for this app
Some applications do not have the ability to disable synchronization only with contacts, in which case you can completely exclude it from the list of synchronized applications. You can also not delete such contacts, but configure the display of contact sources. For this:
- Open your phone book settings
- Go to the "Display" section
- Open Contact Filter
- Select from which sources you want to see contacts
Uninstall on PC or laptop
1. First look on your Android smartphone or tablet to see which account the data that needs to be cleared is linked to: Settings → Manage... records.
2. Open on your computer, in a browser tab (preferably in Google Chrome), the address -mail.google.com.
3. On the login page, enter the login and password of your account used in the Android system.
4. At the top of your profile panel, in the upper left corner, under the Google logo, open the Gmail drop-down menu. And then select "Contacts".
5. In the list, in the contact field that you want to remove, click the “three vertical dots” button. In the submenu that opens, click “Delete”.
After these steps, the contact will disappear from the list displayed in the account, and soon on the Android device, once the auto-sync procedure is completed.
Note.
If the function of synchronization with profile settings on the server is disabled on your gadget, be sure to enable it: Settings → Account management → Google → account settings. Otherwise, the deleted contacts will appear on the phone.
How to add contacts to Lenovo tablet?
Add contact:
- Tap Contacts on the Home screen. Picture 1.
- Click the "Add New Contact" icon in the lower right corner. Fig 2.
- In the Add New Contact interface, enter the name, mobile phone, email and other information, click ADD OTHER FIELD to add more information. Fig 3.
- Select the required field. Fig.4.
- Once the information is complete, click the “Save” icon in the top left corner. Fig.5.
Standard way to delete a contact
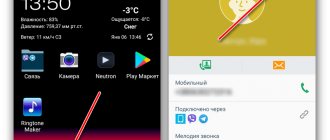
On phones with the Android operating system, there is an easy way to edit your contact list. To do this, you need to find an application that stores a list of them. Usually it is called “Contacts”, but it can be different. Its pictogram is a notebook with a schematic image of a person on it.
Next, the instructions will tell you how to delete a phone number on Android:
- Here is a list of contacts; find the one that is no longer relevant.
- Click on the contact you want to delete. Hold your finger until an additional menu appears.
- From the list, select “Delete” and confirm your decision.
When you click on the desired line, the operating system may behave differently. Sometimes the menu does not appear, and a line is activated at the top of the screen, which schematically displays the available actions. In this case, you need to select an icon that resembles a trash can or trash can.
Also, sometimes the interface of this application involves calling up the menu not by holding your finger for a long time, but by a special button.
Why contacts are not deleted from my Android phone
Synchronizing contacts with What's App servers
There are 2 reasons for this:
- Enabled automatic synchronization of contacts with Google servers, What's App, Telegram or After it, usually deleted entries are returned.
- The contact is associated with some messenger or other application, which is why the “contact is read-only” error appears.
In the first case, the problem can be solved in 2 ways: disable synchronization of contacts with Google and messenger servers or clear the list of contacts from your Google account, and then synchronize them with the device.
In the second case, the problem is also solved in 2 ways:
- Change display settings in the phone book so that identical entries from different applications do not confuse the user.
- Separate contacts and delete unnecessary ones.
Changing Display Settings
This feature does not delete contacts, but hides “duplicates” from different applications. The procedure differs on phones from different manufacturers due to differences in the interface, but the principle is the same. For example, on Asus Zenfone 4 (A450CG) with Android 4.5 and ZenUI v3.0 shell, this is done like this:
- Open "Contacts".
- Click on “Contact Filter”. On other phones, this item can be found in the application settings under the name “Display”.
- Mark the source of the displayed contacts (SIM, phone memory, Google accounts, What's App, etc.).
Contact separation
The procedure is as follows:
- Follow step #1 from the previous method.
- Find the desired entry, hold it with your finger and select “Edit” in the menu that opens.
- Click "Split".
- Delete unnecessary entries in the standard way.
This option is only available on Android 8.0 and 9.0. To delete on versions 7.0 and older, you will need a third-party Easy contacts delete utility. It is used extremely simply: click on the desired contacts and click on the button with a cross at the bottom of the screen.
To summarize, we can say that you can delete problematic entries in the phone book in a few clicks, without resorting to third-party applications.
Standard deletion of a contact in Android OS
First of all, let's try to delete one or more entries. To delete a contact on Android
we will need to perform the following manipulations:
- We open our own telephone directory.
- Click on the button that opens the control menu, and then click on the “Delete contact” icon.
- In the phone book, next to each entry, a small square will glow, through which you can mark the contact. Select all the entries that we want to delete and click “Ok” (located in the top menu).
If you need to completely clear out the telephone directory, then you should not select all contacts
one by one. Click on the special arrow located in the “0 Selected” field, there the “Select all” line will open in front of you, click on it, and then click “OK”. As a result of such actions, the entire telephone list is cleared.
The Play Market has a huge number of applications through which you can manage your phone book. If you need to work with entries stored in the SIM card memory, then in this case, using a free program
Sim Card Manager. Using it, you can delete, edit or, on the contrary, add numbers of friends, create various backup copies, and also carry out other useful actions.
Disable account synchronization
The question of how to delete contacts from Android is directly related to device synchronization. If you really need to clear your phone book or erase certain information from it, you need to enable synchronization with your Google account on your smartphone. Otherwise, all unnecessary information will be saved in your account and will again appear in the gadget’s memory. Therefore, disabling account synchronization is not recommended when working with the phone book.
However, if you need to deactivate a large number of phone numbers at once, you can use disabling synchronization.
- Go to settings.
- Open the "Accounts" section.
- Go to the Google section.
- Deactivate synchronization.
Standard application
The built-in capabilities of the system make it quite easy to manipulate entries in the book of telephone numbers, adding or deleting certain information. Using this method is the simplest and most obvious solution to the above problem, but for some users this procedure causes difficulties. Most often this is due to the recent transition to a new mobile platform, noticeably different from the old one. To delete an unwanted contact on Android OS, follow these steps:
Thus, the selected contact will leave the smartphone’s memory forever.
Will be useful
You can delete several entries at once by simply marking them with checkboxes.
Eliminating duplicate contacts
Owners of smartphones with Android OS quite often encounter duplicate phone book entries.
This usually happens due to the fault of some online services that store information about all the user’s added friends. This problem can be solved very simply:
How else can you delete all duplicate contacts from Android? To quickly complete this task, there are special applications available for download on Google Play.
The most popular of them:
note
Thanks to these programs, you can quickly get rid of repetitions in your book of numbers.
As mentioned above, many applications whose work is directly related to communication between users of portable devices create certain links in the contacts section on the Android OS. This process occurs due to synchronization, designed to significantly increase convenience and automate the execution of certain tasks. However, this function also creates additional inconveniences, which often cause it to be disabled as follows:
It is important to know
Since the import of contacts from the application has been disabled, after the synchronization procedure, all data from the device will immediately be lost.
As a rule, Android smartphone users connect their devices to a Google account, which saves the added contacts. When you switch to a new device and re-authorize, this data is in the internal memory.
How to delete all contacts from an Android phone that appeared in this way? To completely erase such information, you need to switch to a cloud service. To do this you will need to do the following:
Why do double contacts appear?
Installing different firmware on a smartphone and then synchronizing the data can lead to the appearance of double contacts on Android. As a result, the book of numbers can grow to indecent sizes, and the user will have to constantly wade through the jungle of identical contacts. This problem can be partially solved using the function of merging duplicates:
Step 1
.
Launch the Contacts
.
Step 2
.
Press the " Menu
" button of your smartphone.
Step 3
.
Click the " Advanced
" button.
Step 4
.
Click the " Merge Duplicates
" button.
Step 5
.
The OS will offer to find duplicate contacts and merge them. Click the " Merge
" button to start this operation.
Removal from other sources
If there are no problems with clearing the SIM card of unnecessary entries, then the question of how to delete individual contacts on Android synchronized from other applications often leads to a dead end. A deleted contact constantly returns back to the phone book, so many users simply stop contacting it. The problem is solved by disabling synchronization.
After turning off synchronization, you can safely delete entries from your book and applications without worrying that they will come back.