For several years on the Russian market, phones, laptops and tablet computers from Lenovo, one of the most successful Chinese brands, have won the attention of buyers with an excellent combination of quality and affordable price line. It is not surprising that the number of Lenovo device owners increases every year.
One of the most frequently asked questions regarding the use of gadgets from this company is how to take a screenshot on Lenovo. This is usually due to the fact that the function that allows you to take a screenshot is not present in every software. However, it is possible to take a screen photo on any phone, laptop or tablet.
Let's look at a few simple ways to take a screenshot on Lenovo.
Screenshot on a Lenovo phone or tablet using two buttons
The first, most common way to take a screenshot on Lenovo is suitable for most phone models of this brand:
- Open an image on the screen.
- Press the “Power” and “Volume” buttons in the “Volume Down” section (bottom part) with two fingers at the same time. Clarification: depending on the model, the power button may be located on the top of the phone body or on the left, on the side of the body. When you save a screenshot, the device plays a click sound, just like when you take a photo with your phone camera.
- The screenshot has been saved. You can view the saved picture by opening the “Gallery” folder (Pictures/Screenshots) on your phone (tablet).
In a similar way, using the “Volume” and “Power” buttons, a screenshot is taken on the Lenovo tablet.
How to take a screenshot on a tablet
On tablets, similar actions are performed, although the Chinese manufacturer does not seem to have paid enough attention to these devices when it comes to taking screenshots. The function does not work from the power button, although other methods are quite acceptable.
With two keys
Two buttons (volume and power) can be used on any Lenovo tablet, except very old models. Everything is done the same as on the phone (read above).
In the Quick Launch menu
This method is also similar, only the launcher here has its own curtain located on the right side of the screen. If you pull it, a selection of possible actions will open, including the desired button. By clicking on it, you can easily take a screenshot.
Through a special program
If you don’t want to bother with buttons, you can use some universal and free solution. There are a lot of them on Google Play. This method is chosen for functionality. Using a special program, you can not only take a screenshot, but also edit the image, select its type, save path or share, and much more. Sometimes you can get by with just one button; on new models, just touching the screen or shaking the device is enough.
It is worth noting that some applications require root access, which in itself is not easy. For example, one of the best utilities is Screenshot It. Some utilities are expensive, others do not work with certain versions of the operating system. Therefore, when choosing a program, it is important to pay attention to the developer’s requirements.
Dropdown and Quick Launch Menu
In some models of phones and tablets, the “Screenshot” button is already in a special menu. As a rule, information about the availability of this function can be clarified immediately upon purchase and at the same time ask a consultant to show you how to take a screenshot on Lenovo.
On phones equipped with this feature, the “Screenshot” button is located in the drop-down menu. You can open it by holding the “Power off” button on the phone for a few seconds.
On tablets, a similar button can be found in the quick launch menu - it opens if you swipe your finger across the device screen from top to bottom.
Then everything is simple: having opened the desired image on the screen, activate the “Screenshot” icon with a simple click. The image is saved in the same “Gallery” folder.
Method for taking a screenshot through the notification panel
This method will be the best way out of the situation when the smartphone buttons for some reason do not work and the screen is not created. As an alternative, it is suggested to do the following:
- Unlock your smartphone.
- Go to the menu section where you want to take a screenshot.
- Lower the notification shade by swiping from top to bottom.
- Click on the “Screenshot” or “Screenshot” icon.
As in the case of taking a snapshot using hotkeys, a notification about creating a screenshot will immediately appear on the screen of your Android smartphone. The resulting screen can be opened or another frame can be taken from this or another menu.
"Screenshot" - a program for creating screenshots
The methods considered are the simplest and fastest. But how can you take a screenshot on Lenovo if these methods don’t work? In this case, you can download and install a special application on your device.
This method has many advantages:
- Screenshots are always provided with accessible instructions on how to take a screenshot on Lenovo.
- You can independently set the path to save the image.
- Screen photography is taken with one touch.
- The main thing: the screenshot can be edited.
Using third party programs
Additional applications are used by those users who either want or do not know how to work with standard tools. You can find them in the Google Play app store.
The advantages of this method include:
- the ability to edit pictures on your phone;
- the photo is taken with one touch;
- you can choose the path to save the photo;
- availability of detailed instructions for creating a screen.
The user can also find an application that suits his phone model.
How to take a screenshot of the monitor on a Lenovo laptop
There are only two such ways. The most common and, one might say, traditional method is to use the Print Screen button found on any keyboard:
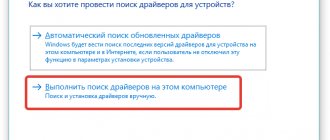
- Having opened the desired image, you need to press the Print Screen button at the top of the keyboard. Externally, nothing happens.
- The image is inserted into Paint, a standard graphics editor, using the right mouse button (“Paste”) or simultaneously pressing the Ctrl+V keys.
- Save a screen photo.
Another method: install a special application that allows you to instantly take a snapshot of an image on your laptop screen. Corresponding programs can also be found. The main advantage of this method is the ability to instantly, in one action, save the image to a folder.
Where to view the saved screenshot
Different screenshot tools export the created files in different ways, so users do not always know where to view the created picture.
- By default, PhotoSCREEN saves the image in the subfolder of the same name in the “Images” directory. But in the export window you can manually specify the save path.
- PrintScreen and the Snip and Sketch utility copy the image to the clipboard. It can be embedded into any graphics or text editor using Ctrl + V.
- In "Scissors" you need to independently select a folder to save.
- Once saved, the PNG file can be found at “Video” - “Clips”.
Screenshot Touch – record video and take screenshots
Screenshot Touch is a rather interesting application for capturing what is happening on the screen, which stands out slightly from the background of similar ones. To work you will need Android version Lollipop or higher.
Application features:
- Screen capture by tapping the screen (via notification area, overlay icon, shaking the phone);
- Record video to mp4 with the ability to adjust resolution, frame rate, sound and video quality;
- Saving an image of the entire web page in the browser as you scroll (to use the function, you need to open the link in the browser and activate the Screenshot Touch function);
- Selecting a save folder, title format, screenshot quality;
- Delay at a specified interval before shooting.
The built-in screenshot editor offers the following functionality:
- Cropping images, rotating clockwise and counterclockwise;
- Drawing on screenshots – brush, shapes, marks, transparency settings
- Publishing the captured screenshot on social networks or sharing it in other services;
For extensive functionality in Screenshot Touch, the user “pays” by viewing advertising; however, it can be disabled for a small fee.
We advise you to familiarize yourself with the access rights that are required to install the application: they may seem more than necessary. This is because Screenshot Touch has multiple video and audio capabilities.
Taking a screenshot on Lenono devices
Communication on the Internet today requires not only the ability to correspond, but also knowledge of how graphic content is created for sharing it over the network. One of the most popular ways to convey graphic information is a screenshot. In other words, this is a screenshot. It is appropriate to use it if you want to show your interlocutor what exactly you see at the moment on your smartphone, tablet or computer. And this may be required not only in friendly correspondence for fun. The screenshot taken can be used to prove your legal case if the dispute concerns the Internet.
Today we will tell you how to take a screenshot on Lenovo. Surely you are well aware that this manufacturer produces a large number of different technical products. You or your friends definitely have a Lenovo laptop, tablet or phone. And you can take screenshots on each mobile device. There are some differences in this procedure for each of the gadgets. Therefore, let's take a detailed look at how to take a screenshot of the screen on a Lenovo phone, tablet and computer.
Part 3: How to Take a Screenshot on Lenovo Using Snipping Tool
Once you have launched the built-in Snip & Sketch app on Windows 10, how to take a screenshot on Lenovo using the sniping tool? Just learn more about different shots with great program as below.
Step 1 Click the Start button on your Lenovo computer. You can enter the Snipping command line and click on the search bar, which will show you the Snipping Tool application.
Step 2 Once you have launched the Snipping Tool, you can click on the NEW Click the button to select your desired screenshot mode, such as Free-form Snip, Rectangular Snip, Windows Snip and Full-screen Snip.
Step 3 After this, you can click and drag your mouse to select a specific area of the screen. Then release the mouse button. In the pop-up window, you can click the Save Snip icon to save the custom screenshot.
Options
There are several methods for creating a screenshot on Android. I suggest considering the simplest ones:
- using tablet/phone keys. This is a fairly simple method that does not require additional settings or downloading applications;
- via the drop-down menu. The method involves adding a button to the top menu - will be described in detail below;
- downloading additional software. Not the fastest method, but downloaded third-party software can make the job easier if you often need to take screenshots.
The best screenshot apps for Android
Key combinations may not work, and the basic capabilities of the Android OS are limited. Screenshot applications complement the standard functionality thanks to editing.
We advise you to download and test several applications: not all of them work on a certain version of Android, some will require root access, the free version may contain advertising, etc.
Review participants:
- Super Screenshot
- Screenshot Easy
- Screenshot Touch
- Screenshot Crop & Share
- Screenshot Ultimate
- Easy Screenshot
Part 4. Best Way to Take Screenshot on Lenovo
What is the best method for easy screen capture, including screenshots, video and audio files? Is there a way to take and edit a photo on Lenovo for free? Blu-ray Screen Recorder provides a free solution to take screenshots on Lenovo ThinkPad, add annotations and edit photos with ease. Moreover, you can also use the program to record video and audio files on your screen.
- 1. Take screenshots, videos and audio files of the area you need.
- 2. Advanced built-in annotation tool, drawing on screenshot and more.
- 3. Customize photo formats, shoot with hotkeys, and customize the area.
- 4. Easily create an animated GIF with a whole series of images.
Wonderful
Rating: 4.9 / 5 (79 votes)
Step 1 Make sure you have opened the correct window where you want to take the screenshot. Download and install the free launcher tool and run the program on your computer. Go to the home interface, you can simply select Screen Capture button to take screenshot on Lenovo ThinkPad for free.
Step 2 Hover over the window to take a screenshot. Of course, you can drag the mouse to select the screenshot area to take a screenshot on Lenovo. Additionally, there are detailed pixels in the screenshot inside the cursor when the image is captured.
Step 3 During the process, you can draw on the screenshot with arrow, texts, circle and other elements on the screenshot. There are more options that allow you to easily customize fonts, colors, styles, and more as per your requirements.
Step 4 If you are satisfied with the screenshot, you can click the Save button to save the screenshot on Lenovo. After that, you can open the screenshot in the media library to manage screenshots and further edit or transfer the screenshot using mouse clicks.
How to delete or share a screenshot
The moment the user opens a frame through the “Gallery” or “File Manager”, full functionality for interacting with the image appears before him. For example, a phone owner can delete one or several screenshots at once in a couple of clicks:
Another way is to open the image itself through the “Gallery” and select the “Delete” option from the available options. After confirming the operation, the screenshot will be deleted from the phone's memory.
If you need to transfer the screen via messenger or another method, you can use the same instructions. The only difference is that instead of clicking the “Delete” button, you need to click on “Transfer”, select the sending method and the recipient’s coordinates. Thus, sending a screenshot is no different from sending any other image from your phone.
Source
Screenshot Crop & Share is a simple and useful add-on for Android
A small assistant utility makes it easier to capture screenshots on Android. After shooting, the image is transferred to a convenient editor. After making changes, you can publish the picture on the Internet or share it with other users.
Among the editing functions we note:
- change of size,
- cropping,
- creating notes,
- marking sensitive data / highlighting important fragments,
In addition to the main and editorial functions, it is possible to capture scrolling pages, shoot certain areas and crop unnecessary window elements - for example, the status bar or navigation.