Smartphones produced by Lenovo, over the years of their existence, have occupied quite a large part of the market for modern gadgets. Even the manufacturer’s solutions purchased quite a long time ago, and among them the successful model A526, continue to properly perform their functions. Only their software part can cause some disappointment to the user. Fortunately, with the help of firmware, this situation can be corrected to some extent. The article discusses the most effective ways to reinstall Android on Lenovo A526.
By following fairly simple instructions, you can restore the functionality of a Lenovo A526 that has lost the ability to start normally, as well as add some additional functionality using updated software. At the same time, before moving on to manipulating the device, you must consider the following.
Any procedures on smartphone memory sections carry certain risks. The user carrying out the firmware takes full responsibility for the consequences! The creators of the resource and the author of the article are not responsible for possible negative results!
Design
The smartphone, made in the form of a classic candy bar, at first looks quite typical for Lenovo, but upon closer examination, noticeable changes in terms of design are visible.
The very first thing that catches your eye is the presence of a power off/on button under the volume key on the right side of the phone. For gadgets of this size, this is progress, since such solutions are mainly used in smartphones with a screen diagonal of 5.5″ and larger.
Otherwise, this is an ordinary smartphone. The front panel contains a 0.3 MP front VGA camera, a 4.5″ diagonal TFT display, a logo, a speaker grille, a microphone and three touch navigation buttons.
The back cover is made of ribbed blue plastic, which makes the phone comfortable to hold in your hand. On the lid there is a speaker grille, a window for a 5MP camera and a brand logo.
Lenovo A526 – complete phone restoration [battery, screen, firmware]
Hello. I had an old smartphone lying around for a very long time - Lenovo A526. His initial problem was a broken screen. Experiments were also carried out on the phone, which is why almost all applications were deleted, including SMS and camera. Finally, I have the desire, time and opportunity to restore it, and at the same time show you how it’s done.
Due to the fact that the phone was lying on a shelf for several years with the battery connected, the latter went into a deep discharge, and the phone does not respond to the connection of the power cable. The current when the wire is connected is 0A.
The battery needs to be lifted. To do this, we connect some unnecessary USB wire to charging, with the black and red wires stripped. Red is a plus, black is a minus. I wound them around the multimeter probes and placed the probes against the corresponding contacts on the battery. The multimeter must be turned on in voltage measurement mode. When it reaches about 4V, you can try inserting the battery into the phone, it should begin to respond to charging.
In general, a similar procedure needs to be carried out at a very low current, and if there is no laboratory power supply, then it is recommended to include a current-limiting resistor in the circuit, but I gave up on this matter. By the way, messages periodically pop up on forums that batteries either explode or catch fire during this procedure, so if anything happens, do it at your own peril and risk. After lifting an over-discharged battery like this, it’s not a bad idea to keep this battery in sight for a couple of full charges, in case it swells or, even worse, catches fire.
The battery has been restored, let's move on to the display. I ordered mine on Aliexpress, ]]>assembled module, with matrix and touchscreen]]>, but there are options to buy everything separately. By the way, the back cover was lost, ]]>I ordered it at the same time]]>.
Unscrew all the screws that are on the back.
Then we pry something open and snap off the inner plastic cover.
We disconnect the cables of the screen and touch screen, carefully peel off the speaker and microphone, and also carefully peel off and pull out the cable of the side buttons.
We remove the buttons from the case.
We assemble everything into the new case in the reverse order, after first making sure that the new screen is working.
Everything is assembled, all that remains is to figure out the firmware. You can download everything you need]]>here]]>. By the way, the following may be useful not only to owners of Lenovo A526, but also to owners of most devices on MediaTek processors; you will only need to take the firmware from your device, the rest of the steps will most likely be similar to mine.
First of all, you need to install the phone drivers, but since they are not signed, you must first disable the mandatory verification of driver signatures. The easiest way to do this in Windows 10 is the following - go to Windows settings, update and security, recovery, in special boot options, click the restart button.
After the reboot, in the menu that appears, select troubleshooting, additional options, see other recovery options, boot options, and finally click reboot.
When prompted to select a download option, press the number 7.
The operating system will boot in test mode, in which mandatory verification of driver digital signatures is disabled. You can install the driver. The archive contains a driver-autoinst folder, which contains the Mediatek-Drivers-Install.bat script. We run it as administrator. Also, just in case, I put another folder and an installation file with drivers in the archive in case you don’t succeed with the above-mentioned drivers.
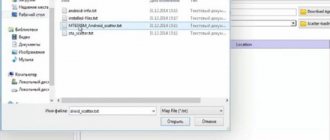
Next, launch the SP Flash Tool. The first step is to make a backup of our nvram. Go to the Readback tab and click the add button. Click twice on the line that appears.
We give the dump a name and open the scatter file in some text editor (in my archive it is in the Firmware folder) and look for the partition there with partition_name: NVRAM
. We look there linear_start_addr, in the case of a Lenovo smartphone it will be 0x1000000, and partition_size – 0x500000.
We enter these values into the window that appears.
In the main SP Flash Tool window, click Read Back, connect the phone without a battery to the computer and press the volume key on it. We wait until the process is completed.
After the backup is ready, go to the download tab, select the scatter-loading file, from the folder with the firmware, in the drop-down menu below select format all + download. And click the download button.
We connect the phone without a battery to the computer, and press any of the volume keys. The progress bar should creep up. When everything is completed, the program will write that everything is OK.
Next, you need to upload our nvram backup, otherwise there will be problems with imei, wifi and other amenities. In SP Flash Tool, press ctrl-alt-v, and in the top window menu, click on write memory. In begin address we indicate 0x1000000. And indicate the path to the backup. Click Write Memory.
If for some reason you haven’t made a backup of your nvram, then don’t despair, I added an nvram dump to the archive, you can restore from it to get rid of the phantom WiFI network, and now I’ll show you how you can change imei.
To do this, launch the IMEI & SN Writer program, select Smart Phone in Platform, select the USB connection. We put the checkboxes next to imei1 and imei2 and enter the necessary ones there (you can see them on the box of the device, or, for example, on a sticker under the battery). Here you can also change the serial number of the device, but in my case, after a full reset, the one that was in the nvram dump is returned, but imei remains low, and this is the main thing. Click on BP DB, select a file whose name begins with BPLG, click on ap db and select a file whose name begins with APDB.
Finally, click Start.
We connect the smartphone to the computer. This time with the battery connected. After the process is completed, a message will appear in the program that everything is OK.
It happens that after such a change in IMEI, the speaker begins to glitch terribly, this problem is treated by resetting to factory settings - turn on the smartphone with the volume up key held down, when the Android logo with an exclamation mark appears, press the power button, a menu will appear, in which you can navigate using the down key volume, and selection - with the increase key. Select wipe data/factory reset and confirm the action. After the process is completed, click reboot smartphone now. We wait until the phone turns on; after the reset, the turn on lasts longer than usual, without panic.
We check that all functions work properly.
As you can see, there was absolutely nothing difficult in restoring the Lenovo A526 smartphone in my case. I hope this information will be useful to someone. And that’s probably all, good luck and see you again.
If you are interested in the tools used:
]]>USB tester]]>
]]>Tweezers]]>
Characteristics
The smartphone is built on a 4-core MediaTek MT6582M processor with a clock frequency of 1.3 GHz and working together with a PowerVR SGX544 video accelerator. The smartphone has 1 GB of RAM and 4 GB of internal memory. If necessary, you can expand the memory thanks to the presence of a 32 GB microSD slot.
The smartphone supports DualSim with GSM/WCDMA communication standards. The Android 4.2 Jelly Bean OS used in the A526 model allows you to cope with the tasks assigned to the device. The smartphone has 3G support, and data transfer can be carried out using Bluetooth 3.0 and Wi-Fi 802.11n. There is also a GPS module that allows you to navigate even without access to the Internet.
| Parameter | Meaning |
| operating system | Android 4.2 Jelly Bean |
| SIM card | Dual SIM support |
| Display | TFT display, 4.5 inches, 854x480 pixels |
| Frame | 132 x 67.6 x 11.1 mm, weight 145 g |
| CPU | MediaTek MT6582M, 1300 MHz (4 cores) |
| RAM | 1 GB |
| Flash memory | 4 GB, supports memory cards up to 32 GB |
| Camera | 5 MP, front camera 0.3 MP |
| Wireless technologies | Wi-Fi, Bluetooth 3.0 |
| Navigation | GPS |
| Battery | 2000 mAh |
| Price | from 5 thousand rubles |
Preparing the device for firmware
Before you start updating the software, you need to do some preparatory work in order to get the desired result and not harm your smartphone.
First, it is recommended to copy all device data to a USB flash drive or computer. When changing software, photos, music, videos, documents, etc. will be deleted. In all applications installed from the Play Store, you should link them to your Google account (if possible) so as not to lose data in them too.
After this, charge your smartphone, preferably 100%. If this is not possible, then flashing the firmware when the charge is less than 20% is not worth it, because if the device is discharged while reinstalling the software, then you will get a “brick” (the system will not have time to change and nothing can be done).
If you want to update the software using your computer, be sure to install the SP Flash Tools program. It is needed to install firmware on smartphones with MTK processors.
Display and cameras
Quite expectedly, the Lenovo A526 uses a 4.5″ TFT display with a resolution of 854x480 pixels. The display does not have additional glass installed at the top of the screen, there is no IPS panel - it is just a regular modest screen with touch control. It is quite obvious that the screen is not the strong point of this smartphone model. Colors are slightly washed out and viewing angles leave much to be desired. But the responsiveness of the screen, even in the corners, justifies its use in the Lenovo A526.
Unlike the display, the sound in the Lenovo A526 is not so dull. The sound quality in the smartphone is quite decent, regardless of how you listen - through the built-in speaker or headphones. A standard 3.5 mm jack is provided for headphones.
The Lenovo A526 smartphone has two cameras – 5 MP main and 0.3 MP front. Flash is not provided for cameras. The quality of video recording and photographs is not the best, and both cameras lack autofocus, which also does not add optimism.
Preparation
As with any other Lenovo model, before carrying out the A526 firmware process, you need to carry out some preparatory manipulations. Clearly and correctly carried out preparation will allow you to avoid mistakes and difficulties, and will also predetermine the success of the event.
Driver installation
In almost all situations where it is necessary to restore or update the software of a Lenovo A526 smartphone, it will be necessary to use the SP Flash Tool utility, as one of the most effective tools for working with memory partitions of MTK devices. And this presupposes the presence of a special driver in the system. The steps you need to go through to install the necessary components are described in the article:
Lesson: Installing drivers for Android firmware
The package with the necessary drivers can be downloaded from the link:
Creating a backup
When flashing Android smartphones, the device's memory is almost always cleared, which entails the loss of user information, so a backup copy is necessary, which can be created using one of the methods described in the article:
Lesson: How to backup an Android device before flashing it
When working with Lenovo A526, special attention should be paid to the procedure for backing up the “nvram” partition. A dump of this partition, created before the firmware and saved in a file, will help save a lot of time and effort when restoring the functionality of wireless networks that were disrupted in the event of an unsuccessful Android installation or due to other errors that arose during the process of manipulating the system partitions of the device.
Applications
The A526 comes with several pre-installed applications:
- SHAREit for data transfer without using a Wi-Fi connection;
- SECUREit, which allows you to speed up your smartphone and protect it from viruses;
- SYNCit makes it possible to back up and restore data with ease.
The manufacturer also installed Skype, clients for social networks, games, a media player, a notepad and a file manager.
Installing drivers
To work with the SP Flash Tools program, you must install hardware drivers for Lenovo A526 so that the application works correctly. There are several ways to do this.
The simplest one is to download the MediaTek PreLoader USB VCOM Port script. It will allow you to quickly install the necessary drivers for working with MTK processors. But, of course, not everything is so smooth, because often the program may not work. Then the manual method comes to the rescue.
First you need to find software on the Internet. After that we move on to installation. First you need to remove the battery from the smartphone, connect it to the PC, and then put the battery back in place. After this, one of two messages will appear in the device manager: either the message “Unknown device” or “COM and LPT ports” will appear.
This inscription only appears for a couple of seconds, so it will be a difficult task to have time to click on it. If you didn’t succeed the first time, you’ll have to try again. You need to right-click on the inscription and then open properties. In the properties window in the drivers tab, click the “Update” button. After this, a window will open in which you need to click on “Search for drivers on this computer.” Click the “Have from disk” button and specify the path to the driver file that was downloaded from the Internet.
Then click “Next” and “Install”.
Factory recovery
The easiest way to flash a smartphone is through a recovery mod (engineering menu). This is something like a BIOS, only in a mobile phone. If you just need to return the software to its out-of-the-box state, then a simple reset to factory settings will help.
To flash the firmware using this method, you need to download the firmware. It is imperative that this be the official version. You can find one by simply entering “download Lenovo A526 firmware” into your browser. This is mandatory, since with the custom version there is a possibility that the process will not complete successfully. The installation file must have a zip extension and name update. If the name, or even more so the resolution, is different, the file is most likely damaged and should not be attempted to be installed. Do not open or change anything in the file under any circumstances. You need to place the firmware file on the memory card, otherwise the smartphone will not see it.
Now you can start updating the software. It has already been said above that before flashing, be sure to charge the device, preferably completely. This is necessary just for reinstallation using this method, because if the battery runs out at the time of flashing the firmware, you will get a non-working device that cannot be restored.
So, first you need to go into recovery mode. To do this, you need to turn off your smartphone. Then hold down the volume up key and the power button for 5-7 seconds (until the phone vibrates). After this you will enter Recovery Mode. In it, find the item “Apply update from external SD card”, now select the package named update.zip. After clicking on it, the files will begin to be copied. After they are copied, you need to select “Reboot system now”. That's basically all, the device will reboot, and you can enjoy the updated device.