Owners of personal computers probably know about the ability to take a screenshot and save it on their hard drive. Why might this be necessary? For example, if you saw something interesting on the Internet and want to save it as an image. A screenshot on a computer is also often used for comfortable communication on the Internet. After all, sometimes this or that problem cannot be conveyed in words, and it is very necessary for the interlocutor to see what you see from the monitor right now.
Whether you want to take a screenshot for business or personal correspondence, or simply to store a picture on your hard drive for yourself, in any case, this is not difficult to implement. In this article, we will tell you how to take a screenshot on a Lenovo laptop, considering all the possible options.
How to take a screenshot on a laptop
First, let's look at the classic situation when you need to take a screenshot of the entire screen on a Lenovo laptop. Everything is extremely simple and can be done even by a person who is far from the depths of knowledge in the field of technology.
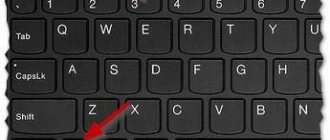
We will solve this problem using just one button and one standard program installed on any operating system. So, on your keyboard you need to find the PrintScreen button. It is available in a laptop from any company and with any OS. This key is usually located in the top row, closer to the right edge.
The sequence of actions is as follows:
- We display the image we want to save.
- Click on the Print Screen button.
- The image is automatically saved to the computer's memory. Now you need to choose a place to save it.
- The standard Paint program, which is available on any operating system, is optimal. If you don’t know how to find it, just click on the “Start” button in the lower left corner of the screen and enter the name “Paint” in the search. Next, press Enter, and the program starts.
- Even if you have never worked with graphic editors before, it will not hurt to save a screenshot. There is nothing complicated here. You will see a white sheet of paper in front of you, and you only need to press the following key combination on your keyboard: CTRL + V. As you probably know, it corresponds to the "Paste" command. The saved screenshot will immediately appear in front of you.
- Now you can edit the screenshot. In Paint, simple editing is available - changing the size of the picture, cropping unnecessary areas, etc. But this is quite enough to solve most problems.
- All that remains is to save the image in a suitable format. This is usually in .png format. Although you can also choose .jpg. To do this, press the key combination CTRL+S, which is equivalent to the “Save” command. A window appears in which you need to select the location where the file will be stored, as well as its format and name. We specify all these parameters and save the image. Now you can use the screenshot and send it to anyone.
Method 1: Standard Windows tools
To take simple screenshots for personal needs, there is no need to install special software: Windows offers the user several options for how to do this. The most conveniences are found in the “top ten”, where they paid special attention to this procedure, making internal applications much more pleasant.
Print Screen key
Of course, the most popular and well-known option to everyone except complete beginners is the use of the Print Screen key (Lenovo shortens its name to PrtSc). The convenience of this method is that you can both instantly save the file and open it for editing.
Option 1: Quick Save
The easiest and fastest way to take a screenshot of the screen without opening it in any program is to press the key combination Win + PrtSc.
The screen will briefly go dark, indicating that the snapshot file has been successfully created. You will find the result in the Images > Screenshots folder. The picture will be saved with the JPG extension.
The downside of this approach is that you can only save a snapshot of the entire screen, but you still have to crop it to the desired part in some editor. However, if you just need to take a quick screenshot for personal use, no additional editing will be needed.
Option 2: Clipboard
When you press the Print Screen key, the screenshot goes to the system clipboard, but in this case you will not be able to save it immediately. You will need to use some application that supports working with pictures. The easiest way to do this is through the built-in Windows graphics editor Paint, but some people replace it with text editors like Word, which also allow you to insert images into documents and save them to your computer as separate files.
Snipping Tool
The first full-fledged tool available in Windows, starting with Windows 7, is Snipping Tool. The developers plan to abandon it in new versions of Windows 10, since this version has a more functional and modern application. However, it is still available in current builds, and is definitely not going away from Win 7 and 8.
Screen Sketch tool (Windows 10 only)
Windows 10 has another, more advanced application - “Sketch on a fragment of screen”. It is more functional than “Scissors” and more pleasant to use.
Game Bar (Windows 10 only)
Windows 10 has another application that helps you take screenshots, but this is not its main function. It makes sense to use Game Bar only if you are interested in other functions of this program, otherwise it is much more logical to resort to applications created specifically for working with screenshots.
How to take a screenshot of a window
The method described above is good and popular, but what if you need to take a photo not of the entire screen, but only of a separate window on it? Of course, you can save a large screenshot and then cut out the desired element, but this is too time-consuming and complicated. Everything can be done much easier!
The principle of operation is the same as in the previous case. There will be exactly one difference here - PrtScr will now need to be held down simultaneously with the Alt button. This combination is precisely responsible for taking a screenshot of a single window.
If several windows are open at the same time, the one on top will be captured in the screenshot. Therefore, be careful when planning to take a screenshot - before pressing the indicated key combination, check that the window you are interested in is on the surface.
Method 3: Built-in function
Of course, you shouldn’t forget that programs sometimes also have functions for creating screenshots. In certain cases, this is much more convenient than using any program or saving a snapshot of the entire screen without the ability to cut out only the active window.
For example, taking screenshots is available in many game clients such as Steam. This way, players can screenshot important moments, match results or a beautiful cut-scene, and then post it to their profile or share it with the community. In addition to the availability of the feature, it can often be customized: change the hot key, save path. All this is done in the client settings.
In various editors and all kinds of applications where it makes sense to take screenshots, the corresponding function has begun to appear more and more often. Check the settings of the program from which you want to capture the screen - it is quite possible that the built-in option will be sufficient.
Screenshot of a specific area
All that remains is to figure out how to take a picture of a single area of the screen. The time-tested Scissors program will help us with this. Accordingly, our first action will be downloading and installing this program on the computer. When this is done, find the program and run it. This can be done either through the folder in which you installed it, or through the Start menu using the search.
When you launch the program, you will see a small window on your laptop screen. The rest of the screen will immediately turn white. You need to look at the button called "Create". Click on it and see a drop-down list that contains all the tools we need. For example, it is a rectangular shape, a window, etc. That is, we need to select the shape of the area of which we want to take a screenshot.
Once you have made your choice, take a screenshot. A window with the photo will immediately open, where you can edit the screenshot and immediately save the photo.
Saving text to a PC or flash drive
As you can see, typing text on a computer or laptop is very easy. To save the results of your work, you should use the following algorithm:
Click on the button symbolizing the floppy disk.
Select the save path (hard drive or flash drive), enter the file name and click “Save”.
To save current changes, you need to periodically press the floppy disk - if you type in Word or WordPad from a computer, then one day, due to a power outage, you can lose all unsaved data. The user will have to type and edit all the text again (until the last save). Of course, this rarely happens, but sometimes you have to redo your entire day's work.
Using third party software
You can also use third-party programs to take a screenshot. Among these, we highlight the DuckCapture program. It combines all the functions presented above, that is, with its help you can take pictures of the entire screen, individual windows and areas. The taken picture can be edited immediately in a clear and simple menu. The clear advantages of this program should be considered the ability to take screenshots both by clicking the mouse and using hot keys. You can also choose the format in which it is convenient to save the image.
As you can see, taking screenshots on a Lenovo laptop is not difficult at all. You can easily take a screenshot of the entire screen or just a portion of it. And this does not require special preparation. All the necessary tools are at hand. Now you can easily take any screenshots, and we are sure that with their help you will be able to make your communication on the Internet much more interesting.
Android
How to take a screenshot of the screen on an Asus laptop: 4 methods
If you have Android at your disposal, you will have to try to get your “green robot” to screenshot the screen.
The problem is that Google initially simply did not even think about providing tablets with such functionality. For this reason, many had to dodge in order to take a screenshot by hook or by crook.
Specialized forums were simply drowning in a sea of requests from tablet owners. Users shared their own secrets and findings, but the developers provided this opportunity only with version 3.2. At the same time, they suggested performing a completely simple action. Just hold down the “Recent Programs” key and pause, then release the key and make sure that the tablet has coped with the designated task.
Unfortunately, even at this stage, it is sometimes difficult to find the right combination to force your laptop to take screenshots without question.
We will share some secrets, but if you have a unique tablet model, you will not be able to create screenshots armed with our recommendations; you will have to surf the Internet and look for an acceptable “recipe” specifically for your device.
By the way, if you are interested in how to take a screenshot on a Prestigio tablet, this universal method is suitable. You need to press the power and volume down keys at the same time, after which the treasured screen will be taken.
Pressing two buttons at the same time will help you take a screenshot
Having figured out how to make a screen on a Prestigio tablet, you may have a question, where was this screen saved? Go to the memory card, find the “Images” folder there, and in it you will already find a folder with the screenshots you took.
We do not strive to list all existing methods for creating screenshots, since this is impossible. There are an incredible number of them, some of them, perhaps, are still unknown to us. By the way, even from the same manufacturers, different models may require different combinations.
Samsung
In this case, the most striking example is the Korean company Samsung, in different models of which the methods may be different from each other.
If you want to understand the essence of the process of how to take a screenshot on a Samsung tablet, you will easily find that the actions you will have to perform are really different.
The pros tell you how to take a screenshot on a Samsung tablet in the Note line; to do this, you should use a digital pen. However, there are other options for how to take a screenshot on a Samsung tablet on other models.
Users who need to take a screenshot of the screen on a Samsung tablet claim that sometimes it is enough to just hold down the “Home” button.
Also among the useful recommendations on how to make a print screen on a Samsung tablet, you can highlight such an option as holding the edge of your palm from one edge of the screen to the other.
So, if you want to figure out how to take a screenshot on a Samsung tablet, you should study various options, and then try to apply it in practice to your own tablet. Anyone who strives to find a way to solve a problem will always find the right way.
Also, the “Home” button will be in demand if you are looking for a way to take a screenshot on an Irbis tablet. Pros recommend holding down the power button together with the “Home” button.
The process of how to make a screen on an Irbis tablet is quite simple, so after making the first screen, you will click all subsequent ones instantly.
Asus
If you are the owner of an Asus gadget and want to figure out how to take a screenshot on an Asus tablet, you will have to make some changes to the settings.
So, before taking a screenshot on your Asus tablet, open the “Settings” option and go to the “Asus Custom Settings” line, now you can see the block regarding screenshots.
Check the checkbox, thus agreeing to the creation of screenshots. Now, to figure out how to take a screenshot on an Asus tablet, just hold down the “Window” button, it is located at the bottom of the tablet, it looks like two windows located side by side. You will see that it is not difficult to take a screenshot on your tablet.
Lightshot
This is an add-on for browsers that installs and supports Google Chrome, Yandex, Firefox. After installation, a button in the form of a lilac pen will appear in the right corner of the browser:
Let me immediately emphasize that this tool is only suitable for taking pictures inside the browser. That is, you won’t be able to “take a photo” of your desktop or any application.
There are many other utilities for this purpose. But the ones I listed in the article will be enough for you. If you have the desire and time, you can test Clip2Net, FastStone Capture or EasyCapture. These are good utilities that I don't use, but they are used by millions of other users around the world.
Snipping Tool
It is also a built-in Windows tool that can be launched through the same search bar (as we did with Paint):
- A small utility window will appear, where you should click on “Create”.
- After that, using the left mouse button held down, select the desired fragment of the screen. When the left button is released, the “cut piece” will be displayed in the editor:
- Now you can do whatever you want with it: draw on it, send it by email, or just save it to disk.
Well, it looks like we’ve figured out this method. Now you can move on to considering third-party applications.
Part 3: Perfect Solution to Take Screenshot Using Screen Recorder
If you want to paint your screenshot using various drawing tools, then definitely Apeaksoft Screen Recorder should be your first choice. You can freely take screenshots of Lenovo screen while recording videos.
Of course, it can also shoot any program on your Lenovo laptop without restrictions.
So, what features about screenshots can you get from Screen Recorder? Just read and learn.

