BIOS is a set of programs that are stored in the motherboard memory. They serve for the correct interaction of all components and connected devices. The BIOS version determines how correctly the equipment will function. From time to time, motherboard developers release updates that fix problems or add new features. Next, we will talk about how to install the latest BIOS for Lenovo laptops.
Update BIOS on Lenovo laptops
On almost all current laptop models from Lenovo, the update occurs in the same way. Conventionally, the entire procedure can be divided into three steps. Today we will look at each action in detail.
Before starting the process, make sure that your laptop is connected to a good power source and that its battery is fully charged. Any even slight fluctuation in voltage can cause failures during the installation of components.
Step 1: Preparation
You definitely need to prepare for the update. You are required to do the following:
- Find out the current version of your BIOS to compare it with the one found on the official website. There are several determination methods. Read more about each of them in our other article at the link below.
Disable your antivirus and any other security software. We will use files only from official sources, so you should not be afraid that malicious software will get into the operating system. However, the antivirus may react to certain processes during the update, so we recommend disabling it for a while. Read about the deactivation of popular antiviruses in the material at the following link:
- Restart your laptop. The developers strongly recommend doing this before proceeding with the installation of components. This may be due to the fact that the laptop is currently running programs that can interfere with the update.
Step 2: Download the updater
Now let's proceed directly to the update. First you need to download and prepare the necessary files. All actions are carried out in special auxiliary software from Lenovo. You can download it to your computer like this:
- Use the link above or through any convenient browser to go to the Lenovo support page.
- Scroll down a little and find the Drivers and Software section. Next, click on the “Get Downloads” button.
In the line that appears, enter the name of your laptop model. If you don't know it, pay attention to the sticker on the back cover. If it is erased or you cannot make out the inscription, use one of the special programs that help you find out basic information about the device. Check out the best representatives of such software in our other article at the link below.
Among the list of drivers and software, find the “BIOS” section and click on it so that it opens.
Click on the “BIOS Update” title again to view all available versions.
Find the latest build and click on “Download”.
Wait for the download to finish and run the installer.
It is better to launch and further actions under an administrator account, so we strongly recommend logging in under this profile, and only then proceeding to the next step.
Problems with the program
If lenovo update does not want to work adequately, you need to determine the reason that led to the failure. To do this, you will have to check the program version. As facts show, most users do not carefully follow the recommendations, so the majority of cases of program failure occur precisely because of an incorrectly installed version.
Another rather funny reason is the lack of Internet. As you know, you won’t be able to install anything without a network connection.
You can also check whether the device model and type are specified correctly. To do this, you need to go into the BIOS and look at the data in the system information.
How to roll back settings on a Lenovo tablet?
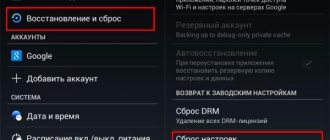
You already know how to return the system to its original state on Lenovo phones. But what if you want to reset the software of your Lenovo 30 or 7600 tablet? This task is easy to complete! All you have to do is do the same as with a smartphone. The tablet settings also have a factory reset function, and as you know, the volume and power buttons on these gadgets are similar. The only difference is the location - the power button is usually on top, not on the side.
Thus, you can reset the system on any Lenovo mobile device, and you will not be afraid of any software failures.
Recovery menu Android in Russian: how to enter and exit, decoding
Android recovery menu - what purpose is it intended for and what advantages does it provide? This is a question that is considered relevant for users of this OS. There is a special boot mode here that starts the recovery operation. The article presents the features and advantages of the mode, as well as options for its use.
Creating a custom backup
In principle, you can take care of creating a backup in advance, and it is not at all necessary to use Windows tools for this. Such tools are also available in the built-in utility.
For example, for Windows 8.1, you can initially select to launch the pre-installed OneKey Recovery application from the list of programs, after which you either agree to save a copy in the section offered by the utility itself, or specify a different path.
To launch a system rollback from a user backup when calling the recovery tool described above, when selecting a recovery task, you will need to specify not the original copy, but your own, using the browse button to access it and select the Backup.wsi file. In this case, unlike the first option, neither disk partitions nor user data will be deleted.
Method for Samsung
Before transferring your smartphone or tablet to recovery, disconnect Samsung from the charger or USB cable!
New models
Turn off Android and hold down the Center Volume Up button + On/Off
Turn off Android and hold down the Center button + Volume Up button + On/Off button
If suddenly it doesn’t work out, use the universal method (read below).
For Samsung Galaxy S8 – S10
- Press and hold the dedicated Bixby button and Volume Up + Power
- After the splash screen appears on the screen, lower the power button, but continue to hold the Bixby button and Volume Up
- Hold these buttons until the Android logo appears on the screen with a blue background
- Release the buttons
- After a few seconds, the Galaxy S8 smartphone will boot into Recovery mode.
Older models and some tablets
- Turn off Android and hold down the Center button and the On/Off
- Turn off Android and hold down the Volume Up and the On/Off
or in a universal way (read below).
System recovery on ThinkPad series models
Now a few words about restoring the Lenovo ThinkPad system. Here the actions are somewhat different from what was presented above.
To access the recovery environment at the boot stage of the laptop, you need to press the F11 key, select the desired language, click the continue button, enter the user password (if set), and then activate the Lenovo Factory Recovery item in the menu that appears. Next, a process begins that is very reminiscent of a regular Windows installation. At one stage you will need to agree to the restart, and then set the necessary parameters.
How to run Lenovo system recovery using built-in tool?
Now let's move on to considering the reset process. First, let's look at system recovery on the Lenovo IdeaPad, Essentials, and models like the G50.
On all such devices, next to the power button or on the side panel there is an additional button, which is responsible for calling the system reset tool without using any removable media or tools from an existing working or even damaged operating system. To begin system recovery on the Lenovo G50 or other similar models, you first need to turn off the laptop completely, and then press the same Novo Button instead of the power button to launch the built-in tool.
Method for SONY
Turn off, turn on and when Sony logo appears on the screen or when the indicator lights up - HOLD/Press (possible options):
- Volume DOWN
- Volume Up
- Click on the logo
- Or turn off Sony, hold down the “Power” button, wait for a couple of vibrations, release the power button and hold down the “Volume Up” button
If you can’t use the universal method (read below).
Management in the Recovery menu
Volume Up and Down —move through the menu. On/Off key —select an item in the menu. There are some Android devices that do not have a volume key ,
in this case, you will need
an OTG cable and a computer mouse.
As soon as you start putting Android into Recovery mode, connect your mouse. This concludes the article. If you don’t know how to use it and what items in Recovery are responsible for, then read the article
- FAQ Clockwordmod or complete instructions for CWM
- How to use TWRP RECOVERY
- If errors occurred when installing the update - Status CWM
That's all! There is nothing complicated! Read more different articles and instructions in the section Articles and Android Hacks . Stay with the Android +1 , it will be even more interesting!
Sources used:
- https://fb.ru/article/418981/vosstanovlenie-sistemyi-lenovo-poshagovaya-instruktsiya-spisok-sochetaniya-klavish-dlya-vosstanovleniya-nastroek
- https://remontcompa.ru/913-kak-otkatit-noutbuk-lenovo-k-zavodskim-nastroykam.html
- https://remontka.pro/recovery-image-lenovo-laptop/
- https://lenovomania.org/otvety/kak-vosstanovit-zavodskie-nastroiki-na-noutbuke-lenovo
- https://androidp1.ru/kak-zayti-v-menyu-recovery/
SHARE Facebook
- tweet
Previous articleHow to block a Beeline SIM card yourself via the Internet or from another phone
Next articleHow to set up email on your Android and iOS phone
Using Windows Operating System Tools
If we are talking about Lenovo laptops and restoring the Windows 10 system, you can also use the tools of the OS itself.
For a complete reset, use the update and recovery section in the options menu, where there is a corresponding item.
It is also sometimes possible to download diagnostic tools that allow you to fix problems when starting the operating system while saving user data. If none of the proposed solutions (for example, in the case of replacing the hard drive or accidentally damaging the partition with factory tools) does not help, you can try to perform similar procedures when booting from removable media with a distribution kit or using disk programs like LiveCD. By the way, it is not always recommended to restore the Lenovo system in terms of a complete reset. Quite often, you can fix some problems through the command console (Shift + F10) using the Bootrec.exe tool, disk check and system component integrity (SFC), etc.
Information for the news
- 506
- Author: admin
- Date: 1-11-2015
1-11-2015
Category: -
Hello admin! I need to restore my Lenovo laptop to factory settings, but I don't know how to do it. It’s very strange, but I didn’t find such an article on your site! Or was it a bad search?
Hello friends! What to do if: 1. The laptop starts working slowly. 2. Browsers open who knows what instead of classmates! 3. The antivirus was eaten by viruses 4. There is 1 MB of free space left on the disk (C:)!? 5. And finance sings romances and there is no money to call a computer technician. Of course, without hesitation, roll back the laptop to factory settings and after that it will function like new, because the state of your operating system will return to its original state. And if you have a Lenovo laptop, then this is as easy as shelling pears, you just need to press one small button - OneKey Rescue System. Was it worth writing an article about this?


