There are probably no PC users who do not need to go into the BIOS at least once during the entire time they work with the computer. Those who use Lenovo products did not stand aside either. This manufacturer has a huge list of laptops, and not all of them can enter the BIOS in the same way, but setting it up is easy - the functions are the same everywhere. Today we will try to figure out how to enter the BIOS on a Lenovo laptop, be it Lenovo s9, Lenovo z50 or Lenovo b50.
Why might there be a need to enter the BIOS on Lenovo? Even though laptop manufacturers in each new released model try to minimize the user’s PC knowledge requirements and give the simplest possible answer to the question of how to configure it or determine the cause of problems, sometimes there is a need for finer adjustment of parameters. What can you use this input for:
- Turning on and off some laptop hardware, diagnosing problems;
- Configuring boot parameters for the OS and the entire device;
- Configuring the disk subsystem, in particular, its operating modes;
- Customization of many other functions, parts or the system in general.
- How to enter the BIOS of a Lenovo laptop: method 1
- Entering BIOS on a Lenovo laptop: method 2
- How to enter the BIOS of a Lenovo laptop: method 3
- How to go to BIOS on a Lenovo laptop: method 4
- How to enter BIOS: method 5
How to enter the BIOS of a Lenovo laptop: method 1
Equipment manufacturer Lenovo has created its own software called Lenovo One Key Recovery - this is a system that includes the ability to backup data on a Lenovo PC and restore it. In order to turn it on, there is an additional button on the laptop - Novo. It is found on almost all the latest laptop models from Lenovo and is located either on the side panel of the case or near the power button. Sometimes, in the most modern models, there is a small hole with a microswitch inside. In this case, you need to use a thin, non-sharp object - for example, a paper clip.
And despite the fact that the direct purpose of this button is not to call up the BIOS, you can still get into the BIOS using it:
- Turn off the device by holding down the power key for 10-15 seconds;
- Hold the Novo key for 2-3 seconds and release;
- Your laptop turns on and opens a small menu with a choice - click on the line labeled “BIOS Setup”.
Built-in key
The vast majority of laptops from this company have a separate Novo button built into the case, pressing which when the PC is turned off will call up the OneKey Recovery System utility, which allows you to perform a system recovery or change Boot Menu settings. In addition to this utility, when pressed, the desired BIOS menu will also be called up.
In the IdeaPad 110, the Novo button was removed from the body and moved to the left side panel in a slightly modernized form. Now it is a hole in the body. To use Novo, you need:
- Turn off the laptop.
- Take a paperclip and insert it into the hole until you hear a characteristic click.
- In the window that appears, select the BIOS Setup item by pressing the button.
Similar buttons are used, for example, to reboot Wi-Fi routers. As a paper clip, you can use a regular paper clip or the one that smartphone manufacturers use to open the SIM card tray.
Entering BIOS on a Lenovo laptop: method 2
Entering the BIOS on a Lenovo laptop is carried out in several ways - unfortunately, there is no one solution for everyone on how to get into the BIOS, but the methods for launching it are quite simple. So, let's move on to the first method.
The most popular solution is to use the keyboard - simultaneously pressing several laptop buttons immediately after starting it. Turn off your laptop (this method will not work if it is turned on), then press the power button and immediately one of the options:
- F2 button or Del button;
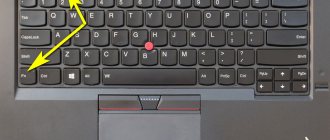
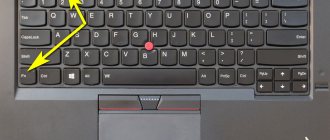
- Combination Fn+F2;
- F1 key
If the BIOS was launched incorrectly, the computer will boot the OS in normal mode. In this case, you will have to turn it off again and call the BIOS again, but using a new boot method. To avoid playing guessing games and launch the BIOS faster, you can also look at the instructions for your Lenovo laptop.
It also happens that the laptop starts up too quickly, and the user does not have time to press the required combination. To avoid this, turn off the laptop by holding down the power key for 10-15 seconds. Then hold down the desired combination to enter the BIOS, and then press the power button and release, while continuing to hold down the keys to enter the BIOS until the desired screen with parameters appears in front of you.
Option 2: Side button
Various brands of Lenovo laptops and laptops, including the B50, have a special small round button on the side near the USB drive (for some, this service button is located near the power button).
So, you need to completely turn off the laptop, and then press and hold this technical button for a few seconds. If you do everything correctly, then you should see a special menu with several items: standard BIOS boot, entering BIOS settings, activating the boot menu and emergency system recovery. The order and name of these sections may differ depending on the version of the laptop you are using.
Now you only need to select the desired option to enter the BIOS in Lenovo B50.
How to enter the BIOS of a Lenovo laptop: method 3
Around the same time that the new BIOS version called UEFI was released, the new Windows 8.1 operating system was released. And along with it, a new way to load the BIOS appeared - through the OS:
- First you need to go to the desktop. Then call the side menu of the Windows desktop - to do this, move the mouse cursor to the lower right corner of the desktop. Select “Settings” – “Change computer settings”;
- Next, go to the “Update and Recovery” menu item, and then under the “Special boot options” line, click on the reboot key;
- After the reboot has been completed, we are taken to a screen with the ability to select an action. Click on the Diagnostics tile and then on UEFI Firmware Settings;
- Confirm your choice by clicking on the “Reboot” button. Done, the laptop has entered the BIOS!
Command line
You can forcefully call up the BIOS menu using the command line familiar to many users. The procedure will take literally a few seconds; you won’t have to look for any third-party combinations or buttons:
- Call the “Run” menu.
- Enter the command “cmd” and click on “OK”.
- Paste the command “shutdown.exe /r /o” and press the enter button.
The computer will restart automatically and a window will open asking you to select a startup method. In this window you need to go to the BIOS.
How to go to BIOS on a Lenovo laptop: method 4
If you have Windows 10, then there is another way to load the BIOS, similar to the previous one. Here it is done a little differently:
- In the “Start” menu, click on “Settings”, select “Update and Security”;
- Open the “Recovery” tab and under the inscription “Special boot options” click on reboot;
- The device reboots, and we see a window for selecting an action. After you enter the desired menu, do everything as in the previous paragraph when starting the BIOS on Windows1.
If, when using this or the previous method, you do not see the “UEFI Firmware Settings” button on the screen, this means either that this laptop has an outdated version of the BIOS without UEFI, or that the OS was installed on the laptop in Legacy mode. Then working with UEFI is not available from the operating system - you will have to use the first two methods.
Setting up the BIOS on Lenovo b50-70 to install booting from a flash drive
To configure booting from a flash drive on the Lenovo b50-70, install it in a USB port and go to settings using the Fn+F2 key combination. Go to the Boot tab in the Boot Mode section and change UEFI to Legacy Support. In Boot Priority we also change to Legacy First. Then exit and confirm saving the changes.
After rebooting the laptop, you again need to go into the BIOS settings using Fn+F2. Go to the Boot tab. Here, in the Legacy section, a hard drive, drive and flash drive appeared. To boot from a flash drive, move it to the first place using the Fn+F6 keys.
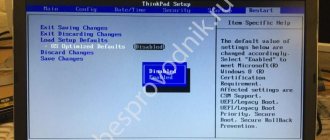
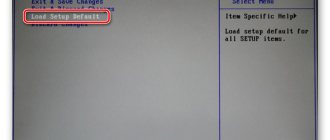
After installing the operating system from a flash drive, you can return the default settings (to factory settings) in the Exit section. Here we select the Load Default Setting item.
How to enter BIOS: method 5
The last method is the most radical, and can only be recommended to those users who already have good experience in disassembling such a device. Otherwise, you run a high risk of permanently damaging your Lenovo laptop.
The essence of the method is as follows: to reset all BIOS settings, you need to temporarily disconnect the special CMOS battery that is connected to the device’s motherboard. After performing this action, the device will “think” that the settings may be incorrect and will offer you to open the BIOS to correct them, or it will even enter it on its own.
BIOS batteries look different and are in their own place in almost every model, so you’ll have to dig around before you get to it and turn it off. But in general the procedure is as follows:
- Turn off the laptop, remove the battery;
- Access the CMOS battery and carefully disconnect it from the motherboard;
- Wait 15-20 minutes (this is necessary so that the CMOS chip is de-energized and the capacitors on the motherboard are discharged);
- Reconnect the battery, reassemble the laptop, connect the power and turn on the device;
- If you did everything correctly, you will see the BIOS settings screen.
We hope that one of the methods described above helped you find the answer to the question of how to enter the BIOS on a Lenovo P70, G50-80, Lenovo ThinkPad T400 or T440 laptop.
Keyboard shortcuts
Fortunately, Lenovo has established a single key combination for almost all of its laptop models: Fn + F2 , where Fn is a special “function” button, usually located in the lower left corner.
Much less often, in order to enter the BIOS, you have to use another Fn + F1 or simply press the Delete (Del) key.
In general, the user's actions come down to two steps:
- Open the Start menu and, by clicking on the virtual power button, select one of the options - shutdown or restart.
- Turning on your Lenovo laptop again or waiting for it to start after a reboot and using one of the key combinations listed above to enter the BIOS is no more difficult than understanding the benefits of UEFI Boot.
If everything is done correctly, the user will see the BIOS menu in front of him. Now he can configure the BIOS, set the operating system boot order and perform other required manipulations - if necessary, after entering the password.
Tip: if your Lenovo laptop starts up too quickly or you can’t enter the BIOS after rebooting, it makes sense to turn it off using a physical button by pressing and holding it for a few seconds.
Now, after giving the Lenovo laptop a little rest, you should start it again - and do not forget to use one of the combinations listed above in time to enter the BIOS.
Main sections and settings
How to enter BIOS
I believe that the first place to start this article is with the question of entering the BIOS (otherwise there will be nothing to configure).
In most PC/laptop models, to enter the BIOS you need to press the F2 or Del (sometimes F1 or Esc) immediately after turning on the device. Some laptops (for example, Lenovo) have a special Recovery button (which is pressed instead of the power button). After this, usually a sign appears (as in the photo below) - to configure the BIOS you need to select BIOS Setup.
I also recommend that you read the articles on my blog about logging into the BIOS (links below).
Control buttons
In the BIOS, all settings have to be set using the keyboard (which is somewhat scary for novice users who are used to doing everything with the mouse in Windows). It is also worth noting that all settings are set in English (however, most of the settings are easy enough to understand what they mean, even for those who have not studied English). And so, about the buttons.
I draw your attention to the fact that in almost every BIOS version, all the most basic control buttons with which it is configured are written at the bottom of the screen (or on the right).
Control buttons at the bottom of the window // Dell Inspiron laptop
Generally speaking, the buttons are as follows:
- arrows →↓↑← - used to move the cursor (change parameters);
- Enter - the main key for entering sections (as well as for selecting certain parameters and switching items);
- Esc - exit the BIOS without saving settings (or exit a specific partition);
- +/PgUp or -/PgDn — increase/decrease the numerical value of a certain parameter, or switch it;
- F1 - quick help (only for settings pages);
- F2 — hint for the highlighted item (not in all BIOS versions);
- F5/F6 - change the parameters of the selected item (in some BIOS versions they can also be used to restore changed settings);
- F9 - system information (loading secure settings);
- F10 - save all changes to the BIOS and exit.
Important! On some laptops, in order for the function keys (F1, F2. F12) to work, you must press the combination of buttons Fn+F1, Fn+F2. Fn+F12. Typically, this information is always indicated at the bottom (right) of the window.
Sections and Tabs
Information
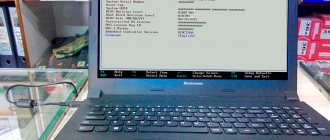
The main tab in the laptop BIOS that you see when you log in. Allows you to get basic information about the laptop:
- its brand and model (see photo below: Product Name Lenovo B70-80). This information is extremely necessary, for example, when searching for drivers;
- BIOS version (if you decide to update the BIOS, this information will be extremely useful);
- the serial number of your device (not available everywhere, and the information is almost useless);
- processor model (CPU - Intel Core i3-5005U 2.00GHz);
- hard drive model;
- CD/DVD drive model and other information.
In general, it is highly recommended to visit this tab when you want to find out information about your hardware. Also in cases where you connected new equipment and you don’t know whether it was detected correctly.
Configuration
One of the main tabs for setting many parameters. In different laptops, the tab contains different settings; the main parameters include:
- System Time/Date - setting the date and time (the time is often lost in Windows, and sometimes it cannot be set at all until the corresponding tab is configured in the BIOS);
- Wireless - Wi-Fi adapter, here you can disable it (note: Enabled - on, Disabled - off). If you do not work with Wi-Fi networks, it is recommended to disable the adapter, as it significantly consumes battery power (even when you are not connecting to a Wi-Fi network);
- Sata Controller Mode - hard drive operating mode. This is quite a broad topic. Here I will say that the operation of your hard drive (for example, its operating speed) significantly depends on the selected parameter. If you don’t know what to set, then leave everything by default;
- Graphic Device Settings - a parameter that allows you to configure the operation of video cards (in laptops that have two video cards: integrated and discrete). In some cases (for example, when working with Windows XP, or when you want to save battery power as much as possible), you can disable the discrete video card here (note: there will likely be a decrease in performance in games);
- Power Beep - enable/disable the tweeter speaker. In my opinion, for a modern laptop in everyday use, this is a useless thing (it was relevant earlier, about 10 years ago);
- Intel Virtual Technology is hardware virtualization that allows you to run multiple instances of operating systems (guest OS) on one physical computer. In general, not for novice users;
- BIOS Back Flash - if you want to update your old BIOS to a new version (i.e. flash) - enable this option;
- HotKey Mode - mode of operation of function keys. If the option is enabled: instead of the usual, say, F1-F12 to refresh a page in the browser or get help, you will be able to use multimedia capabilities - turn up or turn off sound, brightness, etc. To use the usual F1-F12 values, you need to press them together with the key Fn.
Internet
Paper documentation is not always saved. This is especially true for those devices that have been in use for more than three years. But there's nothing wrong with that. In such a situation, the manufacturer’s official website should come to the rescue. There are sure to be electronic versions of all instruction manuals. But here one important point needs to be noted. In the case of a desktop PC, you need to go to the website of the motherboard manufacturer. But in the case of a mobile PC, we turn to the website for documentation. The instruction manual should be on this resource.
How can I change the boot order?
Sometimes you need to change the boot order of your device. That is, make sure that the laptop boots not from the hard drive, but from the installation media (CD or flash drive). Consider the G50:
- We already know how to enter the BIOS, so we’ll skip this step.
- After clicking the notorious “New” button, a menu will appear where, among other things, there will be a Boot Priority item. That's what we need.
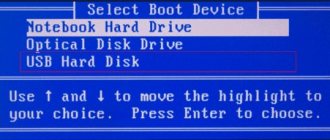
- We go to this item and see a list of devices that are currently available for download. If you are installing the operating system using a USB drive, then you need to select the USB-HDD item.
- And if an optical disk is used as the installation media, then select the “ODD-device-name” item.
After this, the computer will begin to boot not from the hard drive with the pre-installed operating system, but from the bootable media. And you will be able to start installing the system.
Screen
Another way to find out which key is used to access basic settings is to carefully watch the laptop boot process. To be more precise, the first window with equipment parameters. If you see the logo of the device manufacturer, then you need to press Esc. You need to pay attention to the line “Press b to setup”. Instead of b, F1 or F12 must be specified. This is the answer to how to enter the “BIOS” in Lenovo. This method is universal and can be used not only on products from this Chinese manufacturer, but also from any other company.
Hotkeys
Let's start with the standard method, which is present on any laptop computer. We are talking about special keys programmed to turn on the BIOS. Typically, this button does not depend on the device manufacturer, but on the motherboard model and the installed software version. If we take the Lenovo IdeaPad 320, then with the original firmware and hardware, the user needs to press a button on the initial power-on screen.
If this option does not work, then try the + key combination. This is because the system buttons can only be activated using the auxiliary key. You can also find out the exact button on the initial startup screen, where information about the BIOS manufacturer and software version is located:
Expert opinion
Basil
Project manager, comment moderation expert.
Ask a Question
The described method is suitable not only for Lenovo products. All motherboards on laptops and desktop computers use this method of starting the BIOS. Only the power key changes.
