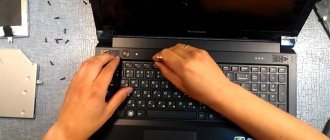
Now voice communication over the Internet is becoming increasingly popular, displacing the usual analogue, as well as the creation of streams and video tutorials. But for all this you need to connect the microphone to the computer and activate it. Let's see how this is done on a Windows 7 PC.
After you have connected the microphone plug to the corresponding connector on the system unit, you need to connect it in the operating system. If you are using a standard laptop device, then, of course, you do not need to physically connect anything. Direct connection, both in the case of a desktop PC and in the case of a laptop, is made using the “Sound”
.
But you can go to its interface in two ways: through the “Notification Area”
and using
the “Control Panel”
. Next, we will consider in detail the algorithm of actions when using these methods.
Method 1: Notification Area
First of all, let’s study the algorithm for connecting a microphone through the “Notification Area”
or, as it is otherwise called, the system tray.
- Right-click ( RMB
) on the speaker icon in the tray.
In the list that opens, select “Recording devices”
. - Sound
tool window will open in the
Recording
.
If this tab turns out to be empty and you only see an inscription indicating that the devices are not installed, then in this case, right-click on the empty
space of the window, and in the list that appears, select
“Show disabled devices”
. If, when you go to the window, the elements are displayed, then simply skip this step and move on to the next one. - If you did everything correctly, the name of the microphones connected to the PC should appear in the window.
- Right
-click on the name of the microphone that you want to activate.
In the list that opens, select “Enable”
. - After this, the microphone will be turned on, as evidenced by the appearance of a check mark inscribed in the green circle. Now you can use this audio device for its intended purpose.
- If these steps did not help you, then most likely you need to update the driver. It is best to use the drivers that are included on the installation disk for the microphone. Just insert the disc into the drive and follow all the recommendations that will be displayed on the screen. But if it is not there or installation from disk did not help, then you should perform some additional manipulations. First of all, dial Win+R
. In the window that opens, enter:Click "OK"
.
- "Device Manager"
will launch .
Click on its section “Sound Devices”
. - In the list that opens, find the name of the microphone that you want to turn on, right-click on it and
select
“Update”
. - A window will open where you need to select the option “Automatic search...”
. - After this, the required driver will be searched and installed if necessary. Now restart your PC and the microphone should start working.
In addition, you can use specialized software to search and update drivers on the machine. For example, you can use DriverPack Solution.
Method 2: "Control Panel"
The second method involves going to the “Sound”
and activating the microphone through
the “Control Panel”
.
You can turn on the microphone in Windows 7 using the Sound
.
But you can activate its window in two ways: through the “Control Panel”
and by clicking on the tray icon. You can choose the method that is most convenient for you, taking into account your own preferences. In addition, in some cases, reinstalling or updating the driver is required.
I can’t communicate with friends on Skype because there is no sound, a new microphone is connected, but the device is not detected, the recording is too quiet... All these are quite common troubles, but easily solvable. Below we will talk about how to properly configure the device.
Currently, microphones of various types and shapes have become widespread. By method
connections can be
analog
, with
USB
output (connect to any USB input on the computer),
wireless
- they will be mentioned later.
And of course , built-in,
in the case of laptops or webcams, which is also analog.
How to connect the device
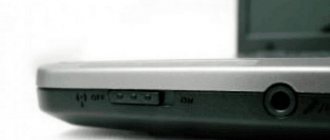
First, let's find out where to insert the connector of a conventional analog device - the most common one at the moment. 3.5 jack plug
, the same as for simple
headphones
.
The microphone jack should be pink
colors, it can be located on the motherboard on
the rear panel
or on
the front panel
of the system unit, on the sound card, keyboard.
How to set up a microphone
It’s not enough to just connect, you also need to configure it. Before you start setting up, you should make sure that the audio driver is installed
.
To do this, look in the Manager
to see if all sound devices are defined and enabled.
If the device is not detected, try reinstalling
its driver.
After checking, we proceed to the setup itself.
Via Control Panel
go to
the Hardware and Sound
.
In the next window, click on Sound
and in the settings dialog select
Record
.
In this tab, select the microphone that we want to configure and click Properties
.
Connect headphones and click on the Listen
, there you will need to check the box next to the words:
Listen from this device
, and then click
Apply
.
After this, you will be able to hear in the headphones the sensitivity
our recording device transmits sound.
Then open the Levels
for optimal gain settings.
When you get the sound that satisfies your requirements, uncheck the listening
.
How to connect a wireless microphone
An extremely convenient device is a wireless microphone with built-in bluetooth
. It is most often used in conjunction with a laptop, because it usually has a built-in Bluetooth module. In the case of a computer, you will need to purchase it additionally.
Go to the laptop bluetooth
and
search for
a new device.
Install the required driver
if it is not detected automatically by the system.
If there are no problems with the drivers, but the laptop still does not see the acoustic recording device, check whether it is turned on and whether the batteries are discharged.
Run the Windows 10 troubleshooter
Windows 10 has a built-in troubleshooting tool that will try to automatically find and fix microphone problems. To access it, go to Settings > Update & Security > Troubleshoot. Select the Record Audio troubleshooter, click Run the troubleshooter, and then follow the onscreen instructions. It is possible that this tool will help you configure the microphone on Windows 10.
How to enable the built-in microphone in a laptop
Go to Control Panel
/
Hardware
there find
Realtek HD Manager
.
The sound manager will open, in the window of which, with the built-in microphone disabled, go to Additional settings
device and check the box there:
Separate
all input jacks as independent input devices.
Next, go to the tab that displays your built-in Mic
.
Here you can adjust the volume
and
gain
.
After that, in the Sound
Your device will appear if it was not there before.
Now you can configure its parameters.
There are many programs that use the microphone's capabilities, such as various online services. Optimal settings for the operation of your recording device will ensure the most comfortable communication
Most modern laptops have the advantage over older models of built-in features, but you need to know how to use them. For example, on a laptop?
PC users today no longer need to select a separate microphone for their laptop, purchase it in addition and carefully connect it. This saves significant time and money. However, often even with built-in functions, less experienced users have questions about how to turn on the microphone on a laptop, since it does not turn on automatically. If the microphone is actually in working order, then the reason for this may be that it is not configured correctly, which needs to be corrected.
How to turn on the microphone on a laptop - a simple way
First of all, users need to check the presence of the microphone itself. To do this, you can read the specification of your laptop, where it will be written exactly whether it has such a built-in function.
A little hint (before you look into the documentation included with your computer) will be the presence of a web camera, because if it is there, then there are built-in speakers. Device Manager will also help you detect the microphone on your computer.
The second step on how to turn on the microphone on a laptop is to check the presence and settings of the speakers. To do this, see if they are displayed in the “Sound” section, “Recording” tab. When the microphone is displayed on the laptop and check if it is turned on. To do this, look at the device settings in the “Advanced”, “Improvements” and “Levels” tabs.
There is also a high probability that the microphone is simply set to a quiet mode of sound transmission, if you still cannot be heard with it on. on a laptop in this case? Go to the “Control Panel”, open “Sound”, then in the menu go to “Properties” and then to “Microphone”.
Here we check the box “Allow applications to use the device in exclusive mode” and here “Give priority to applications in exclusive mode” in the tab called “Advanced”. Trying to test your microphone after setting the highest bit depth. If you did everything correctly, that is, you configured the device correctly, you will be able to hear yourself well. Otherwise, repeat the process of replacing the bit depth and frequency again.
What about some additional effects? To do this, you need to use certain utilities as they depend on the type of sound card. For example, to enable echo or noise suppression on a microphone, or to show the distance to the microphone itself on a laptop, you can use the most well-known utilities, such as Realtek Manager.
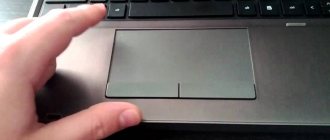
Often in the list of microphones you can find the presence of several built-in speakers. And in order to recognize which one is where, you just need to lightly tap near the microphone - and green marks on the strip will appear on the icon.
- 1. Required drivers are missing
- 2. The microphone is not set up correctly
- 3. Microphone malfunctions
- 4. Microphone is not selected in the program
- 5. The microphone is occupied by another program
- 6. The microphone is faulty
Almost every modern laptop is equipped with a built-in microphone, so for comfortable communication in programs with voice calls and for voice recording, you do not need to buy additional equipment.
However, quite often a problem arises when it is impossible to use this advantage. Simply put, the built-in microphone on the laptop stops working. What to do in such a situation? Why doesn't the microphone work on my laptop or PC? Is this problem a consequence of a serious breakdown? Or is it possible to fix everything without having special knowledge? More details in our review.
Dust and dirt
The next reason why the microphone on your phone may not work well is dust and dirt. The microphone holes on the body of your device are quite small and often become clogged with small dust particles and particles of dirt. As a result, the sensitivity of the microphone is significantly reduced, and if it is very dirty, it almost disappears.
This problem can be fixed quite easily:
- First you need to try blowing air through the microphone. You can try to blow it yourself or use a can of compressed air.
- This may not always work, since dust and dirt particles can accumulate quite heavily. In this case, you will have to use a thin needle (or any other thin object). It should easily penetrate the microphone hole, and with its help you can remove all the dirt that has collected there. You just need to act as carefully and carefully as possible, without pushing the needle too deep, otherwise there is a risk of damaging the microphone itself.
Required drivers are missing
This is the most common cause of this problem. However, mainly in relation to a laptop, it is associated with another problem - the lack of sound from the speakers built into the device. A successful solution is to establish communication between the operating system and the laptop using a special utility, a driver. This is why it is so important to check for the latest drivers on your PC.
What do I need to do? Go to “Control Panel”, then “System”, “Device Manager”, “Sound, game and video devices”. Notice that there is an “Unknown device” menu under this menu? Or an icon with a yellow exclamation mark? If yes, then it's all about the drivers.
It is not difficult to correct the situation. To do this, just go to the official website of your computer manufacturer. Then, using the search, find the exact model of the laptop, indicate the OS version (and bit depth). In the drivers section you can download drivers for the microphone. Download the software to your laptop and install. After this, you must restart the device for the changes to take effect.
The microphone is not set up correctly
On a laptop with Windows 7, 8 or Windows 10, the microphone does not function well if its sensitivity level is incorrectly set. This is why it feels like the microphone is not working at all. How can I check this? Right-click on the speaker image. Then, from the context menu that opens, select “Recording Devices.”
Then select the microphone (right mouse button) and then go to “Properties” / “Levels”. If the sliders are at the lowest level, you need to move them to higher positions. After saving the changes, check if the microphone is working.
Microphone malfunctions
It is quite possible that the built-in microphone does not work due to various glitches. How to fix it? First, restart your computer. Then right-click on the speaker icon. In the menu that opens, select “Recording devices.” And then "Record". When working correctly, the microphone is reflected here. If it is not there, then in this window, click on any free area and check the “Show disconnected devices” checkbox in the pop-up window (sometimes the required item is reflected as “Show disconnected devices”). Then right-click on the microphone.
“Enable” will appear in the context menu; immediately activate the microphone. But sometimes “Disable” is reflected. Click on this inscription, and then “Enable”, this will reboot the device. Be sure to check that the microphone is working correctly. Try making noise or saying a few words. Observe whether the ticker (it is located next to the icon) moving, recording the noise level? If yes, then the microphone is working correctly.
Microphone is not selected in the program
Sometimes other microphones are connected to the laptop. And the main one stops working. What to do in such a situation? Use search to find “Voice Recording.” Click on the microphone image to start recording and check that the device is working correctly. If everything is fine, but the microphone still does not work, for example, in Skype, then the problem can be solved this way: in the program, select “Tools” / “Settings” / “Sound Settings”. The correct device must be indicated in the “Microphone” column.
Microphone is occupied by another program
Has your previously working microphone stopped working? It is quite possible that the reason is that he is busy with another program. How can I check this? Open “Device Manager”, review in this window the programs that are currently active on your laptop. If you notice a program that is likely using a microphone, click on “Quit.”
In addition, certain web portals in the browser are also capable of “taking away” the microphone’s operation. This happens in cases where you connect one or another online service for communication, as well as a special application for recording video from a webcam. Actually, that’s why you should always close those tabs in your browser that you don’t need at the moment.
Connection
Before we begin, your computer will need to check for:
- Option A: Built-in Bluetooth function;
- Option B: a compatible Bluetooth dongle that plugs into one of the USB slots.
Now follow the instructions:
- Click Start, then type “devicepairingwizard” and press Enter.
- Make your peripheral device discoverable, sometimes also called Visibility. This step must be performed on your Bluetooth device and not on your computer. On most portable devices, this is done by holding down the power button for 5-15 seconds, and then the power light indicates that the connection has occurred and begins to flash one or more colors. You may need to refer to the manual of the independent device to clarify the instructions.
- Select your device and click Next to start pairing and select your device in Windows 7, open Device Wizard and click Next again.
- In most cases, you will have to wait after connecting; Windows will install drivers for the peripheral device for a certain time. By default, it will only use built-in device drivers.
Thus, two scenarios appear:
- Select to automatically install the device driver for update.
- Manually download the latest driver from the device manufacturer.
If you skip this step, there is a high chance you will end up with an outdated driver and it may not have full functionality.
Wait until the device drivers are installed in Windows 7.
Congratulations! The headphones are now ready to use. Enjoy your Bluetooth connection!
In theory, the headphones should join Windows 7. Of course, due to the fact that we are dealing with an unlimited number of device manufacturers, they cannot connect flawlessly. Luckily, there is something we can do to try to resolve the issue if the headphones connect but still don't work.
How to troubleshoot connection problems
You need to know the following instructions:
In 9 out of 10 cases, the problem is due to a missing or outdated driver, but if there is another reason, it can be identified by a troubleshooting service.
Windows will search for a solution, and if it can find one, it will offer a fix for connection problems.
We hope this solved your problem!
Unfortunately, sometimes Bluetooth devices will not connect to your computer. The device can connect via Bluetooth, but the connection functionality is missing, simply because a compatible driver does not exist.
Alternative solution
The sequence is as follows:
- Click the Start button in the lower left corner of your desktop.
- In the search field, type “change Bluetooth settings” and press the “Enter” key on your keyboard. After this, the Bluetooth settings windows will appear.
- In the Discovery section, make sure the Allow Bluetooth devices to find this PC checkbox is checked. If it is not checked, check it and click OK to save the changes. If the checkbox is checked, close the window.
After completing the above two steps, follow these steps to connect your headphones to your computer:
- Open Control Panel. On your keyboard, press “Win + R” (Windows logo key and R key) simultaneously to bring up the Launch window. Type "Control Panel" and press "Enter" to open its window.
- Open the "Devices and Printers" section.
- Click "Add Device".
During the pairing process, you may be prompted to enter a pairing code. This is usually 0000 or 1234. If neither of these codes work, contact your headphone manufacturer to obtain the correct code.
Pro tip: Whether you choose to update device drivers manually, using Windows Update, or using a trusted third-party product, it is important that you have the latest, correct device drivers for your operating system installed.
If installing drivers is inconvenient or you are afraid of installing the wrong software, we recommend using programs to automatically search for drivers, such as DriverHub. This is a tool that detects, downloads, and installs any driver updates your computer needs.
To update your drivers using DriverHub, simply click the "Scan Now" button, then from the list of drivers that need to be updated, select all or just the ones you need and click "Update". The necessary correct drivers will be loaded.
Finally, do not forget that in order to connect Bluetooth headphones to a Windows 7 laptop, you need a Bluetooth module. By default, almost all laptop computers have this module on board, but it’s still worth checking.
Perhaps the problem is that the headphones themselves are faulty, try connecting them to your smartphone and check if contact is established. If there is a malfunction, send them to customer service for diagnosis or repair.
Even new voice equipment can suddenly fail to function at the most inopportune moment. But before you get upset that the microphone does not work on your Lenovo laptop
, you can check it in some ways to find out the cause of the breakdown.
First, make sure it is turned on and check all the necessary volume settings on your laptop. Secondly, in addition to the fact that the built-in microphone
may be disabled, it is likely that the necessary drivers are not installed or they simply “flew”. Thirdly, there may be problems inside the device; it would be better if you contact the specialists to take care of it. Have you seen that by changing something in the software, drivers or settings, not only voice equipment can stop working? You can perform a number of different actions one at a time and waste a lot of time.
Lenovo mini-computer
You can only update the software driver yourself. If the results are disappointing, we strongly recommend that you contact specialists; our service center is always happy to help you. Listen to our advice, if you wish, you can eliminate some minor faults, and regarding disassembly, diagnostics and repair, contact us. Below we will describe several options for problems that we most often encounter at work.
The microphone is out of order
Sometimes you have to state the fact: the microphone on the laptop stopped working due to a breakdown. In this case, the only remaining option is to contact a service center.
In 99.9% of cases, the laptop is equipped with a built-in microphone, which allows you to record voice, communicate in programs with voice calls, record video from a webcam, etc. without additional equipment. Today we will take a closer look at the problem when the built-in microphone in a laptop refuses to work.
The problem of the microphone not working is quite widespread for both laptops and desktop computers, which, as a rule, require the installation of a separate microphone. The occurrence of such a problem can be influenced by various factors, which will be discussed in more detail in the article.
The microphone works fine, but I would like to increase its sensitivity
It is better to make this decision with caution and implement it carefully. You can download the Volume+ application, but for more serious changes, use the engineering menu. Note that increasing the sensitivity will not help when the microphone is faulty.
- Open the engineering (service) menu in the phone number dialing section. The combination of numbers depends on the smartphone manufacturer. If you don't find the manufacturer's code for your model in articles and forums, try a combination of other popular developers.
- Select the “Audio” section – “Normal mod” (normal mode, not a loudspeaker, for example) – “Type” (volume) – “Mic” (microphone) – “level” (the level by how much the volume will increase when the sound is increased in games, when talking, etc.).
- Set level 6.
- Value is 0~255 set to 64.
- Save the changes by clicking on “Set”, confirm with “ok”.
- Find the highest acceptable value for the “Max vol” (maximum volume) column of your smartphone model. Please indicate it in this column.
- Exit the engineering menu as you would any other application.
Reason 1: lack of necessary drivers
This is one of the most common causes of the problem, but in this case, as a rule, the sound from the built-in speakers of your laptop will not work either.
Since the equipment (in our case, the microphone) is built into the laptop, in order to establish its operation between the laptop and the operating system, it must have special software, better known as drivers. Our first step is to check whether there are drivers for the microphone at all.
To do this, open the “Control Panel”
, and then go to the
“System”
(to make it easier to find the desired section, you can use the search bar or set the menu item display mode to “Small icons”).
In the left area of the window, select the “Device Manager”
.
A new window will appear on the screen in which you can monitor the status of drivers for a particular device. In our case, we will need to expand the item “Sound, gaming and video devices”
. If under this item you see a parameter, for example, “Unknown device”, or next to the name of the microphone there is an icon with a yellow exclamation mark, we can conclude that the problem lies precisely in the drivers for the microphone.
You can fix the problem as follows: go to the official website of your laptop manufacturer and search the site, indicating the exact model of your laptop.
In the search results, you will need to go to your laptop’s page, and then open the section with additional software and drivers, indicating your version of the operating system (bit depth also matters). In the drivers section, you most likely won't find a driver specifically for your microphone, so you'll need to download audio drivers, which will usually include a driver for your laptop's built-in microphone.
After downloading the necessary software, you will need to install it on your computer (this is done in exactly the same way as installing any other program). Finally, all you have to do is restart your computer.
Reason 2: Microphone malfunction
Windows OS may not always work correctly, and therefore individual devices may periodically malfunction. It can be assumed that this is where the problem with the microphone’s operation arose.
First of all, restart your computer. Then right-click on the speaker icon in the tray and select “Recording Devices”
.
“Recording” tab active.
.
It should show your microphone. If not, right-click on any free area in this window and in the pop-up window, check the boxes next to “Show disconnected devices” and “Show disconnected devices”
.
Right-click on the microphone. If you see the “Enable”
, activate the microphone.
If you see the Disable
, click on it, and then turn on the microphone (this is necessary to reboot the device).
Now say something or make noise into the microphone. Next to its icon there is a ticker that records the noise level of the microphone. Normally, of course, it should move. If you see that this strip responds to sounds, then the microphone is working normally.
Download and install (or update) drivers for your microphone and other audio devices
Windows 10 always tries to download and update drivers for all devices found by the system automatically. This usually works without problems, but sometimes it crashes.
If the previous recommendations did not help you, then the most likely explanation for why the microphone does not work is the lack of the required driver. In this situation, I recommend going to the laptop manufacturer’s website, finding the “Support and Downloads” section related to your model and downloading drivers for audio devices. You can also search for drivers on the website of the motherboard chipset manufacturer. Updating your drivers may solve the problem.
If your microphone connected to the USB port does not work, then try downloading and installing the latest version of the USB controller driver from the website of the laptop or chipset manufacturer.
Reason 3: Incorrectly configured microphone
It can be assumed that Windows has incorrectly adjusted the microphone sensitivity level, which is why it seems to you that it is not working at all. To check this probability of cause, right-click on the speaker icon in the tray and select “Recording Devices”
.
Select your microphone with one click of the left mouse button, and below click on the “Properties” item.
Go to the "Levels"
. If both sliders are low, you will need to move them further to the right. Save the changes and check the functionality of the microphone.
Unmute your phone microphone through headphones
A common malfunction is the occurrence of problems with the microphone located on the headphones. This happens for two reasons:
- Loss of functionality of the input connector on the phone or the microphone itself. You need to test the headphones on another device.
- Zero sensitivity of the headset device. The solution to the problem is to open the engineering menu using the access code and changing this parameter.
In the open menu, you need to open the “Hardware” tab (in the English version it will be written “Hardware”), select the “Earphones Mic” item and find the parameter that determines the sensitivity (Speech Enhancement). Next, after trying various parameters, you need to configure the device so that the microphone in the headphones works well.
Reason 4: the microphone is occupied by another program
If, for example, while trying to talk in Skype you encounter a problem with the microphone not working, then you can think about the fact that the microphone could be occupied by another program.
Launch the task manager using the keyboard shortcut Ctrl+Shift+Esc
, and then carefully review the active programs on your computer. If you see a program running that appears to be using a microphone, be sure to terminate it. This is the best way to deal with all programs whose operation you do not currently need.
Please note that some web services that you work with in the browser can also “hijack” the microphone, for example, if you turned on an online communication service or a web application to record video from a webcam. If possible, close unused browser tabs or close the web browser altogether.
Reason 5: microphone is not selected in the program
If you have other microphones connected to your computer, be sure to turn them off. Now, using Windows search, find the standard program “Voice Recorder” (“Sound Recorder”)
. Click the microphone icon to start recording.
If, after listening to the finished recording, you understand that the microphone works fine, but in your program, for example, in Skype, the microphone refuses to work, you can think that the microphone is simply not selected in the program.
For example, in order to select the desired microphone in Skype, you will need to click on the “Tools”
, and then go to the
“Settings”
.
In the left area of the window, go to the “Sound Settings”
and make sure the correct device is selected in the
Microphone
. In addition, by deactivating automatic microphone volume adjustment, you can set the sensitivity level yourself, for example, by setting the slider to the highest position.
Reason 6: Microphone not working
The final reason for the problem we are considering. In this case, the built-in microphone may not work at all in your laptop. The problem can be quite simple, for example, the required cable was accidentally disconnected, but it can also be much more serious - the microphone is completely out of order.
In this case, we see two solutions: contacting a service center where they can diagnose the laptop, identify the cause of the problem and fix it in a timely manner, or connecting an external microphone through a special output (as a rule, in laptops, the headphone and microphone outputs are taken over by one and same connector).
We hope that any of the methods given in the article helped you solve the problem. In addition, if you have your own troubleshooting method, share it in the comments.
Restoring sound in Skype
If the interlocutor cannot hear you in the Skype application, then proceed according to the following instructions:
- We make a call to some other contact. If there is no one else to call, we use the built-in Echo service. This service was created specifically to check the quality of communication. We call this service and say a few words. After this, the voice will be recorded and forwarded to your gadget. If everything is fine, then you do not have a sound problem, but the other person may have a faulty speaker.
- Let's look at the settings. If none of the interlocutors can hear you, even the Echo service, then go to the menu with the device’s privacy settings and click on the microphone icon. There you will see a list of applications that have access to the microphone. You need to make sure that Skype is among them. If this does not solve the problem, then reinstall Skype.
- We use a headset. There are rare situations when Skype refuses to work with the built-in microphone. The solution to this problem is to connect a Bluetooth headset. The sound quality will improve significantly.