Today, almost every mini computer is equipped with a video camera, including Lenovo laptops: g570, b560, z570, g550, g575, b570e, g580, z575, z580, g560e, g550.
The ones listed above refer to the most common (bought) models on which you can turn on the camera and take pictures.
The only problem that arises is that “newbies” do not know how to enable the built-in webcam on a Lenovo laptop. I think in this article I can help them.
The first thing you need to understand is that in order to enable the camera on your Lenovo laptop, a special program must be installed.
You never turn on the camera itself without a program, except perhaps in Skype or an alternative application.
If you bought your Lenovo laptop with pre-installed Windows 7, Windows 8, or already with the new Windows 10, then the program should be there.
If you installed it yourself (friends), then you will have to install it yourself. Now let's go in order.
What is a webcam and where is it located?
Most modern laptops are thoughtfully equipped with a built-in webcam. This is very convenient, since you do not need to additionally search for a suitable device and install it on your laptop.
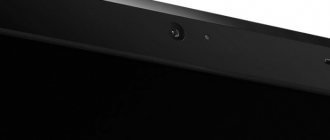
The camera is located directly above the screen. Outwardly, it looks like a small circle, similar to a mobile phone camera. This device provides many advantages. It will help provide video communication with any person, regardless of his location. If during a telephone conversation only the voice is heard, then here the interlocutors see each other.
Modern laptop models have cameras with built-in indicators. They light up when turned on. This provides additional security. The Lenovo laptop has the same functions. How to turn on the camera if you are not an advanced user?
How to find the camera in the software
How to enable the camera on a Lenovo laptop? There are two ways to find it in the software. One of them will certainly open the webcam for further configuration.
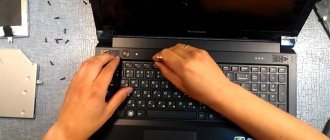
- Open the Start menu. Select the “Search” line. Here you should enter the word “camera”. After the operation, you need to choose the appropriate option.
- Click on the “Start” menu, where we select “Control Panel”. Next, select the “Hardware and Sound” sub-item. Then, in the “Devices and Printers” section, click on “Device Manager”. The webcam will be displayed in the “Image processing devices” line.
- The easiest way is to download the program that requires the camera and carry out the settings directly in it.
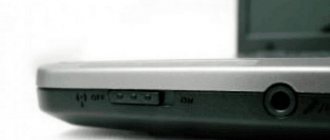
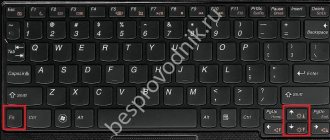
- We are looking for a button on the keyboard with a camera image. Some laptop models have this hotkey. Press the button and Fn at the same time.
- Just invite a knowledgeable person to connect and configure everything. Still, sooner or later you will have to learn to do it yourself.
Having completed one of the steps, the question of how to turn on the camera on a Lenovo laptop will not arise.
How to set up a webcam on a laptop
You can change your webcam settings in the desktop Camera app window. Let's talk about exactly what settings are available in this utility point by point:
- Launch the Camera program using the instructions from the first section of this article. At the top of the application window there is a photo timer (an alarm clock icon). The arrow next to it allows you to switch from automatic to professional shooting mode. On the right there are two round buttons for switching between taking photos and videos.
In the Camera application, you can select a mode (photo or video shooting), and also enable the ability to manually set all settings - To get to the settings, click on the gear-shaped icon, which is located in the upper right corner of the application window under the close icon.
- In the first drop-down menu, you can select the action that will be performed after pressing and holding the camera button. There are three options available: one shot, a whole series of photos or video recording.
Set the action that will be performed after pressing and holding the camera button - In the next menu you can flip the image you see in the application window.
If necessary, set the angle by which you want to rotate the image - In the “Photos” section, options for image proportions and framing grids are available. Depending on the type of shooting you want to use, choose a grid type. It will be easier to apply this or that method.
Set the framing grid according to the shooting method you want to use - With the Burst option enabled, you can take multiple photos until you press the camera button again.
- In the “Video” block, you can select the recording quality (depending on the maximum parameter offered by the camera itself), and also configure the flicker suppression option.
In the “Video Recording” menu, set the quality of your future media content - In the Related Options section, you can change the path to the folders where photos and videos will be saved.
In the related settings section, you can select the location of files with photos and videos taken - In addition, you can enable the use of your computer's location. The characteristics of the photo or video will indicate where it was taken.
Allow the Camera app to show your current location
Installing a separate camera
In cases where the laptop does not have a built-in camera, but you want to chat on Skype, you can resort to using a separate device. Most webcams come with drivers for installation. It is the presence of the driver that will help enable the camera on a Lenovo laptop. If the laptop cannot detect the driver, then the camera will not work.
Method #2 Privacy settings
Another reason why the Windows 10 camera does not start is the privacy settings, namely their incorrect configuration. In the settings you can restrict access of any applications to the equipment. How to solve this problem:
- Open Windows 10 Settings and go to Privacy settings;
- Then, the “Camera” tab. Allow access for all settings and applications.
You may be interested in: How to make a transparent taskbar
Enabling these settings may help with the problem when the webcam does not work in Windows 10. Next, let's look at the error codes that occur when using the webcam.
What is a driver
Setting up the camera correctly on a Lenovo laptop depends on the driver available. Why do you need a driver for your laptop and camera?
This is a necessary link between the laptop and the devices that are connected to it. The computer recognizes most standard devices automatically and does not require driver installation. However, for other equipment not provided by the manufacturer, it is necessary to install a special program that will detect the type of object and install it correctly. Simply put, the laptop uses this program to gain access to device management.
Drivers for a Lenovo laptop camera are disks with a special program. Typically, they are downloaded and installed semi-automatically. All the user needs to do is click on the necessary buttons and wait for installation.
It is worth mentioning here that for standard devices such as a mouse and keyboard, drivers are pre-installed in the laptop software. Therefore, they do not need to be configured.
How to use the driver
How to enable the camera on a Lenovo laptop using a driver? This question will inevitably arise for any new user.
For example, a user bought a camera and connected it to his laptop. The computer recognized the device, but there was no video image. Now is the time to look into the box where the camera was. There should be a disk with drivers there. It must be inserted into the drive. Wait for the download and follow the instructions. Most external devices have detailed instructions on how and what to do. In addition, there are recommendations for troubleshooting errors.
The laptop will automatically install the drivers for the camera in the folder with system files. In addition, it will prudently display a shortcut on the desktop and in the Start menu. This is very convenient, since a novice user can accidentally uninstall a necessary program. And thanks to copying into several folders, he will always be able to find the camera shortcut and use it. Even if all shortcuts are completely lost, the installed program will remain. It should be located in closed system files.
Connecting a Removable Camera
Connecting a removable camera
If your laptop does not have an integrated camera, but you want to communicate via video or take part in any interactive webinar, you need to purchase a removable device and connect it through a suitable interface. Many webcam models come with a set of drivers and configuration software.
If proprietary software is present, there will be no problems with turning on the Lenovo laptop. If the gadget refuses to install drivers, the camera will not start.
What are drivers for?
Why are drivers needed
Correct operation of a webcam on a laptop directly depends on the drivers used. Why are such software packages needed and what functions do they perform?
A driver refers to the middleware between a laptop and the components connected to it. Many devices are recognized by the system without user intervention and do not require the installation of third-party software.
But other parts do not provide for automatic installation of drivers, so you have to download them from the manufacturer’s official website, or from the included disk. In simple words, with the help of such software, the laptop is given the ability to control components.
Drivers for the camera on a Lenovo laptop are downloaded and installed in semi-automatic mode. The operating system independently carries out the procedure, and the user only confirms some actions with the mouse.
There is no need to download drivers for built-in laptop components, such as a keyboard or mouse. They are provided by default.
How to use the driver correctly
How to use the driver correctly
Is it possible to run a webcam on a Lenovo laptop through the installed driver? Perhaps the first question that the average user will face. If you purchased a removable module, connected it to the gadget and saw a notification about successful pairing, but the picture still did not appear, you need to make some settings.
In most cases, along with external components, a disk with drivers is offered, or a link to a site where they can be downloaded. In the first case, you need to insert the media into the optical drive and wait for it to load. The installation is carried out according to detailed instructions, so you should not encounter any difficulties or errors.
The system will automatically install the missing software into the appropriate folder, and will also send an icon of the installed program to the desktop and to the Start menu. This is a useful feature because... you can immediately see the changes made.
Where to find drivers
Finding drivers
If you haven't found the installation disk or have lost it, don't worry. The problem can be solved by downloading drivers from the Internet. To do this, open the official website of the webcam manufacturer or enter the phrase “Download drivers for the webcam” into the search bar and indicate its model. Next you need to run the installation file and follow the system instructions to complete the setup.
To work and communicate on the Internet using webcam functions, you need to connect it correctly. Such skills will help you solve possible problems in the operation of the equipment and set it up without the involvement of specialists.
We will buy your used laptop in any condition no older than 2010! Quick estimate by phone, free courier service in Moscow. Money - immediately. Call! Tel.: +7 (903) 729-32-48 or write to us by email: [email protected]
Sell laptop
Where to get and install drivers
What to do if there is no installation disk or it is lost? This is where many users begin to panic and get upset. And everything is quite simple if you have access to the Internet. All the necessary programs can be found on the Internet. Moreover, with the right request, they can be downloaded absolutely free.
How to enable the camera on a Lenovo laptop using the downloaded program? Here you need to do the following:
- find the file in the download folder;
- if this is a “rar” archive, then open the “setup” file (it is he who is responsible for the installation and subsequent operation of the camera);
- Install strictly following the instructions.
It is worth noting that finding the necessary programs is a very useful skill for all users. After all, everything can fail. For example, the installation disk is broken, and the camera refuses to start working. You need to find the name of the camera and search online on official websites for the necessary drivers. Then download them to your laptop and install.
To work and communicate online using a webcam, you need to be able to install and configure it. These skills will also be useful in troubleshooting problems that may arise. This should not be difficult, since by default all the operation of the laptop is intuitive and does not require special skills.