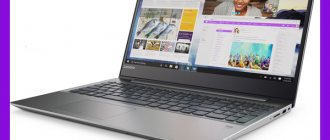
The touchpad, or touchpad, is the most important component of all Lenovo laptops. This is a compact version of a USB mouse. On the one hand, this is a very convenient thing, since it eliminates the need to use a wired mouse, but on the other hand, using the panel is not always comfortable, because it is located near the function buttons.
Today we’ll talk about how to enable the touchpad on a Lenovo laptop if it stops functioning.
Method 1: Hotkey
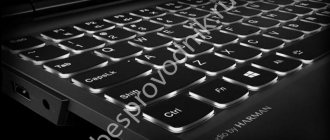
Under normal conditions, when there are no problems with the touch panel, it is most convenient to operate it using a hot key. Depending on the laptop model, it varies: for office models, for example, this is the F6 key:
In devices for gamers - F10:
Note that if nothing happened when you pressed the specified key and the touchpad still does not work, you should try using the combination with Fn: Fn + F6 or Fn + F10. This is due to the keyboard operating mode, where in multimedia mode it is enough to press only the F-key, and in functional mode F1-F12 perform those tasks that are assigned to them by default by the operating system.
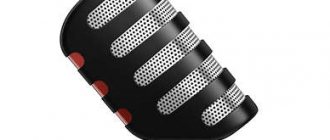
Neonode AirBar will turn a regular laptop or PC monitor display into a touch screen
We welcome our readers to the pages of the iCover blog! Monitors with a touch layer on PC or laptop screens are still exotic today. At the same time, many will probably agree that using the mouse on a widescreen panel within the tiled concept of Windows 8-10 often turns out to be at least inconvenient and unproductive. Here and in similar cases, the advantages of the sensor, which we habitually and happily use every day in smartphones and tablets, would be very useful.
Method 2: Operating system settings
Some Lenovo models may not have the required key, or it may be broken or manually reassigned to another action by the user. In such a situation, you should use Windows settings. The advantage of this option is the presence of an additional feature that customizes the behavior of the touch panel when a mouse is connected.
Settings app
In Windows 10, you can use both of these applications to control the mouse pointer and related devices. Owners of Windows 8 and below should immediately go to the “Control Panel” section of the article, since there is no “Settings” application in these OSs.
- Open “Start” and call up “Settings” using the button provided for this.
- Click on the "Devices" tile.
- Through the left column, go to “Touchpad”.
- The parameter you need will be first in the list. Just click on the toggle switch for it to get the “On” status. Just below you see an additional item - “Do not disable the touchpad when connecting a mouse.” Check or uncheck the box according to your preference. In rare cases when the touchpad does not start working after disconnecting the USB/Bluetooth mouse, activating it may help.
Control Panel app
An alternative to the previous method and the only possible option to manage the touchpad in Windows 8 and previous systems is the Control Panel.
- Open “Start”, find “Control Panel” there and go to it. Change the display to “icons” or use the internal search field to find “Mouse”.
- In Lenovo, the tab you're looking for is named one of the following: Device Settings, Elan, UltraNav, or ThinkPad. On this tab, click on the “Enable” or “Activate device” button, then click “OK”.
In the “UltraNav” option, you will instead need to check the box next to “Enable TouchPad”, then save the changes.
- Some laptops additionally have the “Disable internal decree” function. device when connected external decree USB devices”, which allows or does not allow the touchpad to work after connecting a regular mouse. It also solves the problem of the touchpad not working after disconnecting the mouse.
Upgrading a regular monitor, Making the Screen Touch
Using a regular monitor on their computer, many people have a desire to do some actions on the screen with their hand, without using a mouse, i.e., so that the monitor screen is touch-sensitive.
In the next computer homemade project we will make this wish come true.
To make a touch monitor we will need: - the monitor itself;
- screwdriver; — double-sided tape (about 0.2 mm thick); - electrical tape.
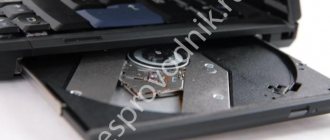
As always, in order to make something out of something, you need to take it apart.
In this case, after removing all the bolts, the Proview monitor case does not fall apart, but this phenomenon is inherent in many modern equipment, since they have come up with ingenious latches.
The provided latches must be carefully snapped off using a screwdriver, so as not to damage or break off part of the body.
Next we need to find a place to place the USB controller.
The USB controller plays a very important role, since the sensor simply will not work without it.
To do this, remove the monitor matrix from the remaining part of the case.
It turns out that there is plenty of space here.
We find a more convenient place to place it.
It's time to install the touch glass (touchscreen).
After cleaning, we try not to touch the screen again and glue the prepared double-sided tape (about 0.2 mm thick) as shown in the photo.
We evenly glue the existing touchscreen onto double-sided tape.
Of course, you can stick the tape around the perimeter of the frame in a continuous strip, but if you need to dismantle the sensor, it will be very difficult to tear it off.
Let's start connecting the touch glass to the USB controller.
First, remove the mounting rail located on the matrix and bend the touchscreen cable around it (the cable is highlighted in red in the previous photo).
Before final assembly. Let's turn it on and check if the monitor works as well as before disassembly.
In principle, the main part of the work is completed and therefore you can immediately test the touch controls.
Source
Method 3: Enable the option in BIOS
In certain Lenovo models, the touchpad may be disabled in the BIOS, and then this device will not work either in the installed operating system or outside of it. Be sure to check the presence of this option in your laptop if the previous two methods do not help restore the device’s functionality.
- Restart the laptop and enter the BIOS using the key displayed when the manufacturer's logo is displayed.
If you don't understand which key to press, read the article at the link below. Read more: Options for entering BIOS on a Lenovo laptop - Using the arrow keys on your keyboard, go to the “Config” tab and expand the “Keyboard/Mouse” section. Inside it there should be an option called "Touchpad" or "Trackpad". If you see that its status is “Disabled”, highlight this line, press Enter and change it to “Enabled”. All that remains is to press the F10 key to save the settings and exit.
Those who do not have the option considered in the BIOS or it is already in the “Enabled” state should use the following method.
Driver problem
Drivers may have failed due to a failure due to reinstallation of the operating system. Without them, the panel may not function partially (for example, only gestures are broken) or completely.
- Enable, disable and customize touchpad gestures in Windows 10
Often, a driver disc comes with your laptop. But if there is no such disk, then the drivers should be downloaded from the manufacturer’s resource. You can find them there in the section called “Service”. When loading, you should pay attention to the following data:
- Windows bit depth (x64, x32, x86);
- Version of the installed operating system;
- Device model.
Maximum compatibility can be achieved only if all three parameters completely coincide. However, there are some exceptions: if the OS bit depth must match 100%, then a different version of Windows is allowed. For example, drivers from Windows 8 will function perfectly on Windows 10, but provided there are no updates for version 10.
If you download drivers in the form of an executable file (*.exe), you can install it like a program using the installation wizard. If the latter does not start, you should add drivers manually. The action plan is:
- Go to the control panel, select “Large icons”, launch the device manager.
- Using the cursor on your Lenovo laptop, open the section called “Mouse” and select “Touchpad” there. Right-click on it and select “Properties”.
- Make sure the device is functioning properly.
- Go to "Drivers". First of all, try to roll back the software by clicking on the button of the same name. If this does not work, select Update.
- A window for selecting update modes will appear. If the necessary software has been downloaded, then select the manual installation option.
- Assign a path to the drivers, wait for the installation to complete.
After reinstalling the drivers, reboot the laptop. During startup, check the panel: if you still cannot disable/enable the touchpad on your Lenovo laptop, then most likely the reason is mechanical damage. The following may be broken:
- A microcircuit that ensures the functioning of peripheral devices. In this case, as a rule, LAN and USB do not work;
- Sensor;
- A cable that connects the touch panel to the motherboard.
You can disassemble the laptop yourself, following the instructions supplied with the device. However, it is better not to do this, since unprofessional intervention can lead to aggravation of the problem.
We have told you about the most effective methods for activating the touchpad. If none of them helped solve the problem, then you should turn to the experts for help. Perhaps the panel is simply faulty. The cause of the malfunction may be due to moisture getting inside, poor contacts, or mechanical failures. Service center employees will conduct a thorough diagnosis, identify the cause of the malfunction and promptly fix it, bringing your laptop’s touchpad back to life.
If your touchpad isn't working and traditionally restarting your computer doesn't help, there are a few simple steps you can take to resolve the issue.
- How to enable booting from a flash drive in BIOS
Method 4: Enable via Device Manager
It is not very often that the touchpad refuses to work due to conflicts in the operating system, and they can be resolved through one of the built-in Windows applications.
- Right-click on Start and launch Device Manager. In the “seven” this application can be found through a search in “Start”.
- Expand the line “Mice and other pointing devices” and find the touchpad there - its name should contain the corresponding word in English (“touchpad”). Right-click to open the context menu and go to “Properties” (you can quickly open this window by double-clicking LMB).
- Switch to the “Driver” tab, where click on the “Remove device” option to erase its driver.
After this, you will need to restart the laptop and, after turning it on, wait a while for the driver to be re-downloaded and installed automatically. Instead, you can use the "Update Driver" option - it helps you install the software yourself, which in some cases eliminates the problem associated with automatic installation. - When updating, a separate window will open in which click on the words “Select a driver from the list of available drivers on your computer.”
- A list of drivers will be displayed, from which select either a proprietary driver (its name will be identical to the name of the touchpad that you saw in the main Device Manager window) or “HID-compatible mouse” if there are no other options.
When choosing a branded driver - if there are several of them - look at the date/number and install the latest version (if this does not work, you can try installing a previous version after uninstalling the installed newer version, as shown in Step 3 of this method).
After the laptop has been rebooted, the touchpad should work immediately, and if this does not happen, additionally use Method 1 and Method 2 of the current article.
In rare cases, no recommendations help, and the device still does not work. We recommend that you refer to our other article, which will help you understand what to do in this situation.
Read more: Touchpad on Lenovo laptop stopped working
We are glad that we were able to help you solve the problem. In addition to this article, there are 12,405 more instructions on the site. Add the Lumpics.ru website to your bookmarks (CTRL+D) and we will definitely be useful to you. Thank the author and share the article on social networks.
Describe what didn't work for you. Our specialists will try to answer as quickly as possible.
How to enable the touchpad?
You can activate the touchpad on Lenovo using the following methods:
- The simplest method is to use the hot keys “F” + “Fn”;
- Via the “Control Panel”;
- Activation in BIOS. To do this, go to the settings menu, select the section called “Internal pointing device” and set it to “Enable”;
- You can - through the “Dispatcher”. If the required peripheral device is displayed there, you can reinstall the drivers or update them;
- In addition, it cannot be ruled out that the touchpad could simply break. In such a situation, you should simply take the device to the service center technician.
All these methods work perfectly on Windows 10 and Windows 8 operating systems.
Now let's take a closer look at how to enable touchpad on a Lenovo laptop using the above methods.
A little theory
The touch surfaces of screens are structurally a separate element that is not directly connected to the display matrix. Of course, the latest generations of smartphones and tablets use so-called OGS panels, in which the sensitive element is built between the pixels, but it is still controlled via a separate bus. In total, there are three types of touchscreens, each with its own characteristics.
Resistive
Resistive technology for constructing touch screens is the simplest and cheapest. Based on the principle of operation, such touchscreens are similar to computer keyboards. On two layers of a transparent substrate, tracks of almost transparent conductive material are applied. These two layers are located on top of each other with a gap of several micrometers. The upper one is necessarily flexible and bends when touched by a finger, closing the tracks. The further away the fault is, the longer the path the current travels and the higher the resistance. Based on its value (accurate to an ohm), the sensor controller calculates where the click occurred.
Resistive touch screens are cheap, simple, responsive to any object, but not reliable enough (a small cut can damage the touchscreen) and have limited transparency (at a certain angle, conductor tracks even become visible).
Capacitive
Capacitive touchscreen is the most common nowadays (as of 2021). It is more advanced and reliable. The number of layers was reduced to one, its thickness became smaller. A grid of transparent conductors with low resistance is applied to the surface of the touch glass or film. The human body is a poor conductor of electricity and is capable of accumulating electrical charge, therefore, when a finger touches the glass, a small current leak occurs, the location of which is determined by the controller.
Wave
In a wave touch screen, acoustic (ultrasound, surfactant technology) or light (infrared, ultraviolet, PSV technology) waves are used to register touches. A frame is installed around the perimeter of the screen, combining the emitter and recorder. When a finger touches a surface, it absorbs and partially reflects the wave, and sensors register the location.
.
SAV and PSV screens are reliable, absolutely transparent (no mesh of electrodes), have an inexhaustible theoretical resource (in reality depends on the quality of the components), if there is a protective frame, the sensor itself cannot be damaged, and the use of armored glass makes the screen matrix invulnerable. Therefore, they are often used in ATMs, payment terminals, industrial machines and medical equipment. But their accuracy in determining finger coordinates is mediocre. Also, wave touchscreens require regular wiping (dirt on the glass causes phantom reactions).
There are other types of display sensors, but they are much less common. In addition, these methods are difficult to implement at home, so they are not discussed.
A little about zForce® technology
The device implementing Neonode optical sensing technology in zForce™ consists of a set of detectors and light emitters, an optical light guide with lenses and a touch controller IC connected to the host. The technology does not impose any special requirements on the display design and its coating, providing 100% optical transparency of the window and consistently high image quality without any artificially created glare. The authors of the new product emphasize that the features of optical sensing technology provide a number of significant advantages in comparison with existing touch and non-contact techniques, such as cameras, infrared, resistive and capacitive screens. The simplicity of the principle used in Neonode in zForce™ significantly reduces the resource intensity and cost of the final solution, while expanding the scope of its application in mobile phones, wearable technology gadgets, PCs, laptops, printers and others.
It is important that the technology works on any type of display and with display surfaces of any shape, including concave surfaces. For user convenience and to avoid screen contamination, the non-contact “air touch” method is useful in many cases. In the future, it is possible to use another valuable advantage of the Neonode AirBar - the ability to work properly even when immersed in water, which is completely unacceptable for a capacitive sensor.
Dear readers, we are always happy to meet and wait for you on the pages of our blog. We are ready to continue sharing with you the latest news, review articles and other publications and will try to do everything possible to ensure that your time with us is useful for you. And, of course, do not forget to subscribe to our columns.
Source