Although the volume of flash drives and memory cards is growing, the reliability of cloud services is increasing, and the speed of information transfer over wireless channels is increasing, many laptop owners still actively use optical media: watching videos and listening to music, recording files.
Budget and ultra-thin laptops are produced without drives for CD, DVD and Blu-ray discs, but in models of the mid-price range such drives are often found, and in their absence there is always the opportunity to install a component later, if necessary. Working with this type of media begins by opening the tray. There are several ways to perform such a simple operation.
How to open a disk drive on a laptop
There are two main options for how to open the disk drive on a Lenovo IdeaPad 330 laptop or other models - using a mechanical button or using software. Let's consider each of the methods separately.
Button
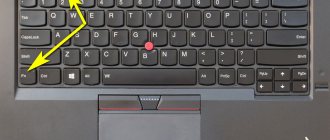
The easiest way to open a seed on a Lenovo laptop is to press a special button near the drive. It has an oval shape and may have an inscription in the form of a strip and a triangle drawn above it. The algorithm of actions is as follows:
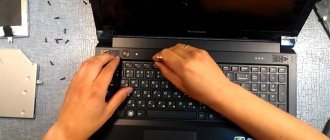
- With the Lenovo laptop turned on, briefly press the button on the end.
- Make sure you were able to open the CD ROM on your Lenovo laptop. The latter must travel a short distance.
- Pull the device to fully open the device.
After this, you can remove or put the disk in a special place. This must be done until you hear a click so that the CD/DVD is securely locked into the latch.
Software methods
If the previous option did not work, there is another method on how to insert a disk into a Lenovo laptop. To do this, do the following:
- Log in to My Computer.
- Find the icon with the name of your DVD drive.
- Click the right mouse button.
- Click on the “Extract” item.
In this way, you can remove the disk drive from a Lenovo laptop. At the same time, it pops up automatically.
There are situations when, after logging into “My Computer,” the required disk is not detected. In this case, do the following:
- Go to Start.
- Click Win+R.
- Type regedit.
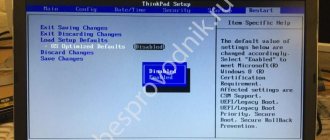
- Find the section HKEY_LOCAL_MACHINESYSTEMCurrentControlSetControlClass{4D36E965-E325-11CE-BFC1-08002BE10318}.
- On the right side of the editor, find UpperFilters and LowerFilters.
- If there are any, remove them.
There is also a second option:
- Enter the registry editor by following steps 1 to 3 of the instructions discussed above.
- Find HKEY_LOCAL_MACHINESYSTEMCurrentControlSetServicesatapi.
- Make Controller0 here if it wasn't there.
- Select DWORD and give it value 1.
After that, close the editor and restart the laptop. After that, try opening the disk on a Lenovo L340, G50 or other models.
If this fails, try a few more steps to resolve the issue:
- Turn off the laptop and remove the battery. Wait 15-20 seconds, and then return everything to its place and launch Windows. In this way, it is possible to turn on the disk drive on a Lenovo laptop if any problems occur with it.
- Check for drivers. To do this, right-click on “My Computer”, go to “Properties” and Device Manager. There, find your DVD drive in the list and pay attention to the icon next to it. If there is an exclamation mark, this indicates that there are problems with the drivers. In this case, right-click and select “Update”. Also check if the device is turned on. To further extend the drive on a Lenovo laptop, you need to use the equipment.
- Press Ctrl+Alt+Del and go to “Task Manager”. Here, find the processes that are occupying the drive and preventing it from opening. This could be some kind of office program or other software. Right-click on it and select “End task”. If some processes cannot be removed, use additional software, for example, you can install Unlocker. After installation, the program icon appears in the desired interface and helps with uninstallation.
The steps discussed above help you open the drive even if difficulties arise in the system.
Method 2: File Explorer in Windows 10
As you know, the disk drive is displayed in Windows 10 if it is connected to the motherboard. This allows the user to open the drive through Explorer. The first option is to use the left panel from any location. You should simply click on the disk line with the left mouse button.
After this, the screen will display information about inserting the disc into the device. At the same time, the drive itself will open. Now you just need to insert the media and close the tray. After successful loading, the contents of the CD or DVD will automatically appear in the Explorer window.
The second option for interacting with the drive through Explorer is implemented in the “This Computer” section. Here you should find the corresponding device and right-click on it to display the context menu.
In it you are interested in the “Extract” item. Click on it and wait until the tray is fully extended to insert the disc. After the media has been successfully installed, close the drive and wait for the disc to load. You will be notified that the blank is ready for reading.
Additionally, let's take a quick look at a common problem where an empty drive is not displayed in Explorer. Accordingly, the considered method cannot be implemented. The absence of a device is associated with folder settings that you can change yourself. You only need to perform a few simple steps.
Apply the changes and close the current window. You can return to File Explorer to see if the drive appears empty.
How to remove sidir in case of damage
There are situations when it is impossible to get the device due to internal damage. In this case, you need to know how to open the disk drive in a Lenovo laptop using emergency methods. Follow these steps:
- Find any thin object, for example, a paper clip.
- Insert it into the thin hole near the sidir and press lightly until it clicks.
- If everything is done correctly, the lid will open.
- Pull it further to open it completely.
There is another way to view the disk on a Lenovo laptop if the above steps did not work. Take a sharp knife and insert the blade into the gap around the lid and apply a little pressure. Be careful not to damage the internal mechanism. This method is a salvation if you cannot open the sidir due to misalignment or mechanical damage.
Acer
On the Acer Aspire 4625G laptop, the disk drive is located on the right, and the button that opens it is on the body of the laptop itself, at the top right.
You need to press this button.
Where to find the drive
To check whether a Lenovo 330 or another model has a disk drive, just look at the device's characteristics or pay attention to the end parts of the device. Most often, the optical drive is on the right. If there is a plug instead of a sidir, it means that the option is not provided in such a device.
Now you know how to open the disk drive on a Lenovo laptop, and what to do in case of software / mechanical failures in the device. Start by using the button, and if that doesn’t work, try removing the disc using the software method. If this does not work, use a thin wire or paper clip to open it mechanically.
In the comments, tell us which method helped you, and what other methods exist for opening a seedrom.
Lenovo
As an example, consider the Lenovo ThinkPad E540 laptop. Here the drive is located on the right and there is an “Eject” button on it.
Clicking this button will open the disk drive.
Solving possible problems
Above we talked about only one case, which is associated with problems interacting with the drive in Windows 10. There are other reasons why the hardware is not displayed or the drive itself does not open the tray for installing media. If you have any difficulties with this, we advise you to study the topical guides on our website using the following links.
That was all we wanted to tell you about opening a disk drive in Windows 10. All you have to do is put one of two methods into practice to insert the required disk into the device.
Source
device Manager
You can use Device Manager to check if the drive is functioning. To do this, go to “My Computer” or use the control panel.
In the seventh and tenth versions of Windows, click on the “Start” button, finding the control panel there. Select small or large icons, find the manager and check if you have a disk drive.
For Windows 7:
For Windows 10:
With these simple methods you can easily open your drive and remove the disc. If you have any questions for me, ask them in the comments and I will be happy to help. I wish all readers good health and goodness!
It's already the twenty-first century, but even this was not a reason to completely abandon disks. Of course, most portable devices, including tablets and netbooks, are simply not designed for bulky components, and therefore are manufactured without a disk drive. But if you become the proud owner of a laptop with a CD-rom drive, you will probably want to figure out how to open it and use it at least once.
Method 1: Button on the DVD drive
If the system unit is within easy reach, you can open the drive using a specially designated button, which is located next to the drive compartment. You only need to click on it once and wait for it to trigger, which happens almost instantly.
However, it is not always convenient to use the mentioned button, and in some situations it is completely broken and does not respond to pressing. Then all that remains is to use the standard operating system tool by turning to the following method.