How to do a Hard Reset on a Lenovo A319 phone
Mobile phone users sometimes need to restore their gadget to factory settings.
This is relevant if any violations of the software platform are observed. They may occur due to a long absence of updates, or their incorrect installation. Also, in some cases, the phone begins to reboot itself due to excessive loading by various applications. Restoring to factory settings will help solve this problem as efficiently as possible. Also, a Hard Reset will be appropriate if you have forgotten the graphic password set on your smartphone and cannot enter the menu.
It’s worth noting right away that if you decide to reset the settings, you will not only be able to restore the system, but also delete all data from your mobile device. This applies, in particular, to all audio and video files, and even the contact list. Therefore, you should return to factory settings only if information important to you is saved on an alternative medium.
In this article, we will tell you how to do a hard reset on Lenovo a319, one of the most popular mobile gadgets in the budget price segment. There are only two ways to reset settings on Lenovo. The first involves the use of external buttons, and the second - the device menu.
How to reset Lenovo A319 through the menu
There is another method to make the A319 Hard Reset. To implement it, you will need full access to the menu. That is, if you need a rollback to factory settings because you forgot the password for your smartphone, this method will not suit you.
If you want to format settings in order to eliminate or prevent software problems, then using it is quite possible and not at all difficult.
If you have full access to your phone and you remember the password set on it, then you can use both methods of resetting data on Lenovo. Their effectiveness is equally good in both cases. The main thing is to follow the instructions given, and then the Hard Reset on your phone is guaranteed to be successful.
Source
Instructions for recovery via the engineering menu
In order to find out what has happened on a Samsung or some other smartphone, you need to:
- enter the combination *#06#. If there are problems, then under IMEI 1 and IMEI 2 there will be just an empty space;
- enable Wi-Fi, if NVRAM is damaged, the connection “Nvram warning err = 0x10” will appear in the list.
In such cases, you can proceed to recovery through the engineering menu. The main advantage of the method is that root rights and various additional programs are not needed; everything can be done right in the device. To change the identifier, you need to look at the combination on the device box or under its cover. Followed by:
- enter *#*#3646633#*#* on your phone (each equipment usually has its own command, for example, on Lenovo you enter ####537999#.);
- in the menu that opens, click on Connectivity;
- go to CDC Information - Radio Information (in English);
- in the submenu there are 2 categories: Phone 1 and Phone 2, that is, the 1st and 2nd slot for SIM cards, we need the first one;
- where “AT+” is written, write the English “E”, click AT+EGMR=1.7, “IMEI” (enter your own) and click on command activation.
After completing all these actions, the message OK should be displayed, this means that everything was successful; if the phrase At command is failed to send appears, something was messed up. It is worth remembering that after the AT+ characters you must leave a space. Next, you follow the same instructions and enter the second number, but here you need to select AT+EGMR=1.10,"IMEI". Reboot the device and check the ID with the combination *#06#.
To restore a Qualcomm device, you will need to connect to a PC and download special drivers.
There is another way to register an identifier through the engineering menu; it is suitable for those who are unable to complete the process using the first method described above:
- dial *#*#3646633#*#* to enter the desired menu (on Explay fresh *#*#84666364#*#*);
- find the line “Telephony” and select “GPRS”;
- first enter code 1, then 2 and press “WRITE IMEI”;
- turn off and turn on the equipment again.
If something doesn’t work out, you should use specialized software. You can download Maui meta, a utility designed to backup devices on MTK.
Lenovo A319 Hard Reset how to do
Lenovo A319 is a popular smartphone that has been discontinued for a long time, but is still widely used among people. If you are one of the owners of this smartphone, then you definitely need to know how to do a Lenovo A319 hard reset.
Hard reset is literally translated into Russian as “hard reset”, but a more literary name is reset.
The instructions for Lenovo A319 hard reset help in almost all cases of smartphone malfunction. This could be a locked smartphone through a forgotten pattern key. You can also use reset Lenovo A319 if the smartphone freezes or does not turn on at all.
In short, Lenovo A319 hard reset can be used in any unclear situation, but you must be prepared for the fact that all data on the smartphone will be deleted . You need to back up your data so you don't lose your photos, contacts, messages, apps, and the rest.
Also make sure your smartphone battery is at least 70% charged. The Lenovo A319 hard reset process itself only takes a couple of minutes, but you cannot allow the smartphone to turn off while cleaning the internal memory.
Lenovo A319 firmware Android 5.1 and 6.0
It's no secret that the latest firmware is constantly being created for popular phones by the users themselves. All that is required from the manufacturer is to publish the source code of the official firmware, and then it’s up to the craftsmen.
Since Lenovo A319 is very popular, the number of custom firmware is very large. Unfortunately, there are no measured firmware based on Android 6.0 yet and it won’t be faster, you can only install and look at it, otherwise it is not viable (the camera, Bluetooth and other bugs do not work).
But there is CyanogenMod 12.1 (Android 5.1) firmware for Lenovo A319, and it is fully functional. There are also a huge number of its modifications, which allows you to try out different improvements to the system from users.
There is also firmware for Lenovo A319 based on the stock one, with an interface from third-party manufacturers. For example, if you like the Samsung interface, install the Galaxy J1 firmware/port; you like the Asus interface, ZenUI. For Lenovo A319 you can download such firmware here.
Lenovo A319 hard reset
1. A hard reset begins by turning off the smartphone. You can also pull out the battery to turn off the power completely. Don't forget to put the battery back in.
2. Next, hold down the “ Volume Up ” and “ Power ” buttons. Hold both buttons simultaneously until a menu of three options loads.
3. The image below is hard to see, but you need to select the first option “ Recovery ”.
4. The new menu is called Android Recovery , or recovery mode.
5. Here you need to select “ Wipe data/ factory reset ”.
6. Now confirm that you agree to delete all personal data – “ Yes – delete all user data ”.
7. 2-3 seconds, and Lenovo A319 hard reset is done!
8. All you have to do is select “ Reboot system now ” to leave recovery mode.
We hope we helped you hard reset your Lenovo A319. If not, write in the comments below.
Dear reader! If suddenly the method described in the article did not help you, please help others - write how you dealt with the problem or ask a question. By the way, the answer to your question may already be in the comments.
Please do not remain indifferent - share useful information with people. If you know the answer to an existing question, please write, the information will be very useful to someone. Thank you in advance!
Look at these materials:
Did you like the article? Share with your friends on social networks!
Source
Lenovo phone freezes when turned on and does not turn on
This can happen if you install software from unverified sources. A return (reset) will return the phone to its “original” state (as after purchase).
Also, the problem can be solved (not always, of course, depends on the specific one) by changing the firmware. This can be done independently or at a service center.
Just keep in mind that erroneous actions or inappropriate firmware can completely ruin your Lenovo.
CONCLUSION: Of course, it is impossible to take into account all the points. I described only the basic ones. If they didn’t help you, use a friend in the form of a comment function. Good luck.
Most owners of modern gadgets have more than once encountered situations where the device malfunctioned or did not respond to commands. Unfortunately, almost all smartphones fail from time to time, regardless of manufacturer and price.
Today we will look at the problem when a Lenovo phone does not turn on, and we will look at the reasons for this.
Lenovo cell phones often suffer from problems with software and hardware components, especially if we are talking about budget models. One of the most common is spontaneous shutdown and lack of subsequent response to various user actions. Although the situation seems scary at first glance, only in extreme cases will you need service repairs or replacement of your smartphone. There are three types of sources of these breakdowns:
- Hardware - a problem in the hardware after falls, temperature fluctuations, tests by the sun, moisture and sand.
- Software – directly concerns the operating system, viruses and crashes.
- External – most often, a breakdown of the charger is mistaken for a problem in the smartphone itself.
Let's take a closer look at the reasons why your Lenovo phone won't turn on and how to solve them.
What is TWRP Recovery. Instructions for use.
What is TWRP Recovery. Instructions for use.
TWRP Recovery is a much more powerful system recovery utility (menu) compared to the factory one, which allows you to make full backups of the entire system of the device, install software, firmware, kernels and much more on it, which is usually not possible with factory recovery . TWRP is installed in a special system partition of the internal memory of a tablet or phone, in place of the factory recovery.
TWRP Recovery can help you out in some seemingly hopeless situations. Even if your tablet or phone stops booting, in many cases, using TWRP you can restore the system from a backup, with all its settings and applications.
Here is a rough list of what you can do with TWRP Recovery:
• Install custom firmware and unofficial kernels
• Install factory system updates, add-ons and patches
• Connect to a computer via USB, in removable storage mode
• Create a complete backup copy of the current firmware and its individual parts (system, settings, applications)
• Restore the device from a previously created backup
• Reset to factory settings (Wipe – data/factory reset), clear cache (wipe cache), clear Dalvik-cache (wipe Dalvik-cache), clear battery statistics (wipe battery stats)
• Create partitions on a memory card and format them
• Execute terminal commands
• Work with files on your device
For many smartphones and tablets, installing TWRP Recovery is a fairly simple procedure.
Purpose of main menu items:
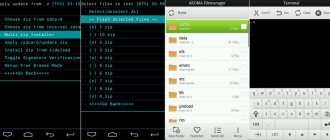
1. Install – installation of firmware and add-ons
This is one of the most frequently used items in TWRP Recovery.
With its help, you can install both official and unofficial (custom) firmware, install kernels, themes and other software, which should be located in a zip file located on the built-in memory of your device.
After selecting a file, you are taken to the next menu, where you can choose to add the next file to the firmware queue (Add More Zips button) or start flashing the selected file using the slider located at the bottom of the screen.
Using the Zip Signature verifications option, you enable the zip file signature verification mode.
Using the Force MD5 check on all Zips option, you can enable checking MD5 checksums for all zip files installed on the device.
2. Wipe – cleaning and resetting to factory settings
Using this option, you can clear sections such as Cache, Data, Cache, System, and also do a Factory Reset, after which your phone or tablet will return to the state in which it was sold in the store.
Reset to factory settings (hard reset) for Lenovo A319 phone
There are many reasons why you may need to perform a hard reset on your Lenovo A319 smartphone. Typically, this procedure is performed to restore the functionality of a system that has been damaged by viruses, deletion of system files, clumsy firmware updates, and many other things. It is very easy to perform a Hard Reset on any smartphone, but you should be aware of the consequences of this action and be able to make a backup copy of the system and files. We will talk about all this in detail below.
How to determine that the problem is in NVRAM
Loss of NVRAM is often the result of incorrect rollback of settings through third-party programs, partial or complete firmware, also done incorrectly.
Signs that indicate file loss:
- If you turn on Wi-Fi on your smartphone, a network appears with the name “ NVRAM warning err=0×10 ”;
- After entering the USSD command *#06#, no IMEI codes are received in the response message, because... they are stored in NVRAM.
- In some cases, the phone cannot detect the SIM card network.
How to do a hard reset on a Lenovo A319 phone from the settings menu?
Attention! Due to FRP (Factory Reset Protection, that is, reset protection), Android will ask you to enter the login and password of the account that was assigned before the Hard Reset procedure. Therefore, if you plan to sell your smartphone, you need to log out of your Google account (Settings - Accounts - Google - Delete account) before resetting, so that the person who receives your phone can activate their profile on it.
Given the wide range of Android phones and the difficulty of describing the reset process for a specific model, we will show the guide using the example of three fundamentally different devices and firmware:
Reset to factory settings (hard reset) for Lenovo A319 phone
Lenovo smartphones running Android have the ability to reset to factory settings, in other words, the ability to do a Hard Reset. This reset will be useful if your phone becomes slow, freezes, or is infected with a virus. Also, if you're going to sell it, it's a good idea to delete all your data from it.
In this guide, we will tell you how to reset your Lenovo phone to factory settings in two ways that are suitable for all models, including a319, a320,a536 and a1000:
But first, I would like to draw your attention to the fact that after performing the reset, all data, applications, games, photos, music and contacts will be deleted from the phone’s memory. Your Lenovo will be completely clean, as if you just bought it.
Hard Reset from the phone menu
In order to reset settings from the menu, you need to go to Settings
-> Recovery and reset
and select " Reset settings"
After this, you will see a warning that all data will be deleted from the smartphone’s memory. To confirm the operation, click on the “ Reset phone settings”
". After this, the device will reboot and begin restoring to factory settings. The process takes from 5 to 10 minutes.
Getting rid of error number 901
It is most often encountered when working in a browser or while downloading applications from the official store - Google Play. The problem is that the Wi-Fi network authentication ends abruptly. There are several ways to solve this:
Reconnect to this or another Wi-Fi network.
If you have chosen the latter option, we remind you about the rational use of Internet traffic - without an accompanying tariff plan, it is better not to experiment, it may cost you too much. If you receive the message “An error has occurred in the Google Play Services application” with a number not described in our article, then it can be solved in the same way - by clearing the cache, deleting updates, or reconnecting to the Wi-Fi network, as described above.
Market) often work quite unstable, which causes many failures. As a result, the system notifies the user that an error has occurred in the Google Play Services application. Now we will look at why such problems arise and how to deal with them, especially since they all have practically the same nature (errors of paid services associated with purchasing or downloading applications are not considered).
Hard Reset using buttons
If you cannot reset from the menu, for example due to a virus, then you can do it using the physical buttons on the phone body.
The procedure is as follows:
We hope you now know how to reset your Lenovo phone to factory settings. If you have any questions, ask them in the comments, we will try to help.
If you perform a factory reset, important information may be lost
Resetting the tablet to factory settings is also appropriate if the tablet works without a single glitch, but the owner decided to sell it. Of course, no one wants personal information to become the property of strangers.
Current reasons
Resetting settings on an Android tablet erases absolutely all information that is on the device. The owner, after the manipulations have been carried out, will receive a tablet that will be in the same pristine condition as it was on the first day of its purchase.
Such a reset to factory settings is useful when Android refuses to work due to carelessly carried out settings or a poor-quality update. Resetting allows you to breathe new life into your favorite tablet.
When Android refuses to display SIM cards, you also have to think about actions to reset the settings.
Resetting the settings and returning them to factory settings is also relevant when the tablet does not recognize the flash drive or incorrectly displays information about the battery charge.
If the main goal is to sell the tablet, then you can safely begin carrying out such manipulations. If you plan to continue using the gadget, then it is important for the owner to save the information stored on this tablet.
In this regard, before resetting the settings on your Android tablet, it is important to carry out a backup, which allows you to subsequently restore all information and ensure further comfortable use of the gadget.
Recovery options
Android provides several options for resetting settings, including hard and soft reset. The owner himself must figure out how to reset the settings on the tablet, which method will be preferable for him.
Soft Reset
A soft reset is a simple reboot of the device, which can be done in several ways.
A soft reset can be achieved by holding down several keys at the same time. The combination of such keys may differ depending on the Android model.
Soft Reset can also be launched through the user menu. Some manufacturers have equipped gadgets with special buttons located on the Android body, by clicking on which you can successfully launch Soft Reset.
Finally, Android will once again display a clarifying menu, after clicking the “Erase everything” button, a process will start that restores the factory assembly. This process will take a short period of time, on average from two to five minutes, after which Android will reboot and be ready for use. Perhaps, at the time of the first launch after Hard Reset, the English language will be automatically set, then the user should enter the menu and independently set the required default language.
The second Hard Reset method is suitable for those users whose Android refuses to boot. A Hard Reset, carried out from the “Recovery menu,” can help restore the normal operation of the gadget. To get into it, you need to turn off the gadget, then you need to press a certain key combination (for each specific model, the combination may differ, so you should find it on the Internet by specifying the gadget model in a search engine).
For most models, press the device's power button and volume button simultaneously. The press should not be short-term, but with a slight hold. Next, press the volume down button and hold it until the Recovery menu appears, allowing you to restore the factory state.
In recovery mode, you should restart Android, press the power button and volume button again, and then go to the “Wipe data/factory reset” submenu.
It should be noted that in the Recovery menu mode, touch control of the gadget is not available, so you can only move from one submenu to the next using the volume button.
Having information about how to restore the correct operation of a gadget, you should not resort to Hard Reset too often. It is carried out only in the most exceptional cases. It’s even better to install applications and updates that are trusted by most users and recommended by experts. In this case, the device will delight you with flawless operation, and there will be no need to return to the factory state.
This article will help everyone who wants to make a wipe for the Lenovo A706 model. Wipe, identical to hard reset - return to original factory settings by resetting. This operation is used in several situations: the user forgot the pattern\password\pattern from Lenovo A706; I entered the pattern key incorrectly several times; there is a need to unlock the phone from a graphical lock; Lenovo A706 shows a message with the following text: “many attempts to enter the pattern key”; the user cannot remember the password for his Google account or email, which does not allow him to fully use the device; After installing games or applications on the Lenovo A706, the device began to slow down terribly or not turn on at all.
Trouble-shooting
In this section, we will look at the most common faults that cause Lenovo to not turn on:
- Complete battery discharge and other related battery problems.
- Firmware update failures.
- Software problems.
- Virus attack.
- Mechanical damage to internal parts.
Battery completely discharged
Battery problems can be temporary or permanent, and they have different solutions:
Incorrect system update
From time to time, the Android OS firmware and its shell are updated, but glitches may occur during the process. Often, after installing a new version of the system, equipment turns into a non-working “brick”. However, do not rush to replace it with another model; this can be solved by rolling back to factory settings.
It is done using Recovery Mode. Three buttons are pressed simultaneously in the following sequence:
- Volume rocker.
- Without releasing the previous one, return to the Desktop key.
- In parallel with them there is a power on and off button.
A menu will appear on the screen. The pointer moves with the volume rocker up and down respectively. You must select Factory Reset, confirm your choice and wait for the process to complete.
If after this the smart device does not work, then you need to contact a specialist, and he will do the flashing of the system himself.
Software glitches
Even more often, Android-based cell phones do not start due to various kinds of software glitches. The manufacturer and system developers have provided for such scenarios, so they advise resetting the settings in such cases. We have already discussed how to do it above.
Please note that pressing the keys in succession will not work to start recovery mode on some models. It is started by a special button on the end of the case, which looks like a small hole, using a needle or a special pin that comes with the kit.
Viruses
Viruses are another popular reason for difficulties with Android technology. They arrive by downloading files and applications from unknown sources, and can seriously damage system data necessary for startup. Most likely, a flashing will be required, which will completely delete the information. But in some cases, service center specialists still undertake manual cleaning of the system storage from viruses and malware.
You can avoid this outcome by first downloading anti-virus software, for example, Dr.Web or ESET.
Mechanical damage and moisture ingress
Let's look at the most popular types of mechanical damage that prevent switching on:
- Screen failure (malfunction of the cable, display, or moisture ingress through the seams).
- The charging socket is dirty. Dust, fabric threads from clothes or crumbs get into it. you need to be careful, using a regular needle.
- Damage to gadget contacts with batteries. This can be either oxidation or mechanical stress that led to deformation.
- Damaged power button. If the device is new, then most likely it is a factory defect.
- The worst option is a burnt-out power controller that controls charging.
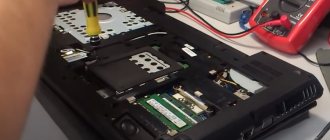
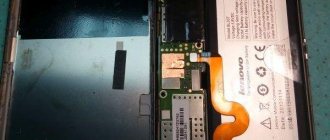
How to flash Lenovo A319: step-by-step instructions
The first thing to do is remove the battery from the device and do not install it until the flashing is completed. This is a mandatory condition that must be strictly observed.
The second step is to open the installed Flash Tool program.
Third, you need to go to the Scatter File section and find the downloaded firmware file in the system. It is likely that it will be signed as “*smartphone processor model (for example, MT6572)*android_scatter”.
The fourth step is to wait until the firmware is loaded into the program.
Fifth, you need to find the DA DL All with check sum block. This is necessary in order to give a command to the program that the firmware will be installed on the phone without a battery. Once again, you should pay attention to the very first step of the instructions.
Sixth, go to the “Format” item, where you need to check the Auto Format Flash and Format whole flash boxes. You need to click “Okay” and connect your smartphone via a USB cable to your computer.
The processor will perform the seventh action itself. It will format the smartphone. After completing the initialization and disk partitioning process, you need to disconnect the smartphone from the cord and click on the Download button.
Eighth, you need to connect the USB cable to your phone and computer. If the Lenovo driver has not been installed, the system will either display an error (and then you will have to install it manually), or will try to find and install it itself.
Ninth – the process of downloading new firmware to the smartphone has begun. As soon as it is installed, the program will show a small window with a green circle - the flashing is completed. Now you have learned how to flash Lenovo A319.
View gallery
FlashTool program
The official FlashTool program is designed specifically for flashing phones on the Chinese MTK platform. This is exactly what Lenovo uses in production. So with its help you can reflash any Lenovo phone. Below is a step-by-step {instruction} for working with the program:
- Download and install drivers for a specific phone model. To install, first connect the phone to the computer, go to “Device Manager”, there we see a new connection and update the drivers. We advise you to install them only from the official Lenovo website. Usually, they do not “fly off” during use.
- Download the FlashTool program, unzip the file with it and install it in a convenient folder on your computer.
- Download the appropriate firmware version. Use only proven sources so as not to harm your phone.
- Launch FlashTool and specify the path to the downloaded firmware. All files that you add will appear on the display here.
- Disable PRELOADER to avoid problems. Apart from this, there is no need to uncheck any boxes.
- We connect the phone to the computer and click on “Download” in the window that appears.
- The device is recognized by the system and the automatic firmware of the phone starts here.
Having disconnected the device from the computer, turn on the phone flashed with a USB flash drive. This is necessary to check its functionality. Carry out the initial options, and if everything is in order, this means that you have mastered the flashing process perfectly.
How to reset Lenovo A706
Method two: As a rule, the standard method of resetting settings to factory settings is to reset via the menu: Settings > Privacy (or Recovery and Reset) > Reset
When the problem lies in the software (the device slows down or does not turn on at all), most often you don’t have to resort to resetting the settings (otherwise, skip this paragraph and go straight to Hard Reset Lenovo A706). You can boot your Lenovo A706 into Safe Mode by uninstalling any recently installed programs. This is followed by a simple reboot of the phone and checking its normal functioning.
Lenovo A319 hard reset
1. Hard reset starts with shutdown
smartphone. You can also pull out the battery to turn off the power completely. Don't forget to put the battery back in.
3. The image below is hard to see, but you need to select the first option " Recovery"
4. The new menu is called Android
Recovery
, or recovery mode.
5. Here you need to select “ Wipe
data/ factory reset
”.
6. Now confirm that you agree to delete all personal data – “ Yes –
delete all user data
”.
7. 2-3 seconds, and Lenovo A319 hard reset is done!
8. All you have to do is select “ Reboot
system now
” to leave recovery mode.
We hope we helped you hard reset your Lenovo A319. If not, write in the comments below.
Lenovo smartphones, like devices from other companies, tend to freeze. Users often encounter slow operation of models, which cannot be changed by simply rebooting the phone. If your tablet or other Lenovo smart devices are slow, won’t load, or show the Android icon with an exclamation mark, then you need to contact a service center or restore the device yourself.
It is for such cases that the “Return to factory settings” function is provided. Lenovo smart devices running on the Android operating system can be reset to their original state using several methods. This is especially useful if there is a password, pattern or other lock on the smartphone screen, and information about it is lost. A factory reset is otherwise called a hard reset.
A lot of information has been written on how to reset a Lenovo phone. However, it may not always be correct due to operating system updates and user changes to settings.
Before you decide to completely update Android, you need to know that after the operation is completed, all user data from the device’s memory, even contacts, will be lost. That is why you should save all important numbers in a notebook or copy them to an SD card.
You can return the device to factory settings through the “Settings” or “Settings” menu, using the corresponding button on the smartphone panel, as well as the standard boot function – Recovery. These methods are suitable for all models, including a319 and a1000.
Before starting recovery, it is advisable to make backup copies to the cloud, not only of contact information, but also of other important information.
Option #3. Flashing
The third method is the most radical, but it is definitely worth using if the phone suddenly turns off, does not turn on, or freezes. We act according to simple logic - if the system cannot be restored, then it should be replaced. In the case of computers and laptops, we usually reinstall the operating system, and for phones, changing the firmware works.
First, download the firmware to your computer, and then transfer it to the memory card installed in the phone. The firmware is downloaded as an archive, and there is no need to extract files from it. We throw it on the map exactly in this form.
Now we go to Recovery in exactly the same way as in the previous case, that is, by holding down the power and volume buttons. If there are installation files on the memory card, the system will recognize them and offer you the following option: install zip from sdcard. This is exactly what we need if the phone turns off and we need to change the firmware. We confirm the actions by starting to download the file.
Typically flashing takes a few minutes. Don't be alarmed if your phone turns off during this process - this is quite normal. It can reboot, and repeatedly. And this is not a cause for concern.
After several reboots, the system will turn on, and, most likely, you will no longer see freezes and slowdowns. This means that the problem is a thing of the past, and now you know how to turn on a phone that has started to slow down or does not turn on.
Lenovo a319, s60, s960, s860 and others sometimes freeze on the splash screen, when turned on on the logo and while launching applications.
There are several reasons, but most often the fault lies in the software (firmware), memory and applications installed on the phone.
If there is not enough computing power, then a “trap is provided” - lenovo hangs or reboots
The manufacturer says that stable operation requires 700 MB of free space in the main (system) memory.
It is also necessary to monitor the number of installed applications, update them on a regular basis and, if possible, transfer them to an SD card.
NOTE: if such a fate befell you, then what to do and how to reboot your Lenovo phone if it is frozen and does not respond to anything
Safe Mode Lenovo A706
To switch to safe mode, turn on the phone using the “ Power”
"and press and hold the "
Volume
" button immediately after the logo appears.
The phone will turn on and you will see the words “ Safe Mode
” at the bottom. To easily exit safe mode, we reboot your Lenovo.
Sooner or later, many Android tablet users encounter a situation where the tablet needs to be cleaned and restored to factory condition. There can be many reasons for this, but basically it is either unstable operation of the device or “cleaning” of data before sale. There are also situations when the tablet stops turning on altogether or freezes when loading; in such cases, a full reset is not necessary.
First of all, it is worth separating two concepts: Hard Reset and Soft Reset.
Option #3. Flashing
The third method is the most radical, but it is definitely worth using if the phone suddenly turns off, does not turn on, or freezes. We act according to simple logic - if the system cannot be restored, then it should be replaced. In the case of computers and laptops, we usually reinstall the operating system, and for phones, changing the firmware works.
First, download the firmware to your computer, and then transfer it to the memory card installed in the phone. The firmware is downloaded as an archive, and there is no need to extract files from it. We throw it on the map exactly in this form.
Now we go to Recovery in exactly the same way as in the previous case, that is, by holding down the power and volume buttons. If there are installation files on the memory card, the system will recognize them and offer you the following option: install zip from sdcard. This is exactly what we need if the phone turns off and we need to change the firmware. We confirm the actions by starting to download the file.
Typically flashing takes a few minutes. Don't be alarmed if your phone turns off during this process - this is quite normal. It can reboot, and repeatedly. And this is not a cause for concern.
After several reboots, the system will turn on, and, most likely, you will no longer see freezes and slowdowns. This means that the problem is a thing of the past, and now you know how to turn on a phone that has started to slow down or does not turn on.
The Lenovo A319 phone is one of the best options for lovers of budget gadgets. The manufacturer has a good reputation, and the smartphone itself is quite inexpensive. However, no matter how reliable the device is, one day you may encounter technical problems.