In the modern world, a smartphone is an indispensable thing, so when your favorite gadget takes a long time to charge or does not turn on at all, this becomes a whole problem, especially if it is a new phone.
First of all, we think about how to charge our gadget, especially when we are in a hurry and are looking for the causes of problems in the phone, but before that we should carefully inspect the accompanying equipment:
- Socket - if the wiring is old or there are some other problems with electricity, then this may well explain why the gadget is sometimes charging or not;
- Charger - check its integrity, it may be damaged;
- Incompatibility of the charger with the gadget - if the inputs are similar, this does not mean that the charging device is suitable for both models of smartphones.
If you are convinced that you do not have any of the above problems, you can move on to studying the phone itself. We will look at the most common reasons why the phone does not accept charge.
- The gadget is charged only from the computer
- What to do if the phone does not charge, but the charger is connected
- Poor contact contact
- The phone does not charge from the charger
- The smartphone is charging in the opposite direction
- The phone takes a very long time to charge
Causes
In addition to faulty charging, the following may be the reason why the gadget does not charge:
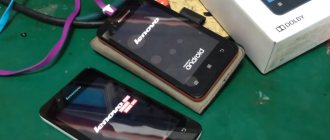
- The smartphone is completely frozen - only a hard reboot will help.
- The battery has become unusable.
- The connector or the contacts in it are damaged.
- The micro USB cable plug is deformed.
- Software glitches.
Before you do anything, to solve the problem, you need to diagnose it by checking each item from the above list.
How else can you fix the problem?
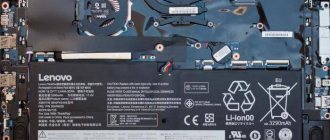
If the charging block, USB cable, connector of the Lenovo Vibe S1 smartphone and its battery do not raise suspicions, you need to move on to software troubleshooting. Charging problems arise due to a malfunction in the Android operating system. The only way out of this situation is by resetting to factory settings:
- Open your phone settings.
- Go to the "Backup and Reset" section.
- Click the "Reset Settings" button.
Performing this operation deletes all files from the device memory. To avoid losing important information, it is recommended to first make a backup copy through the settings.
Battery fault
Lenovo smartphone batteries have a limited charge-discharge cycle (about 300-400). For this reason, after a couple of years the capacity drops significantly, down to zero, and the battery is not able to start the system.
The easiest option, if there is no visible damage to the case, is to replace the battery with a new one. It is advisable to take the original one, since non-original ones do not “work” at full capacity.
Often the battery “swells”; in this case, you must immediately buy a new battery, otherwise everything could end in a fire. Li-Ion elements are deformed and fail with minor mechanical damage.
Special programs
In order not to suffer manually, we use special programs for calibration. For example, Battery Calibration, which is very easy to use:
- Download the application on Android and launch it.
- We connect the gadget to charging, bring the charge level to 100% and leave everything in this position for another 1 hour.
- We go to the program menu, select “Calibrate” and wait for the process to complete.
- Disconnect the charger and reboot the smartphone.
Battery calibration
Battery calibration is a procedure that allows you to manage the “memory effect” on Lenovo smartphones and other Android devices. As you know, with a constant incomplete charge, its capacity drops over time, and in order to restore everything, you should use this method of bringing the part to its optimal condition.
If your gadget charges very slowly, you should try calibrating the battery. This is done like this:
- We discharge the device until it turns off on its own.
- We take out the battery for 2-3 minutes, then insert it again. If it is built-in, this action is skipped.
- We charge the device completely. Experts recommend charging for 8 hours.
- We take out the battery again and leave it for 1-3 minutes, after which we put it back and turn on the phone.
If your mobile phone does not charge, you must use other methods or take it to a service center to find out the problem.
Video
Leading author of many columns on the website expertland.ru. Well versed in technology and electronics. Capable of solving any technical problem in a matter of hours, he loves to write about his experience and best practices.
- published articles - 94
- readers - 23 919
- on the website from September 25, 2021
Often phone users encounter a problem when the device is charging, but refuses to turn on. Nothing happens after connecting the power adapter. This problem is usually caused by several reasons.
Faulty charging connector
If the charger is connected to another gadget (you can connect it not only to Lenovo) and charges it, most likely the problem is in the micro USB socket. It needs to be replaced by a specialist, but first make sure that the charging cable and power connector are compatible. The fact is that seemingly identical chargers are sold for all smartphones, but in fact some plugs may not fit.
The problem may lie in the charger cable: even visually, the entire cord can be damaged from the inside, and then energy will not be supplied through it.
Diagnostics and cleaning
When the battery does not charge, this often happens due to temporary wear of the part itself or faulty contacts. The latter are easy to check:
- We take a flashlight and direct the light into the connector of the device for charging.
- If oxidation is visible on the contacts, remove them using a piece of cotton wool soaked in alcohol. This must be done carefully and only after turning off the device.
- If the contacts are damaged, it is better to trust a specialist, because to restore them you need to use a soldering iron.
The phone does not respond to charging due to broken firmware
In rare cases, the cause of “zero response from the phone” turns out to be a crashed firmware. However, in this case, the smartphone will show at least some signs of life - the light indication will work, you will be able to enter Recovery mode, and when the charge is connected, the black screen may blink a little.
The main diagnostic in this case is to try entering standard Recovery mode. If you get there, it’s a broken/flat firmware and you’ll have to install it on your phone again.
Charger fault
To diagnose the functionality of the charger, just connect it to another device. If the charge indicator lights up, it means that the cause should not be looked for in this element.
If the other device does not respond to connection to the power supply, you need to replace one of two parts - the cable or the power supply. It happens that over time the plug changes shape, and in this case the problem will be obvious: being in the phone socket, it will wobble or will not be inserted at all. To replace it, it is best to contact a specialist, since doing it yourself is problematic.
If the unit is faulty, the indicator will not light up when connected to the network, and then you need to purchase a new one and leave the old cord. If the cable and the unit are the same, you will have to buy a completely new charger.
The gadget is charged only from the computer
When the phone is charged only from the computer, but the smartphone is turned on and working normally, it is worth checking the charger. But if charging is in order, but the smartphone does not see it or writes that charging is in progress, but in fact it is not, there is a malfunction in the phone.
In some cases, flashing the gadget's firmware or replacing the input helps, but only a professional can do this after examining the device and identifying the problem.
Software
Often, Lenovo Android devices take a long time to charge and then quickly discharge due to constantly running programs that use a lot of energy. If this is the case, then you need to turn off all applications, Wi-Fi, Geolocation and Bluetooth while charging so that the device charges as quickly as possible.
Energy optimization
What can help fix the problem:
- Optimization programs: Clean Master, Smart manager, etc. They disable all existing processes that interfere with the optimal performance of gadgets.
- Do a factory reset through the Settings menu, using the number combination or pressing the Power keys, as well as the volume up and down controls at the same time.
Flashing Lenovo
Reinstalling the firmware helps. To do this, you need to connect your phone to your computer and follow the instructions:
- Launch ROM Manager, connect a flash card with custom firmware.
- In the utility, select “Install ROM from CD card” and specify the path to the file.
- Click on “Save current ROM”. This will allow you to roll back the firmware to the old one in the future if you don’t like the new one.
- Select “Reboot and installation”, agree to the action and wait for the program to restart the smartphone and update the firmware.
All of the above steps usually take no more than 40 minutes, but to avoid permanent breakdown of the device, you should still visit the official service to update the software.
BIOS/UEFI settings are incompatible with Windows settings
Operating systems of the Windows family have the ability to reduce the amount of electricity consumed by a computer. Similar functionality is also present in the boot firmware BIOS or more advanced - UEFI. Both of these programs are responsible for the initial setup and subsequent startup of the computer. The settings used in the BIOS/UEFI may conflict with similar settings of the operating system, in our case with the parameters responsible for energy consumption. There are 3 solutions to this problem:
- Reset power management settings in Windows;
- Reset BIOS/UEFI settings;
- Update BIOS/UEFI to the latest version.
Let's look at everything in more detail.
Resetting power options in Windows
To reset power management settings in Windows, you need to do the following:
- Open "Control Panel", find and go to the "Hardware and Sound" section.
- Next, go to the “Power Options” section.
- On the right side of the window, click on the “Display turn off settings” menu item, and then select “Restore default settings for the circuit.”
- Return to the previous page and go to the section “Setting the transition to sleep mode.” Here you should also click on a similar inscription.
Next, it is recommended to turn off (namely turn off, not restart or put into sleep mode) the computer, wait about a minute and turn it on again. If the problem remains, move on.
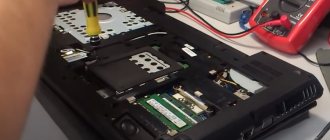
Resetting BIOS/UEFI settings
To reset boot firmware parameters, a special user interface is used that is not accessible from the operating system. Those. It will not be possible to read further instructions and at the same time delve into the BIOS/UEFI settings from the same computer. Therefore, you will need to open the article on another device or simply take a photo of the subsequent text.
To enter settings and reset BIOS/UEFI settings you need:
- Turn off and turn on the laptop again.
- Immediately after pressing the power button, press “F12”, “Del/Delete” or “F2” on the keyboard (depending on the specific laptop model), after which the BIOS/UEFI user interface will appear on the screen.
- Depending on the BIOS/UEFI version, the appearance of the interface may differ, so you should go through all the tabs and find the item “Load Default Settings”, “Restore Setting”, “Load Setup Settings”, “Load Setup Defaults” or a similar option. In some BIOS/UEFI versions, the reset function may be launched on the initial screen of the interface.
- When you select the reset option, the program will ask you to confirm the action. It may simply be "OK" or the user will need to enter the letter "Y" and then press enter.
- After the reset, all you have to do is press the “F-10” button and agree to save the applied changes.
It is recommended to reset the BIOS/UEFI together with resetting the power settings in the Windows system itself.
BIOS/UEFI update
If resetting the BIOS/UEFI settings did not lead to the desired result, you can try updating this boot program. You can do this directly from Windows. For this:
- Go to the official Lenovo website (lenovo.com).
- At the top, in the “Support and Warranty” section, select “Drivers”.
- A new page will display a search bar where you should enter the laptop model (can be found on the computer case).
- When you follow the link offered by the site, a table with sections of all available software for the selected laptop model will be displayed on the screen. Among them you need to find the “BIOS” section.
- If there is an update, an icon in the form of a leaf with a “+” sign inside will be displayed opposite the inscription “BIOS update for Microsoft Windows...”.
- By clicking on this icon, the number “1” will appear at the top of the table opposite the inscription “My download list”. You need to click on the inscription. A “Download” button will appear at the bottom, clicking on which will download the BIOS update installer program.
Power supply failure
If your smartphone's power supply breaks down, charging will naturally not occur. But, again, it depends on what kind of damage it is. The power supply may still produce a certain current, which will not be enough, then charging will proceed slowly, stand still, or the phone will slowly discharge even while charging.
If the unit completely fails, then charging, naturally, will not occur at all.
There is only one solution - go and buy a new power supply with similar characteristics - they are usually written on the case. It’s hardly worth taking it in for repairs - buying a new one will most likely cost less.
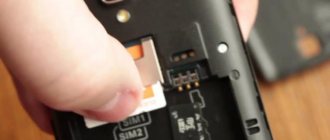
SD card
One of the reasons why an Android phone does not turn on is the use of an SD card with a larger capacity than stated by the manufacturer. The desire to experiment is in the blood of users. If the specification says that you can only use 32 GB, you will definitely try 64. With a high degree of probability, the device will recognize the card. It will work normally until the recorded amount of information exceeds that declared for support.
If, after a software failure, the phone stops turning on or does not boot, just remove the problematic memory card from it. A forced reboot will bring the smartphone into working condition.