Companies that create Android smartphones, including Lenovo, implement and use an engineering menu to test their devices.
In Lenovo, the Engineering menu contains various settings and options for testing the gadget that are not available to ordinary users. But now, having downloaded a special application from the Play Market, or knowing the special USSD command, any user can go there.
Why do you need a hidden engineering menu in Android?
The engineering menu is a special special application that is hidden from the eyes of the average user and is used by developers to test and set the necessary parameters. It allows specialists to check the operation of various sensors and adjust the operation of system elements.
If you decide to enter the “holy of holies” of developers, then when working with the technical menu of the Android OS, be extremely careful: an error when changing functions can lead to various malfunctions in the operation of the device.
HTC Service Codes
*#*#3424#*#* Functionality testing program
*#*#4636#*#* Information menu
*#*#8255#*#* Launches the Gtalk service monitor
##3424# Diagnostic mode
##3282# EPST
##8626337# VOCODER
##33284# Network status technical data
##7738# Protocol revision
How to enter the menu?
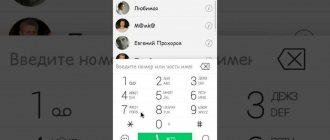
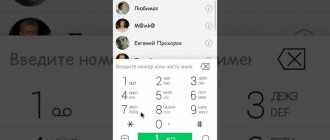
Don’t know how to access the engineering menu on Lenovo? To log in, you must enter numbers, as with standard dialing of a telephone number. After this, you will need to dial a certain combination consisting of signs and numbers. It is necessary to take into account that this combination is different for each smartphone creator. In addition, it also depends on the planned adjustments in the Lenovo menu.
Combinations to launch Engineering Mode
For Lenovo smartphones operating on the MediaTek chipset (as well as for gadgets from other Chinese manufacturers), to get to the technical menu, you need to enter one of the combinations:
- *#*#3646633#*#*;
- *#*#54298#*#*.
If any of the above special codes do not work, then you should use third-party applications; you can even download them on the Play Market. It is best to use applications such as Shortcut Master, Mobileuncle Tools in such situations.
Video “How to work in Engineering Mode”
We suggest watching the video before taking any action yourself.
Please note that Engineer Mode does not work on certain smartphone models running Android 5.1 Lollipop. In addition, it is not valid when using the Cyanogenmod firmware.
When you reboot into Android 4.4.2, the changes made in the special application are subsequently reset.
Mobileuncle Tools program
The functionality of this application is almost the same as that of the engineering menu, called by a special code, with the only difference that here the user is given the opportunity not only to familiarize himself with data about the memory, sensor and display of the device, but also to update the firmware and improve GPS.
To work with this program you need root rights (root).
Shortcut Master utility
This program was created specifically to delete, search, create. It does not contain functions for entering Engineer Mode. However, through it you can get acquainted with the list of secret special commands operating on the device. After clicking on the command name, the “Run” command will appear in front of your eyes. This is a very comfortable way of working; you don’t need to do any extra steps.
To view the list of available codes, in the Shortcut Master program you should call the auxiliary menu by clicking on the “Secret Code Explorer” item.
Root rights to access the engineering menu
To enter Engineer Mode in certain versions of Android, you must have special root rights. You can obtain these rights through special programs such as UniversalAndRoot, Farmroot and others.
To access the gadget via Farmroot, you should:
- Install and launch the application;
- If the program supports installing root rights on your device, then a list of available actions will appear on the display, among which is “Get root”. Click on this item;
- Select one pre-installation method for obtaining rights;
- The installation will begin;
- After the installation is complete, a message will appear indicating that root access has been established.
Android service menu. Lenovo engineering menu: entry and list of secret codes
Today, the Android operating system is maximally adapted to the needs of the modern user. A wide range of settings and functions will satisfy almost any request.
And yet, sometimes it seems that this is not enough, and you want to expand the functionality of the gadget. This is precisely the opportunity that the engineering menu provides.
In this article you will learn how to configure the engineering menu and what it is.
How to enter the Android engineering menu
The engineering menu is a special program with which the user can make adjustments to the operation of the gadget, as well as conduct technical testing and evaluate the performance of sensors.
There are several options for entering the engineering menu. Namely:
- special command - *#*#3646633#*#*
- short versions of the command - *#*#4636#*#* or *#15963#*
If you were unable to log in using special codes or you have a tablet that does not support dialing, you can download special applications.
Restoring IMEI through the engineering menu
Quite often, when using a gadget for a long time, various errors begin to arise that significantly affect the operation. Both global manufacturers and Chinese counterfeits are susceptible to this. In order for the device to work properly again, it is often recommended to do a full reset or reflash it.
You can learn more about updates and select firmware from our article. And you can find out how to do a full reset to factory settings in the article -.
After such manipulations, sometimes the smartphone or tablet stops seeing the network. In such cases, you need to check the IMEI code of the device. This function is available in the engineering menu.
You can read how to restore IMEI through the engineering menu in our article.
Reset engineering menu
Changing the values of the engineering menu must be done extremely carefully, since incorrect settings can lead to incorrect operation of the device. Before changing anything, it is recommended to write down the original values in order to protect yourself in case something goes wrong and the new settings lead to poor performance of the device.
If you did not write down the initial settings, you can reset the developer menu to factory settings. This is available on any MediaTek processor. A prerequisite is to have root rights.
You can read how to get root rights in our article, selecting your smartphone model.
To reset you need:
- install Solid Explorer or any other explorer
- go to the root folder
- next is the data folder
- select nvram
- then go to the apcfg folder
- find aprdcl in it
And already there you will find all the changed settings of the engineering menu. Partitions can be deleted selectively. If you are not satisfied with the work of, for example, Audio, then delete all Audio folders. After this, be sure to restart your device.
After a reboot, the system will automatically create remote files with standard parameters that are built into the processor. If you want to completely reset the settings to zero, then delete the aprdcl folder.
After a reboot, it will be restored, and the phone will have the factory settings of the engineering menu.
Write in the comments any questions you have regarding the engineering menu. We'll be happy to help.
How to enter the engineering menu of MTK Lenovo
If you are still a complete beginner, then to understand some terms, I recommend that you familiarize yourself with the following topics:
Why do we need an engineering menu?
The engineering menu may be needed to test the operation of the touchscreen, display or GPS, adjust microphone parameters, volume, and so on.
So what you need:
- Telephone
- Straight arms and a bright head
Spoiler
Begin:
1. Set Root rights for your smartphone. This can be done in different ways; the easiest way is to open the FAQ section of your smartphone. for example - theme for P780 -
Spoiler
What are superuser rights?
Root (from the English root - root; read "root"), or superuser - a special account in UNIX-like systems with an identifier (UID, User IDentifier) 0, the owner of which has the right to perform all operations without exception.
Advantages of Root: Having access to the main administrator profile (superuser), you get a number of features that are not available in normal operation.
First of all, obtaining Root makes it possible to remove standard applications imposed by device manufacturers, change themes and shortcuts, and also launch specialized applications that significantly expand the capabilities of the smartphone (usually such applications require Root rights).
In addition, it becomes possible to change system files (Recovery image, Bootloader or images displayed during boot), run Linux executable files, install applications to a memory card or transfer program caches to it.
In some cases, after modifications to the OS, available only after obtaining Root rights, it is even possible to achieve a small, but still increase in battery life performance.
Disadvantages of Root: As with everything else, gaining Root access has its disadvantages. First of all, the device loses its warranty and in the event of “something like that”, provided that you cannot roll back your “device” to the official firmware, you will have to repair it solely at your own expense.
The rooting procedure is simple - by doing everything in accordance with the descriptions, you can achieve what you want, but if you do not have any experience, the potential risk remains - under unfavorable circumstances, the device may turn into an unusable “brick”.
Another important drawback is that opening Root privileges implies interference with system files and entails the loss of the ability to update over the air (install OTA updates).
More precisely, the ability to update may not be lost, but the consequences of the update will be unpredictable.
The most harmless of them is the loss of root privileges, but more fatal options are also possible - up to and including obtaining a brick.
Types of Root rights: There are several types of Root rights:
Full Root – permanent rights that remove established restrictions. It is not recommended to update the operating system. Shell Root is similar to Full Root, but without access to the system folder.
Temporary Root – temporary Root access. After rebooting the device it disappears.
How to get Root rights? A lot of universal ways and methods of obtaining Root rights on devices running Android are described. Most of them involve the use of special programs and a computer.
Among such programs, Universal AndRoot, Unlock Root, z4root, Revolutionary and others are well known, promising to get what you want in “two clicks”. Unfortunately, not all of them can 100% help you achieve what you want, specifically for your mobile device.
Moreover, such software can be detected as a virus because it makes changes to the kernel of the Android operating system.
In this case, the antivirus is partly right - all these programs are virus exploits that penetrate the system kernel and when downloading or installing them, it is recommended to disable the security software.
Another way to obtain Root rights is to install modified firmware on your smartphone. In this case, all the work has already been done for you by specialists, and all you have to do is choose the firmware that is suitable specifically for your device. By the way, there you will also find various decorations and additions for your smartphone model.
It is worth noting that some phones have protection supplied by the manufacturer - NAND lock.
Most often, HTC was guilty of this, so the owners of such devices were out of luck - NAND lock prohibits making any changes to the /system partition (it will not allow anything to be written/deleted to/from the /system partition, even if it is remounted for writing), which is why It is impossible to install the Superuser program in the /system folder.
It is still possible to Root phones with NAND lock, but it will not be fully functional (you can only get Shell root or Temporary Root). You can find out whether your device has NAND lock in the discussion thread for your model in the Android – Devices section.
How to check that root rights have been obtained? It is possible (but not necessary) for an application called Superuser or SuperSU to appear in the list of programs
When running programs that require root privileges, a corresponding prompt will pop up
Programs that previously did not work, citing lack of rights, are now fully functional. In the terminal emulator, when you enter the su command, a hash prompt appears: #
This verification method depends on the method of obtaining root rights (for example, when using Universal Androot, this verification method is unacceptable). In a terminal emulator, type the command “/system/bin/id”. If you get “uid=0(root) gid=0(root)” in response, then you have achieved what you wanted.
- Now you know why you need to obtain Root rights in the Android operating system. Some users believe that Root is necessary, while others live quite well without it. It’s up to you to decide whether to perform this procedure or not, just don’t forget about the warranty and everything will be fine.
The engineering menu is an application hidden from the user's eyes, which is used by developers to test smartphone or tablet models, as well as set the required parameters. Thanks to this application, specialists can make adjustments to the operation of system components. How to find the engineering menu on a Lenovo smartphone? Actually, it's not difficult. However, it is worth noting that the user in this case assumes enormous responsibility. Using secret codes, on which the engineering menu is based, is dangerous. One mistake can turn the device into a brick. Thus, if it is not necessary, there is no need to take risks as an experiment. If you decide to make changes to the parameters, you should follow the instructions below.
What can you customize in the menu?
In Engineer Mode, the settings of existing cameras, sound, and recovery mode are often adjusted. In this case, you need to be extremely careful, because the names of items in various device models can differ significantly.
Adjusting sound parameters in the engineering menu
If the ring volume level of your gadget is not acceptable for you, find the section called “Audio” in the engineering menu and go to “LaudSpeaker Mode”. There, click on “Ring”. Change the existing signal values - in the “Max” section, increase the “Vol” value (the limit value is 200). Click on the “Set” button.
To enhance the tone of the conversational speaker, select “Normal Mode” in the “Audio” section and go to “Sph”. Set the signal values from minimum 100 to maximum 150.
In order to increase the sensitivity of the microphone, you should go to “Audio - Normal mode - Mic”. At each level, the same microphone sensitivity indicators are set. Click on “Set”, reboot and check if the other person can now hear you better than before.
Disabling unused frequencies
Modern smartphones are very “gluttonous” and quickly consume battery power to ensure the functioning of applications. Using Engineer Mode, you can significantly increase the battery life.
Gadgets are capable of scanning GSM frequencies - 1900/850 MHz, 1800/900 MHz. The last pair operates on the territory of our state, which means that there is no need to scan the network at other frequencies. For an unnecessary pair, the signal can be deactivated so that less battery power is consumed.
In the engineering menu, go to “Band Mode”. Deactivate frequencies that you do not use by unchecking GSM850 and PCS1900. If the device supports a pair of SIM cards, then you should open the SIM2 and SIM 1 sections in turn, and then carry out the specified actions in each of them. To save the new settings, click on “Set”.
Camera
By default, Android smartphones are able to save photos in JPEG. But most photographers prefer to take photos and process the material in RAW for greater editing capabilities. The technical menu allows you to select the optimal photo format.
In the engineering menu, find the “Camera” section and select the type of image there. In addition, in the camera menu you can increase the size of photos, set the ISO value, activate shooting in HDR format to increase the detail of images, and set the frame rate for videos. After changing each of the parameters, you should save the new settings by clicking on “Set”.
Recovery Mode
Recovery mode is an analogue of Bios on a PC. It makes it possible to control the device without logging in. There are the following recovery options:
- Removing personal information from the system;
- Creating backup copies of the operating system;
- Access to root rights;
- Firmware update;
- Reset existing settings to initial ones.
In recovery mode, you shouldn't take actions unless you have confidence in what they can ultimately lead to. Certain commands can cause significant harm to the system and device.
Lenovo ideapad Secret codes
*#06# – show IMEI – this is a non-repeating unique identifier The command works on any mobile phones.####0000# – External Version ####1111# – Engineering menu####2222# – serial number
####3333# – LenovoLogger
## 7820 # SIM card lock status * # 07 # or ## 07 # launch main add-ons page + information ## 4678255 # tier3 status ## 634 # color option + call time counter * # 06 # to check IMEI (international identifier mobile equipment). *#7780#factory reset. *#67705646# clears the LCD display (operator logo). *#0000#view software version. *#2820# Bluetooth device address. * # 746025625 # Sim clock allowed status. *#62209526# – Show the MAC address of the WLAN adapter. This is available * # 92702689 # entering the secret menu: displaying the serial number, month and year of manufacture, date of purchase of the phone (MMYY), date of last repair, if found (0000), phone life timer * # 21 # Allows you to check the number on which forwards all calls. * # 30 # Allows you to see the private number * # 43 # Allows you to check the call waiting status of your phone. * # 62 # Allows you to check the number to which Call Forwarding is made * # 67 # Allows you to check numbers that are on busy calls * # 67705646 # Removes the operator logo on 3310 and 3330 * # 73 # Resets phone timers and game results * # 746025625 # Displays the status of the SIM clock. If your phone supports the "SIM Card Clock Stop Allowed" power saving feature, this means you will get the longest possible standby time. * # 7780 # Restore factory settings * # 8110 # Software version for Nokia 8110 * # 92702689 # Displayed 1. Serial number, 2. Date of manufacture, 3. Date of purchase, 4. Date of last repair (0000 without repair), 5. Transfer of user data. 12345 This is the default security code * # 3370 # - Activate the Enhanced Full Rate (EFR) codec. Increase signal strength, improve signal reception. This will also help if you want to use GPRS and the service is not responding or is too slow. The phone battery drains faster though. *#3370* – (EFR) deactivation. The phone will automatically reboot. Increase battery life by 30% as your phone receives fewer signals from the network. *#4720# – Activation of Half Rate Codec. *#4720* – Deactivate the Half Rate codec. The phone will automatically reboot If you have forgotten the wallet code for your Nokia S60 phone, use this reset code: * # 7370925538 # Please note, your wallet data will be deleted. The phone will ask you for the lock code. Default lock code: 12345 Press *#3925538# to delete the contents and wallet code. Service Provider Unlock: Insert sim, turn on the phone and press the up/down arrow keys for 3 seconds, the pin code should be entered Press C, then press * the message should flash, press * again and 04 * pin * pin * pin # *#7328748263373738# resets the security code. Default security code is 12345*#1471#Last Call (Vodafone only) On this page you will find secret codes for Lenovo ideapad. With their help, you can access advanced settings, use hidden features of your phone, access the engineering menu, get information about your phone's battery status, and customize your phone as per your requirements.
STANDARD GSM CODES FOR Lenovo ideapad
Change PIN – **04*, then enter the old PIN, and the new PIN twice. Change PIN2 – **042*, then enter the old PIN2, and the new PIN2 twice. Unlock the SIM card (PIN) – **05*, then enter PUK and the new PIN twice Unlock the SIM card (PIN2) – **052*, then enter PUK2 and the new PIN2 twice
Set up unconditional call forwarding (you must order this option from your operator)
| Cancel all redirects | ##002# |
| Cancel all conditional redirects | ##004# |
| Activate all conditional redirects | **004*Phone number# |
Set up unconditional forwarding
| Turn off and deactivate | ##21# |
| Deactivate | #21# |
| Enable and activate | **21*Phone number# |
| Turn on | *21# |
| Check status | *#21# |
Set forward all calls in case of “no answer”
| Turn off and deactivate | ##61# |
| Deactivate | #61# |
| Enable and activate | **61*Phone number# |
| Turn on | *61# |
| Check status | *#61# |
Set the call time before all calls are forwarded in case of “no answer”
When setting up call forwarding by “no answer”, you can set the time in seconds that the system gives you to pick up the phone. If you do not pick up the phone during this time, the incoming call will be forwarded. Example: – **61*+709571234604321**30# – sets the waiting time to 30 seconds Set the waiting time – **61*Phone number**N# , N=5..30 (seconds) Delete the previous setting – ##61 #
Make unconditional forwarding of all calls in case of “not available”
Disable and deactivate – ##62# Deactivate – #62# Enable and activate – **62*Phone number# Enable – *62# Check status – *#62#
Set up call forwarding when busy
Disable and deactivate – ##67# Deactivate – #67# Enable and activate – **67*Phone number # Enable – *67# Check status – *#67#
Complete call barring (you must order the service from your operator)
Change password for all prohibitions (default – 0000) – **03*330*old password*new password*new password#
Configure barring of all outgoing calls
Activate – **33*password# Deactivate – #33*password# Check status – *#33#
Bar all calls
Activate – **330*password# Deactivate – #330*password# Check status – *#330#
Ban all outgoing international calls
Activate – **331*password# Deactivate – #331*password# Check status – *#331#
Completely block all incoming calls on Lenovo ideapad
Activate – **353*password# Deactivate – #353*password# Check status – *#353#
Set up barring of all incoming calls when roaming
Activate – **351*password# Deactivate – #351*password# Check status – *#351#
Set Call Waiting (you must order the service from the operator)
Activate – *43# Deactivate – #43# Check status – *#43#
Prohibition of sharing your phone number
Deny – #30#phone number Allow – *30#phone number Check status – *#30#
Set up Caller ID function
Deny – #77# Allow – *77#
Check status – *#77#
Source: https://mobilagid.ru/code/Lenovo-ideapad/27398.html
Lenovo engineering menu - service codes, factory reset
Almost all Lenovo smartphones are powered by Tek processors, which means that gadgets with such a chipset always have the Lenovo engineering menu. Today we will tell you how to go there, what it is needed for and how any owner of a Lenovo gadget can use it to their benefit.
You probably already understood from the name that this menu was created in order to configure, test and debug various phone modules. Since it is mainly used for the latter purpose, the average user will not be interested in digging into at least half of these functions.
In addition, we urge you to be careful: if you do not know what exactly you are doing, then it is better not to mess with this setting, as there is a risk of disabling important parameters of the device or even turning it into a “brick”.
Common service codes for most Android devices
*#*#4636#*#* Displays information about phone, battery and usage statistics
*#*#7780#*#* Resets settings. Only removes applications
*2767*3855# Full reset, device firmware is completely reinstalled
*#*#34971539#*#* Shows complete information about the camera
*#*#273283*255*663282*#*#* Quick backup of your media files
*#*#197328640#*#* Enables service activity testing mode
*#*#232339#*#* or *#*#526#*#* Wireless network testing
*#*#232338#*#* Displays Wi-Fi Mac address
*#*#1472365#*#* Quick GPS test
*#*#1575#*#* Various GPS tests
*#*#0283#*#* Loopback test
*#*#0*#*#* LCD display test
*#*#0673#*#* or *#*#0289#*#* Audio test
*#*#0842#*#* Vibration and backlight testing
*#*#2663#*#* Displays the touch screen version
*#*#2664#*#* Touch screen test
*#*#0588#*#* Proximity sensor testing
*#*#3264#*#* RAM version
*#*#232331#*#* Bluetooth test
*#*#7262626#*#* GSM signal testing
*#*#232337#*#* Displays Bluetooth address
*#*#8255#*#* Testing the Google Talk service
*#*#1234#*#* Information about the device firmware
*#*#1111#*#* FTA software version
*#*#2222#*#* FTA hardware version
*#*#44336#*#* Displays build time
*#06# Find out IMEI
*#*#8351#*#* Enables voice dialing registration mode
*#*#8350#*#* Disables voice dialing registration mode
Entering the Lenovo engineering menu
To log in, you need to open the dialing menu on Lenovo and dial a special code: *#*#3646633#*#*. True, it doesn't always work. If nothing happens, try entering *#*#4636#*#* or *#15963#*. If everything is done correctly, you will see the Engeneer Mode program with a slightly strange design - this is the same engineering menu.
If for some reason not a single code worked, then to enter the section we need, use the specialized program “MTK Engineering Mode” or another similar one. To do this, you will need to go to the Play Market or App Store and download it. Once it is installed, launch the application and complete all the necessary steps. As a result, you will be able to configure the phone through the engineering menu by going to certain sections of it.
Motorola Service Codes
Devices manufactured by Motorola have a special built-in menu, which can be accessed by entering *#*#4636#*#*.
The following codes are also available for Motorola devices:
*#06# Determine IMEI
*#*#786#*#* Reset
*#*#1234#*# * or *#*#7873778#*#* Open superuser application
*#*#2432546#*#* Manually checking for updates
*#*#2486#*#* Motorola service menu
Engineering menu functionality
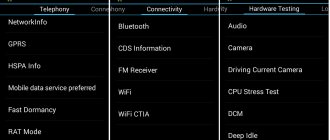
There are several hundred different settings hidden here, which are divided into six large tabs:
- Telephony - view and check the parameters of the phone's mobile network, set automatic answering of an incoming call, check the compatibility of the smartphone with a specific mobile operator, disable support for bands, and it is also possible to reset all settings to factory settings;
- Connectivity - checking Wi-Fi and Bluetooth module, the function of turning off the display while using Wi-Fi Display and much more;
- Module testing (Hardware Testing) - test the sound volume through the headset, increase it, check the screen and other important sensors and modules of the Lenovo gadget;
- Location - all the same actions, but related to location verification: disabling A-GPS detection and others;
- Debugging (Log & Debugging) - here, for the most part, various links to utilities and tests from Tek and those companies that supply other components to the smartphone are stored;
- Others - other settings and tests, for example, setting font sizes on the phone.
It would also be useful to clarify that setting up the phone through the engineering menu on new Lenovo models will be carried out a little differently due to the different structure of the menu items, however, the general meaning remains the same, and therefore it will not be difficult for a knowledgeable person to configure it. Lenovo service codes for entering the menu may differ slightly from what was indicated in the previous paragraph, but usually it is the same.
Secret service codes for Android devices - a large selection
Details Category: Questions about the android system Published: 01/16/2017 11:01 Author: Lewkee
Service codes are present in any Android device. Initially, their main goal was to test devices before sale or during production. In today's review, we will provide a larger list of secret Android service codes, both general and for specific brands.
Using secret ones, you can gain access to various useful functions - testing the device, resetting to factory settings, finding out IMEI, accessing certain settings, etc.
Service codes are launched using the dialer application (“Phone”, “Dialer”, “dialer”), they are typed on the dialer’s numeric keypad and work without pressing the call button. If your device does not have calling capabilities and does not have a calling application, you have two options - Install a third-party dialer, or use the Secret Codes application for Android (more details at the bottom of the article).
LG G3 Service Codes
This device also has a special convenient menu with switches. In order to enter it you need to enter one of the following codes:
International versions: 3845#*855#
Korean models: 3845#*400#
AT&T: 3845#*850#
Sprint: 5689#*990#
T-Mobile: 3845#*851#
Verizon Wireless: ##228378 (+ call)
We urge you to use your brain and not go where you shouldn’t when using these opportunities. Questions can be asked in the comments
Increasing phone volume through the engineering menu
Now let’s demonstrate how to work with hardware settings using the example of one of the most popular operations and learn how to increase the volume on Android through the engineering menu. So, go to the menu using Mobileuncle MTK Tools or by entering the “magic” code, then find and open the Audio subsection. If you entered the menu through the Mobileuncle Tools program, this subsection will be located in the senior section Engineer Mode, in other cases it is usually located on the Hardware Testing tab.
In the Audio subsection you will have the following options:
- Normal Mode – normal mode that works when a headset is not connected to the device.
- Headset Mode – headset mode that turns on when headphones or speakers are connected to the smartphone.
- LoudSpeaker Mode – loudspeaker mode. Activated when the speakerphone is turned on, provided that a headset is not connected to the device.
- Headset_LoudSpeaker Mode – loudspeaker mode with a connected headset. The same as the previous one, but with headphones or speakers connected.
- Speech Enhancement - this mode is activated when talking on the phone without using the speakerphone.
There may be other settings in the section, for example, Debug Info and Speech Logger, but it is better not to touch them. Select the mode for which you want to change the volume level (let it be Normal Mode), select Type in the list that opens and indicate for which function we will change the volume. The following functions may be available:
- Ring – adjust the volume for incoming calls;
- Media – adjust the speaker volume when playing multimedia;
- Sip – sound settings for Internet calls;
- Sph – sound settings of the conversational speaker;
- Sph2 – sound settings of the second speaker (the option may not be available);
- Mic – change the microphone sensitivity;
- FMR – FM radio volume settings;
- Sid – it is better not to touch this parameter, otherwise problems with the interlocutor’s voice may occur.
Having selected a function, scroll through the current list, set the desired Value (from 0 to 255) and click to apply the new Set settings.
To change the volume level, you can also use preset templates - the Level option. Most phones have seven levels, from 0 to 6. It is advisable not to touch the Max Vol setting, just as you should not set the Value values too high, otherwise the sound in the speakers will begin to wheeze. Other modes in the Audio subsection are configured in a similar way.
Some smartphone and tablet models require a reboot for the new settings to take effect.