- Setting up a wireless connection
Laptops are slowly retreating and with uncertain steps are leaving the computer device market; they are being replaced by tablet devices and transformers, which are the future of computer gadgets. These include the Lenovo tablet, instructions for setting up and parameters of which will familiarize you with the example of the ThinkPad Helix.
User's Guide version...
Lenovo tab a10-70, User Guide
- Image
- Text
- Content
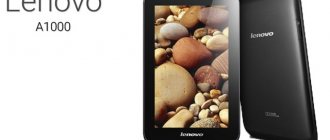
Lenovo TAB A10-70
User guide
version 1.0
Please read before use
safety instructions and important notes
in the included manual.
- index
- chapter01
- chapter02
- chapter03
- chapter04
- chapter05
- outro
Answers to popular questions
A few frequently asked questions and their answers:
- Can I use my tablet while charging? It is possible, but without consuming a lot of power, for example, during gaming. This will cause the device to heat up more and damage the battery. But the negative impact will only occur with regular games while charging. Also, if the device is expensive and powerful, then there will be no problems.
- How to install Viber on a tablet? Like any other application, Viber is installed through the Play Market application store on Android and the App Store on iOS.
- How to unlock the screen? To unlock you need to press the power button. It is located either on the side, on top, or below the display.
- Can an elderly person, such as a grandmother, learn to use a tablet? Yes. Both this manual and visual examples of use are suitable for this. The main thing is not to rush and do everything at the pace of the person being taught.
The first “lessons” are especially important. Then the grandmother or grandfather will learn on their own. So there is nothing difficult about teaching your grandmother to use an Android tablet.
Appearance, Buttons, Turning the tablet on and off
Page 3
- Image
- Text
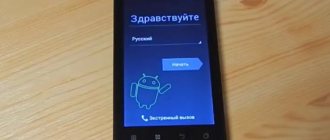
1-2 Buttons
On/off button:
Using this button you can turn on/off the tablet and screen.
Volume controls
Press the increase
or
decrease
the volume to
sound volume settings.
1-3 Turning your tablet on and off
Turning on the tablet
Press and hold
on/off
button in
for 3 seconds, then release it. Will be displayed sequentially
Lenovo logo and splash screen, indicating that the tablet is turned on.
Turning off the tablet
Press and hold
on/off
button in
for 1 second. To turn off your tablet, select Turn off
in
pop-up window and then click OK
.
NOTE.
When connected to a computer using a USB cable
Make sure there is enough battery charge for normal operation. IN
Otherwise, charge the device using the power adapter before
connection via USB.
Technical specifications
- Screen: 11.6 inches, resolution - 1920x1080, IPS matrix, support for up to ten clicks
- Processor: Intel Core i5-3337U, frequency 1800 MHz
- Operating system: Windows 8, 64-bit
- Internal memory: 128/180/256 GB
- RAM: 4 GB
- Cameras: 5MP – main, 2MP – additional
- Graphics controller: Intel HD Graphics 4000
- Internet connection: Wi-Fi, 3G
- Data transfer: NFC and Bluetooth
- Device dimensions: 296x187x20 millimeters
- Weight: 1.67 kilograms
- Additions: Intel VPRO protection feature available
- Battery life: up to 10 hours with docking station and up to 6 hours in tablet mode
It is important to know that the tablet is most intended for business people who are constantly on the move and simply need a powerful and mobile tablet computer.
Status bar
Page 7
- Image
- Text
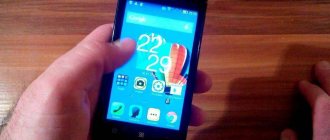
Switching Home Screens
The tablet has multiple screens.
Switch between screens by swiping the screen with your finger. Badges
can be moved from one panel to another.
1-8 Status Bar
Any system messages will be displayed in the status bar.
The status bar displays connection and level information
WLAN signal, battery charge and charging status, as well as others
notifications.
Slide down the status bar to display the notification panel, in
which contains the flight mode switch, the settings shortcut
wireless network, GPS shortcut, auto-rotate screen switch,
brightness adjustment panel and settings shortcut.
Android OS
Nowadays, the most common operating system installed on tablets is Android. If you have not had to deal with this operating system before (for example, on a smartphone), you may find the controls very difficult and confusing at first. But this is only the first impression, which is often very misleading.
In fact, there is absolutely nothing difficult in working with it; it’s just that ignorance scares us all at first. And once you understand, you will see for yourself that Android is a simple and effective operating system. This is why these instructions exist for dummies who got their hands on the tablet for the first time.
Android is a simple and efficient operating system
Latest apps, Manage apps
Page 8
- Image
- Text
1-9 Latest apps
The tablet remembers applications that were used previously.
Click
to display a list of recently used
applications. Tap an application from the list to open it.
1-10 Application Management
Swipe your finger on the home screen to open the list
applications.
Top 3 Tablets for Beginners
The main criteria for the best tablets for beginners are a large screen, not too high a price, and high-quality build from a trusted brand.
Top 3:
- HUAWEI MatePad T 10 32Gb Wi-Fi. 12,000 rubles.
- Samsung Galaxy Tab A 10.1. 15,000 rubles.
- Lenovo Yoga Smart Tab YT-X705F 64Gb. 18,000 rubles.
Entering text
Page 9
- Image
- Text
Click
Options
>
DEVICE
>
Applications
for
control all applications.
Removal
1. Select the application you want to remove from the tab
Third party
.
2. Click Remove
at the top of the screen.
3. Click OK
.
Stopping a running application
1. Select the Running
.
2. Click on the running application that you want to stop.
3. Click Stop
.
1-11 Entering text
You can easily enter text using the virtual keyboard
directly on the touch screen, for example when adding
contact information in the Contacts application or entering and changing
SMS messages. You can enter letters and numbers directly on
What to do first
When the device is turned on and the desktop is visible (various programs and icons in the background of the image), there are several instructions that you need to follow first.
All of them relate to the settings of the mobile device, and if you do the following steps after turning it on, then in the future it will be easier and more convenient to operate the device.
Checking the system update
The system is the operating system on which the device runs. Roughly speaking, this is the main control mechanism, a kind of “framework” between all elements and a “conductor” between man and technology.
This system is regularly updated by those who created it. The main reasons for the update are the security clause and the addition of new features.
Instructions:
- Unlock screen.
- Click on the “Settings” symbol marked with a gear.
- At the very top, click on “System Update”.
- Select “Check for update”.
- If it is, click “Update” and do not touch the device until it is updated.
Language
The system language is very important, because if you choose the wrong language, everything will not be clear. If when you turned on the device the language was not Russian, then it is better to ask someone experienced in operating gadgets to make the settings and set the language to Russian.
Instructions for changing the language:
- Go to Settings.
- Find the “Language and Input” section. If it is not there, select “Advanced settings” and find this section there.
- Click on the “Language” or “Languages” tab.
- Select the desired one from the list of languages.
Important! The name of each language is written in its language.
date and time
The date and time parameter is important not only for informing a person, but also for many internal processes of the device. So, an incorrect date and time can interfere with synchronization, downloading updates, and running applications.
How to set the date and time:
- Open Settings.
- Find the “Date and Time” section. If it is not there, select the “Advanced settings” section and find what you need there.
- In the “Date” tab, select a date.
- In the “Time” tab, select the time.
If the tablet is already connected to a working mobile network via a SIM card or connected to the Internet via Wi-Fi, it is better to enable the “Use network time” and “Use network time zone” functions.
Installing a SIM card
A SIM card is a small chip that gives access to the mobile network. Access is provided by operators such as Tele2, MTS, MegaFon, Beeline. If the tablet has room for a SIM card, then you can make calls and connect to the Internet through it.
SIM card installation:
- Turn off the device.
- Find a place on the case to insert the SIM card. You can see it in the instructions.
- Open the SIM compartment (if there is a compartment) by inserting a paperclip (included with the device) into the small hole next to the slot. Use this paper clip to press the button in the recess.
- Pull out the slot and insert the card into it.
- Reinsert the slot and turn on the gadget.
Screen
The screen on Android can be customized in very detail and I do not recommend this for beginners, as there are more important things. The only thing you need to do with the screen at the very beginning is to adjust the brightness to suit you.
To do this you need:
- Open Settings.
- Go to the “Screen” or “Display” section.
- Click on the “Brightness” item.
- Customize it for yourself by moving the slider left and right.
You can select automatic brightness adjustment by checking the box next to the same inscription.
Infinitely obtaining an IP address
This is a fairly common problem that tablet users encounter when they try to set up the Internet on their gadget. In this case, it is recommended:
- rename the network name. If the previous one was in Cyrillic, then it is advisable to use English characters;
- reboot the router;
- try to enable DHCP in the router settings;
- change the network encryption type and restart the tablet.
- https://wifigid.ru/raznye-nastrojki-telefonov/kak-podklyuchit-planshet-k-internetu-cherez-wi-fi
- https://smartphonus.com/how-to-connect-wi-fi-on-tablet/
- https://tvoirouter.ru/featured/kak-podklyuchit-wifi-na-planshete.html
- https://bezprovodoff.com/wi-fi/nastrojka-wi-fi/kak-nastroit-wifi-na-planshete-android.html
- https://vpautinu.com/planshet_smartfon/android/kak-nastroit-vaj-faj
- tweet
Setting up Wi-Fi on your tablet manually is easy. If the setup is successful, you will be able to use the Internet immediately. If nothing works the first time, it is recommended to delve into the router settings. Step-by-step instructions on how to do this are described above. Everything is so simple that even a beginner can handle it.
Sources used:
SHARE Facebook
Previous articleTransfer data from an old iOS device to a new iPhone, iPad or iPod touch using Quick Start
Next articleWhat is GLONASS in a smartphone, phone and why
Apple iPad Wi-Fi setup
So, connecting Wi-Fi on an iPad is no different from an Android, the only difference is in the graphical interface. To make it more clear to you, I will explain schematically:
- In the application menu, find the “settings” icon and click on it
2.In the settings menu, select WiFi and a window of available networks will appear on the right. If there is no network, then Wi-Fi is disabled. To turn it on, move the slider next to WiFi to the opposite position and the networks will appear. Then select the network you want to connect to. Click on the network, if it is under the password, the “Enter password for the network” window will appear, enter it and click on the “connect” button. After these steps, you will connect to the Wi-Fi network without any problems. If you have a problem and you don’t remember the password for your router, I advise you to read the article - how to find out the password for your router .
Thanks to its unique properties and wide capabilities, the tablet has become extremely popular among users in all countries of the world. In addition, thanks to wireless networks, accessing the Internet and exchanging data has become even easier. However, not everyone knows and understands how to set up WiFi on an Android tablet.
This is a pressing question, since not everyone is familiar with this operating system. Moreover, even if you have been using a similar device with Android for several years now, it is unlikely that you have ever had to manually configure such connections, or even delve deeply into the features of this platform.
But sometimes there are cases when this is simply necessary. If the connection is hidden in the access point configuration, it is simply impossible to set up a WiFi connection automatically on an Android tablet.
How to connect Android to a wireless network
Before moving on to manual settings, you should figure out how to connect to a wireless access point on your tablet. To do this, swipe your finger from the top edge of the screen to the bottom. In the menu that appears on the toolbar, find the button indicated by the Wi-Fi icon.
Not all users of these modern gadgets know how to set up Wi-Fi on a tablet. This is necessary for high-quality Internet operation using wireless networks. Today you can find a Wi-Fi hotspot in almost any public place. In addition, it is configured at home to surf the Internet simultaneously from several devices. Most often, tablets allow you to establish access without problems, you just need to enable the option. However, there are times when manual configuration is required.
First connection
Video instructions are available here:
Before turning on Wi-Fi (Wi-Fi) on your Android tablet, you need to make sure that “Airplane Mode” is not activated, because it interferes with the operation of all wireless modules for communication. To do this, swipe down, starting from the very top of the display, and look at the status of this mode. The icon should be inactive and gray.
How to enable Wi-Fi on your tablet:
- Open the settings of the mobile device (you can do the same “lowering the curtain” as described in the previous paragraph).
- Find the “Wi-Fi” item in the “Wireless Networks” group and activate the tablet’s Wi-Fi module.
- Now tap on the title of this section.
- After the list of detected access points appears, tap on the one you need, focusing on its name.
If the desired network is not found in the list of found ones, you need to rescan. To do this, tap on the icon with the pictogram of two arrows in the form of a circle (update).
If this doesn’t work, then the following instructions for connecting Wi-Fi on your tablet will help. Most likely, the name of the point is not translated by the router, and only those users who know its name and password can use this network.
In the pop-up window that appears, enter the password and establish a connection to the wireless access point.