Even those Android devices that were relevant several years ago, and today are considered obsolete, provided that the technical characteristics are balanced at the time of release, can serve their owner for a long time as a digital assistant capable of performing a wide range of modern tasks. One such device is the Lenovo IdeaTab A3000-H tablet PC. Possessing a fairly powerful processor and the minimum amount of RAM sufficient for today, the device is perfect for an undemanding user even now, but only if the Android version is updated and the OS runs smoothly. If you have questions about the device software, the firmware will help, which will be discussed below.
Despite its venerable age by the standards of the modern world of mobile devices and the not-so-recent versions of Android available for installation on the device, after flashing the A3000-H firmware in most cases it works much more stable and faster than in a situation where reinstalling and updating the system Software has not been carried out for a long time. In addition, the procedures described below can “revive” tablets that are not working in software terms.
In the examples described below, manipulations are performed with the Lenovo A3000-H, and software packages are intended only for this specific model, download links for which can be found in the article. For a similar model A3000-F, the same Android installation methods apply, but different software versions are used! In any case, all responsibility for the condition of the tablet as a result of operations lies solely with the user, and recommendations are followed at his own peril and risk!
Before flashing
Before you begin installing the operating system on your tablet computer, you need to spend a little time preparing the device and the PC that will be used as a manipulation tool. This will allow you to flash your device quickly and efficiently, and most importantly, safely.
Drivers
In fact, the firmware of almost any Android tablet begins with the installation of drivers that allow the device to identify itself in the operating system and make it possible to pair the device with programs designed to manipulate memory.
Read more: Installing drivers for Android firmware
To equip the system with all drivers for the A3000-H model from Lenovo, including the specialized mode driver, you will need two archives, which are available for download at the link:
Download drivers for firmware of Lenovo IdeaTab A3000-H tablet
- After unpacking the “A3000_Driver_USB.rar” archive, you get a directory containing the “Lenovo_USB_Driver.BAT” script, which must be launched by double-clicking the mouse.
When the commands contained in the script are executed,
the component auto-installer will start, requiring only two actions from the user - clicking the “Next” button in the first window
and the “Done” button upon completion of your work.
Installing drivers from the archive described above will allow the computer to recognize the device as:
- Removable storage (MTP devices);
Network card used to obtain Internet on a PC from mobile networks (in modem mode); - ADB devices with USB Debugging enabled.
Additionally. To enable “Debugging” you must go through the following procedure:
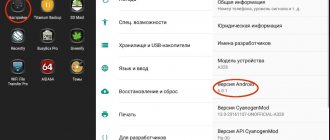
- First, add the “For Developers” item to the menu. To do this, go to “Settings”, open “About Tablet PC” and activate the option with five quick clicks on the inscription “Build number”.
- Open the “For Developers” menu and check the “USB Debugging” checkbox,
then confirm the action by clicking “OK” in the request window.
Read more: Installing VCOM drivers for Mediatek devices
Connecting the Lenovo A3000-H model for installing the “Mediatek Preloader USB VCOM” driver, as well as for directly transferring data to memory, is carried out with the device turned off!
Superuser Privileges
Root rights obtained on the tablet make it possible to perform various actions with the software component of the device that are not documented by the manufacturer. Having privileges, you can, for example, remove pre-installed applications to free up space in the internal storage, as well as fully back up almost all data.
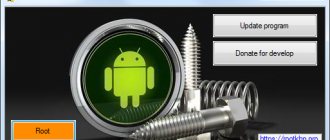
The simplest tool for obtaining root rights for Lenovo A3000-H is the Framaroot Android application.
Just download the tool using the link from the program review article on our website and follow the recommendations indicated in the lesson:
Lesson: Getting root rights on Android via Framaroot without a PC
Saving information
Before reinstalling the firmware, the user performing the operation must understand that during the manipulation process, the information present in the device’s memory will be erased. Therefore, creating a backup of your tablet data is a necessity. Various methods are used for backup, and instructions on using various means of saving information can be found in the article at the link:
Lesson: How to backup an Android device before flashing it
Factory recovery: data wipe, factory reset
Overwriting the internal memory of an Android device is a serious interference in the operation of the device, and many users are wary of the procedure. It should be noted that in some cases, if the Lenovo IdeaTab A3000-H OS does not work correctly and even if it is impossible to boot into Android, you can do without a complete reinstallation of the system by carrying out manipulations that allow you to return the software part of the tablet to its original state using the functions of the recovery environment.
- Boots into recovery mode. For this:
- Turn off the tablet completely, wait about 30 seconds, then press the “Volume+” and “Power” hardware keys at the same time.
Holding down the buttons will cause three menu items to appear on the device screen, corresponding to the device boot modes: “Recovery”, “Fastboot”, “Normal”. - By pressing “Volume+”, set the improvised arrow opposite the “Recovery Mode” item, then confirm entering the recovery environment mode by pressing “Volume-”.
- On the next screen shown by the tablet, only the image of a “dead robot” is found.
Briefly pressing the Power button will bring up the recovery environment menu options.
- Clearing memory partitions and resetting the device to factory settings is done using the “wipe data/factory reset” function in recovery. Select this item by moving through the menu by pressing “Volume-”. In order to confirm the choice of option, use the “Volume +” key.
- Before resetting the device, you will need to confirm your intention - select the menu item “Yes – delete all user data”.
- All that remains is to wait until the cleaning and resetting process is completed—the confirmation message “Data wipe complete” is displayed. To reboot the tablet PC, select “reboot system now”.
Performing the reset procedure allows you to rid the Lenovo A3000-H tablet of the “software garbage” that has accumulated during operation, which means the reasons for the “braking” of the interface and individual application failures. It is also recommended to perform cleaning before reinstalling the system using one of the methods described below.
Stitcher
Since technical support for the model in question has been discontinued by the manufacturer, the only effective method to reinstall the operating system on the device is to use a universal flasher for devices created on the Mediatek hardware platform - the SP Flash Tool utility.
- To perform memory manipulations, a specific version of the program is used - v3.1336.0.198 . With newer builds, due to the outdated hardware components of the tablet, problems may arise.
- Installation of the utility is not required; to be able to work with the device through it, you should unpack the package downloaded from the link above to the root of the system partition of your PC disk
and run the file “Flash_tool.exe” as Administrator.
Preparing for self-flashing
Before reinstalling the software on your Android device, you need to make a number of preparatory measures:
- download a software update program to your PC (Odin, Kies or SP Flash Tool and find a high-quality usb cable (if the reinstallation will be done using a computer);
- (if you plan to reinstall Android to an unofficial version);
- charge the gadget's battery to 100%;
The functionality of the installed software largely depends on its version and build. To prevent the new firmware from starting to conflict with the hardware after some time, you need to find out the serial number of the mobile device:
Let's look at a more detailed procedure for updating Android on a phone using Samsung and Lenovo as examples, although these instructions are also suitable for many other brands.
Wireless protocols
The gadget feels great on Wi-Fi networks using 802.11 b/g/n protocols. The only thing worth noting is that it ignores 3G networks when working with WiFi. It would also be useful to mention the range: the quality of reception and transmission drops noticeably if you move more than 10 meters from the router. User reviews are full of indignation about this: the connection seems to be good, but as soon as you move into the next room, the signal noticeably deteriorates. To transfer data over short distances, you can use wireless Bluetooth version 4.
The Lenovo IdeaTab A3000-H also has GPS protocols, and navigation is surprisingly fast. The accuracy of the readings fluctuated within quite reasonable limits even under unfavorable conditions (rain and block room).
Camera
IdeaTab A3000 is equipped with a 5MP main camera and a 0.3MP front camera.
In general, you can imagine the quality of pictures from cameras with this resolution that are not equipped with a flash. Autofocus on the main one doesn't help much.
OS and interface
The tablet runs Android 4.2 Jelly Bean.
The interface is very similar to the stock system, but has some minor modifications from Lenovo. The manufacturer also installed a small set of programs.
Results
pros
- high quality screen
- battery
minuses
- Russian firmware must be reflashed to be able to make calls
- weak cameras
In general, the Lenovo A3000 tablet turned out to be of high quality and interesting for game lovers and people who use this device as a video player. Of course, I would like a higher screen resolution, but even with this the work is quite comfortable.
The fresh and faster Lenovo IdeaTab A3000-H tablet has become a replacement for the not entirely successful model of the previous generation A1000. The gadget looks very attractive due to its characteristics and, naturally, price segment.
So, the hero of today's review is the Lenovo IdeaTab A3000 tablet. The characteristics, design, controls, advantages and disadvantages of the device will be discussed in detail in the article. The opinions of experts will be taken into account along with reviews of ordinary gadget owners.
How to reflash a Lenovo a3300 tablet
Reflashing the Lenovo a3300 model is not much different from what was described above. First of all, it should be noted that for this device you need to download the drivers and firmware file that are suitable only for it.
In addition, you can use the special program Smart Phone Flash Tool
, which also has a clear interface.
The firmware procedure begins by selecting the item where the firmware file is loaded. Then click the Uprgade
at the top of the window. The tablet itself is completely turned off and disconnected from the computer. When 0% appears at the bottom of the utility window, the device needs to be connected. The computer itself will detect the new device, after which the utility will continue flashing the tablet.
How to reflash a Lenovo a1000 tablet
You can reflash Lenovo a1000 directly from the device itself by installing the TWRP Recovery
.
You will also need to download drivers for the device. Then you need to select the Mt6577_scatter
and transfer it to the
TWRP
, confirming the replacement.
Next comes the work of the program described above Smart Phone Flash Tool
.
Important: there are several modifications of the Lenovo a1000 tablet.
In this case, the flashing procedure was described for
version F
, which is sold in Russia. If you have another device purchased abroad, its operating principle will be slightly different.
Conclusion
The process of flashing Lenovo tablets is not something complicated. The main thing is to have a computer with Internet access at hand and download exactly those drivers that are suitable for the device model.
How to flash Lenovo. Video
), everything is quite simple and you don’t need to go to a service center.
Special mode driver - tablet firmware mode driver from PC - https://yadi.sk/d/dPnMLOIwaKKuu
Firmware of. Only for version A3000-F
Manual driver installation for firmware
- Login to the computer as a user with Administrator rights
- press the key combination - +R (the Windows button is located between the left Ctrl and Alt)
- write devmgmt.msc (or devmgmt.msc) in the mmc window that opens (Device Manager will open)
- remove the battery from the smartphone, and then return the battery back (do not turn it on)
- connect the smartphone to the computer with a cable
- Right-click on the new device that appears in Device Manager. If a device with a yellow triangle appears in the “Composite ABD Interface” section, then install the adb driver on this device. If it is not installed, then the spoiler above contains instructions for manually editing this driver. And if the device appears in the com ports section or in unknown devices with the name “MT65xx Preloader”, follow these instructions further.
- In the menu that appears, click Update drivers
- We look for drivers on the computer (for example, if you unpacked the archive with the latest drivers, then look for the folder for your operating system and point to the file usb2ser_"the OS version and bit depth are indicated here"). Select a driver for your operating system.
- Depending on the questions, click next/OK/agree
- On win8 and win8.1, drivers are installed with signature verification disabled.
Disabling signature verification on win8 is done like this:
- Win+I -> Change computer settings -> General -> Special boot options -> Restart now.
- When shutting down, click Diagnostics -> Advanced options -> Boot options -> Restart.
- After a menu appears, select “Disable mandatory driver signature verification.”
Disabling signature verification on win8.1 is done like this:
- Win+I -> Settings -> Change computer settings -> Update and recovery -> Recovery -> Restart now.
- When shutting down, click Diagnostics -> Advanced options -> Boot options -> Restart.
- After a menu appears, press F7 and wait for the computer to restart.
- Next, install the drivers according to the instructions.
Important information!
It’s no secret that in different batches of Chinese phones, sometimes hardware components are changed that cannot work correctly with the firmware for similar devices from the previous batch. Of course, you won’t get a non-working phone, but the software provided by the manufacturer to retailers is often not the “latest” "And after flashing new devices with software versions intended for old revisions of the device, the user runs the risk of getting a partially non-working phone. To avoid this, it is highly recommended to do a full rom-backup of the phone before flashing the device!
Lenovo tablet firmware
We have already downloaded the SP_Flash_Tool flasher program to our PC, now we need to unpack it, this needs to be done in a directory with a name without Cyrillic characters.
Turn off the tablet. The USB cable must not be connected to the computer. Remove the back cover and press the Reset button with a needle (hardware reboot of the tablet).
(skip if the drivers are already installed) Connect the phone to the computer with a cable. The operating system will find a new device - point the system to the folder with the driver. If something does not work out with the installation of drivers, then read the instructions provided above for installing drivers. Disconnect the cable from the computer.
Launch the SP Flash Tool program. Click on the Scatter-loading button and select the file MT65**_Android_scatter_emmc.txt (it is in the folder with the firmware, the firmware is different, so the scatter file will be called differently, but there will always be “scatter”).
Please make sure that there is a mark on DA DL All With Check Sum. If in the FT window there is no checkmark on the fac section and the path is not specified, then check the box and double-click on this section - select fac.img in Explorer.
Click the Firmware Upgrade button (in some cases Download).
Then we connect the turned off Lenovo tablet to the computer. The program should see it and start flashing the firmware. If the tablet is not detected, then simply press the “Reset” button. In the device manager, with the drivers installed correctly at the time of firmware installation, you should see mtk usb port (MediaTek PreLoader USB VCOM Port) in the com ports. And after the firmware is completed or if any error occurs, the device turns off and disappears from the device manager.
After finishing the firmware, disconnect the Lenovo IdeaTab A3000 tablet from the computer and turn it on. That's all.
There are also many reasons to abandon this step. But if you have already decided to take this drastic action, then from this article you will learn how to flash a Lenovo tablet without dangerous consequences for yourself and your device.
After reading the detailed analysis of this article, you will know exactly how to flash a Lenovo tablet correctly and independently
IMPORTANT
! Be careful when flashing your tablet. Any mistake in this process can be fatal - from voiding the warranty to rendering the device unusable.
Design
In appearance, the tablet is very similar to its predecessor, the A1000, but the new model is slightly different from the old series, and for the better.
The design of the device has pleasant outlines, but does not pretend to be unique or at least in any way different from similar tablets from other brands. The back panel has a rough texture, so the gadget should not slip out of your hands.
The cover of the IdeaTab Lenovo A3000 is removable, and under it we will see a micro-SD memory card slot, two places for SIM cards and a battery. At first glance, everything seems to be fine, but only the battery is secured with secret bolts and sealed. This move caused a storm of emotions in the reviews of tablet owners, who immediately got used to replacing low-capacity batteries with more powerful ones. And in our case, it is impossible to do anything without losing the warranty.
As for the dimensions of the IdeaTab Lenovo A3000, they are standardized for the 7-inch form factor - 194x120x11 mm and weighing 340 grams.
The tablet's equipment is extremely sparse even for this segment. All we will see in the box is the device itself, a charger (very convenient) and a short instruction manual. Unfortunately, there are no cases, headsets, adapters, etc. here. The warranty period for service also has the usual date of 12 months.
Specifications
- Processor: MT 8389/8125, 4 cores, 1.2 GHz
- Operating system: Android™ 4.2 Jelly Bean
- Memory/Storage: RAM: 1 GB LP-DDR2; Internal memory: 4 GB/16 GB eMMC; Expandable Memory: Up to 64 GB (MicroSD)
- Display: 7.0-inch. IPS; 1024 x 600
- Battery: Lithium polymer, 3500 mAh
- Networks: Wi-Fi (WLAN 802.11b/g/n); Bluetooth® 4.0; A-GPS; WCDMA/HSPA+ (850/900/1900/2100 MHz); GSM/EDGE (850/900/1800/1900 MHz)
- Front camera 0.3 MP, Rear camera with autofocus 5.0 MP
- Dimensions (W x H x D): 194 x 120 x 11 mm
- Weight: 345 g
- Ports/Slots: 3.5 mm headphone and microphone jack, MicroUSB (with USB-OTG support), MicroSD memory card slot
- Sensors: Accelerometer (g-sensor), Light sensor
Autonomous operation
Without special load (viewing photos, reading books), the gadget will work for about 10 hours. If you use wireless protocols and access the Internet, the battery will last for about 7 hours or so. Maximum energy consumption (video, web surfing, games) will drain the battery in 3-4 hours.
The battery life of the device is, in principle, satisfactory and comparable to similar gadgets in this price segment - nothing supernatural or outstanding, but you can work calmly, as they say, without a cord.
Sound
The device is equipped with a very good acoustic system, and the sound is quite acceptable in terms of quality. Naturally, low frequencies are practically inaudible, but high and mid frequencies sound more or less natural.
What pleased the model was its volume. Even if you set the sound level to half the maximum, the speaker system will easily drown out the 100% volume of other similar devices. True, you shouldn’t get carried away with this, because at 80% and above the sound begins to turn into cacophony. But this volume level is clearly excessive, even if you use the tablet outdoors.
Display
The tablet has a 7-inch IPS screen with a resolution of 1024 by 600 pixels.
Viewing angles are wide, brightness and contrast are above average, but color rendition is not great.
Multi-touch technology supports up to five simultaneous touches.
One of the downsides is that the tablet slows down when switching from landscape to portrait mode.
Iron
The device received a quad-core Mediatek MT8389 chip with a clock frequency of 1.2 GHz.
PowerVR SGX544MP is responsible for graphics, the amount of RAM is 1 GB.
You can see the test results in the screenshots - quite good and higher than enough for everyday tasks.
Lists of sensors and chip indicators:
How to reflash a Lenovo tablet via computer
First of all, you need to find the company's special utility on the Internet, known as Update Tool L3. Then you will need drivers for your computer and a special system image. All this can be found on the official website of Lenovo.
The next step is to fully charge the tablet and turn it off. After completing these steps, you need to press the volume minus key
until the device begins to vibrate.
At the same time, you will have to hold the tablet's power key. Now you can release it, continuing to press minus, waiting until a black screen appears with an inscription indicating that Fastboot USB
.
Finally, the tablet can be connected to a computer on which the appropriate drivers are already installed. By running the downloaded utility required for flashing, the firmware file itself is selected. It should be noted that it must be previously unpacked.
A window appears in the utility, the second item in which informs you about the choice of firmware type. If left NONE
, then the system itself will simply be updated, while retaining the old data.
Typically, this choice allows you to correct errors in the operating system. If you need to erase data, then you should stop at the second item in the drop-down menu “ Erase user data
”. In this case, the output is a tablet that is indistinguishable from the one on store shelves. By pressing the forward key, all that remains is to wait until the utility updates the system.
The whole process proceeds relatively quickly. The result is a clean tablet, completely ready for use.