If you are using a Lenovo or Motorola smartphone, you definitely need to flash the firmware on your device. Of course, the OEM is deploying OTA, but it is a labor-intensive process.
With technology making things easier and more accessible, capturing the firmware file for a device is not a big deal. Yes.! Now users can install updates themselves.
We have thousands of file sharing websites that host these firmware files. The question arises about how to install the firmware. Some devices have the ability to update locally. This is what allows you to simply view your firmware zip file and the system automatically performs the flashing.
However, not all devices have this option. So, to solve this problem, OEMs are now offering dedicated tools for their devices.
Today we present to you Lenovo Moto Smart Assistant. This is an exclusive flash tool for Motorola and Lenovo devices. We have posted the latest version here, v4.4.0.12 .
This tool supports Windows OS. It doesn't matter whether you are using Windows XP or Windows 10 (32 and 64 bit), it is compatible with all versions of Windows OS. Flash tool is officially developed by Lenovo Group Limited,
Preliminary preparation
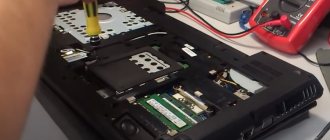
Sometimes Lenovo synchronization with a PC via a USB cable does not occur due to the fact that the operating system ( in particular Windows 8 and 10 ) is trying to find and install drivers for the smartphone. But, as a rule, problems arise the first time you connect. The installation process fails, and in the device manager of the computer, in the “portable devices” item, the smartphone is displayed, but with an exclamation mark .
Related Posts
Download and install Goat Simulator on Android and iOS
No sound in YouTube video
Customize your Chrome browser by choosing your own theme style
How to Enter Fast Boot and Recovery Mode on Xiaomi Mi 11
How to Add DuckDuckGo to Chrome Browser on Android Smartphone
How to Improve Sound Quality on Your Android Phone
Installing Lenovo PC Drivers Manually (Windows 8 and Below)
If automatic driver installation is unsuccessful, you can do everything manually. To install, do the following:
- Right-click on the Windows icon in the lower left corner. Click on “Control Panel”.
- Open "Device Manager". We are looking for our phone.
- Right-click on the smartphone device. A context menu appears where you need to select “ Update drivers...”.
- In the window that opens, click on the option “Search for drivers on this computer”, then “Select a driver from the list of already installed ones”.
- A window will appear with a list of equipment; you must select “USB Devices”.
- Next, all drivers for USB devices will be displayed. We select MPT USB devices and click the button below to continue.
- The driver installation process has begun. All that remains is to wait for the successful completion of the procedure.
AirDroid
Another good program for fully synchronizing Lenovo with a PC in Russian is AirDroid. You can also download it from the Google app store. After launch, the program will provide an address that must be entered into the address bar in your computer browser. Then you need to confirm the Wi-Fi connection on your smartphone. It is important that the devices are connected to the same network.
After connecting to the device, the browser on the PC will display an interface that looks like a desktop. In the right corner, all information about the smartphone and its memory is provided. Using the control panel below, you can transfer files and folders from your PC.
The advantage of the program is that you can perform any action. For example, clicking on the calls icon will display detailed call details. You can call or write a message via PC, even use your smartphone camera remotely.
Solving common problems
Often users encounter a problem when they cannot connect Lenovo to a computer via USB. But such cases are not isolated and, as a rule, typical. Therefore, there are ways to troubleshoot synchronization problems.
The computer does not see Lenovo via USB
- If the PC does not detect the smartphone, then you need to make sure that the phone is turned on and is not locked with a pattern . If the device starts charging when connected, then the connection mode is selected incorrectly, so you need to enable USB debugging.
- Also, if the problem occurs, reinstalling the drivers of the connected device on your PC can help. This method is quite effective in many cases. Malfunctions in the computer hardware cannot be ruled out. The USB connector or the cable itself may be damaged.
- The simple reason is that the cable is damaged, try using a different one.
The phone does not see the PC
- Enable USB debugging . If some Lenovo models, including the K3 or K5, do not see the computer, then first you need to rule out damage to the components: USB ports or cord. And only then start treating the smartphone. First of all, the connection mode must be selected correctly. Enter developer mode (through settings), then enable USB debugging.
- Do a hard reboot . Press the power button for 30 seconds, or until it vibrates, and release.
- Reset . You can also turn off the phone, then hold down the Power and Volume Up buttons at the same time. Hold them for 10-15 seconds until the image appears on the display. Only in this case, all data and settings will be deleted. Therefore, it is better to upload all the information to a flash drive or upload it to the cloud in advance .
How to enter BIOS
On different Lenovo models, the methods for entering Bios on a laptop may differ. First, try the standard login method - when you start your personal computer, you need to press the F2 button on the keyboard, sometimes holding down the Fn key first. Next, the PC settings menu will be called up.
But this method does not always work. For some Lenovo models, the BIOS does not load when you press F2 or Fn+F2 - for example, Lenovo Legion Y520, Lenovo G70, G50-30 or G500. If you tried to enter bios using the method described above and it did not work, the following instructions are for you:
- There should be a special small key with a curved arrow on the side of the laptop (where the charging socket is usually located) or right next to the power button. It's called Novo Button, One Key Recovery or One Key Rescue System. You need to turn off the laptop and click on it.
- If you pressed the correct button, the laptop will start, and on the screen you will see that we go to a special start menu:
- Normal Startup (normal download);
- Bios Setup (parameters);
- System Recovery (system recovery);
- Boot Menu (boot menu).
- As you most likely guessed, to enter the BIOS on Lenovo, you need to go to the BiosSetup item. After you select it, you will see that the laptop has entered the BIOS and you can configure it as you wish.
Answers to popular questions
How to properly disconnect a smartphone from a computer?
In the connected device manager on your PC, you need to stop synchronization in the same way as another flash drive or drive. It is important to remember to properly disconnect devices.
Is it possible to sync Lenovo with PC via Bluetooth?
Yes, only the Bluetooth module must be installed on the computer.
Why are smartphone drivers not automatically installed on my PC?
There is a possibility that their installation is blocked by an antivirus or the version of the PC operating system is significantly outdated. This is especially true for Windows XP.
Now you know that the main problems when establishing a connection are incorrect settings or outdated drivers. Having dealt with all the presented methods for connecting Lenovo to a computer, you can choose any option convenient for you.
Need help solving an important problem? Then ask any question about Lenovo and we will answer it!
We tame Lenovo hardware and marvel at the nuances of XClarity
In the series of articles about system software, the well-known monsters of the “blue giant” were left for dessert: Lenovo XClarity and IBM Systems Director.
Every time I read documentation for IBM applications, I have a strong association with completing a multi-stage quest. But let’s attribute the effect to the scrupulousness of the technical presentation and look into the capabilities of IBM’s monitoring monsters.
The patient for research will be an IBM x3650 M4 machine, which Server Mall received after another purchase of hardware, complete with an alarming red light. Of course, the server has a proprietary Light Path with indication of most states, but even more information can be collected using proprietary monitoring applications.
In the wilds of the IBM/Lenovo website you can find the following hardware management tools:
- Lenovo XClarity is a system for centralized resource management of IBM and Lenovо servers. Allows you to configure and update machines, receive notifications about the status of equipment and manage it remotely;
- Lenovo XClarity Integrator for VMware vCenter – a tool for managing virtualization hosts directly from the VMware vCenter console;
- Lenovo XClarity mobile app – a mobile application for monitoring, power management and rebooting IBM/Lenovo machines;
- IBM Systems Director is a well-worn predecessor of XClarity with a more modest set of capabilities.
I will dwell on these tools in more detail and try to briefly outline their capabilities and potential interest for the administrator. If you have been working with IBM for a long time, then much of this article will not be a revelation - in this case, I would be grateful if you could share your set of systems management tools from IBM in the comments.
The Lenovo XClarity equipment monitoring and management system has replaced the well-known IBM Systems Director package. It can automatically collect information about IBM/Lenovo servers and network equipment and allows you to make some settings. With native hardware, XClarity can operate agentless, using IMM capabilities directly.
I’ll immediately note an important nuance - XClarity can only properly monitor IBM/Lenovo server systems, which makes this software uninteresting for a mixed environment with equipment from different vendors.
IMM is a proprietary implementation of the IPMI remote management protocol, similar to iDRAC for Dell servers or iLO for HP.
The following systems are supported:
- IBM System dx360 M4, Type 7912, 7913;
- IBM System x3300 M4, Type 7382;
- IBM System x3500 M4, Type 7383;
- In the meantime, it is possible to work with Cisco Nexus switches.
XClarity performs all the usual functions of a monitoring system and supports Syslog recording for more detailed investigation of problems. In keeping with the times, there is also a mobile application for receiving monitoring messages via Push Notifications.
In addition to monitoring and remotely connecting to IMM consoles, the system can perform some configuration tasks for the systems entrusted to it. For example, with XClarity you can simultaneously install up to 28 operating systems or bring machine configurations to a common denominator using templates. For the bravest and most determined, mass firmware updates are also available - up to 50 servers at a time.
In the configuration template, you can specify storage and network adapter parameters, required firmware versions, select the operating system to boot and assign typical IMM, BIOS/UEFI parameters.
In addition to templates, there are also policies. With their help, you can check the compliance of server systems with internal IT standards. XClarity Administrator will warn about inconsistencies between the firmware used and will update them itself after the administrator's approval. Together with the templates, we get something like Active Directory for hardware .
XClarity comes in a ready-to-use virtual machine format for VMware vSphere and Microsoft Hyper-V. In the table below you will find a brief comparison of the two available editions – Administrator and Pro:
| Lenovo XClarity Features | Lenovo XClarity Administrator | Lenovo XClarity Pro |
| Supported Systems | ||
| Lenovo Flex System | x | x |
| Lenovo System X M5 and X6 Rack Servers | x | x |
| Other Lenovo System X servers | x | |
| Automation and fault tolerance in Microsoft Hyper-V and VMware ESXi clusters | ||
| Manage, monitor and update hosts from the VMware vCenter console | x | |
| Automatic migration of cluster virtual machines when updating host firmware | x | |
| Automatic migration of cluster virtual machines when the monitoring system detects a potential problem | x | |
| Approximate cost of a license for 1 server* | ||
| $200 | $350 |
Pro version supports integration with VMware vCenter, which allows the latter to learn about hardware failures and, for example, move machines to another host.
In a vSphere environment, a machine can move to another host at the initiative of the balancing mechanism, or if the host is unavailable or does not see the storage. Of course, this list can be seriously expanded if there is detailed information about the hardware.
If XClarity is available, the list of triggers is supplemented with the following:
- Problems with the load on the processor, cache memory, bus controller, or external host interfaces;
- RAM load;
- Problems with the power subsystem;
- Overheating of components;
- Problems with drives, RAID controller;
- Incorrectly installed firmware.
All these situations can be controlled through the virtual machine migration policy. The policy itself is configured once, after which XClarity readily expects trouble.
To automatically move machines to another host, the vSphere cluster must run in fully automatic DRS (Distributed Resource Scheduler) mode. In addition, for proper operation of all monitoring subsystems, it is recommended to use ESXi builds from Lenovo.
The vCenter integration plugin is available in the XClarity Pro version, but it can also be purchased as a separate component for XClarity Administrator. The cost of such a license is approximately $406.99 per host, including a subscription to updates and technical support for three years.
Installation is possible on both a physical and virtual machine with the following parameters:
- Customized IIM interface;
- ESXi version 4.1-6.0, or better yet ESXi builds from Lenovo;
- Operating system: Windows Server 2008 (x64) – 2012 R2;
- At least 4 GB RAM, preferably 8 GB;
- At least 20 GB of disk space, preferably 40 GB;
- 1 – 2 processors.
XClarity Administrator will be useful starting with an infrastructure from a small server rack. The larger the server room, the stronger the effect. It’s just a pity that it can’t update drivers for operating systems and can’t monitor third-party equipment.
The XClarity Mobile application allows you to receive information from all IBM/Lenovo systems on your Android or iOS smartphone, which can be useful in daily work.
For example, you can check how the scheduled firmware update worked while in public transport on the way to work. You can also use it as a “lazy guy” from the server at the other end of the computer room: press a button on your smartphone and send the server to reboot; or turned on the indicator light on the car to quickly search in a clogged rack. In general, you can come up with enough scenarios, and it is not at all necessary to do exactly as Lenovo teaches in marketing materials.
The application is available for smartphones running Android 4.4 and higher, or for devices running iOS 8 and higher. To work, you will need a VPN to a network with XClarity running.
IBM Systems Director can be considered the “grandfather” of lifecycle management systems, since its history goes back to 1993, to OS/2 systems. Currently this is a free monitoring system for physical and virtual server systems, which is not officially supported or developed.
Systems Director collects information through passive (platform) and active (common) agents, or through the WMI, SNMP, IPMI or IMM protocols.
Data is stored in a database of one of the following types:
- IBM DB2;
- ORACLE;
- Microsoft SQL Server (including Express).
For modern infrastructure, it is immediately worth noting the nuance of working with Windows Server 2012. Machines with this OS need to be configured in a special way, as described in IBM recommendations.
As for the differences from the newer XClarity, they are as follows:
- XClarity only works with ESXi and Hyper-V hypervisors, while IBM Systems Director even supports Xen;
- In the free edition, Systems Director's capabilities are limited to monitoring, alerts, and firmware updates for IBM server hardware;
- XClarity contains more features for checking the compliance of hardware configurations and firmware versions with policies;
- IBM Systems Director supports driver updates, unlike XClarity.
It’s even strange that IBM abandoned further improvement of the product and switched to the more limited XClarity system. However, the "old man" distribution is still available upon request.
In the case of IBM/Lenovo, the excessive choice of management software does not make your eyes run wild, so you can give simple recommendations:
- If your environment uses IBM SystemX machines, the best tool for monitoring and managing firmware is the free Systems Director. The application allows you to receive data via SMTP, WMI and IPMI, which makes it possible to connect to third-party equipment monitoring;
- For newer Lenovo hardware, it is better to use XClarity, especially if you need integration with VMware vSphere or Microsoft Hyper-V hypervisors.
Finally, here are some links to delve deeper into the question yourself:
- Additional selection of IBM tools
- Features of VMware DRS
- Best practices with IBM Systems Director
- IBM Configuration and Options Guide
For IBM software solutions, information is traditionally very fragmented and scarce. If you know something about XClarity and Systems Director that is not mentioned in the article, be sure to share the information in the comments.