The Lenovo A536 phone is one of the most interesting mobile gadgets today. Its reliable operation is guaranteed by timely updating of applications and software platform. Firmware for smartphones is used specifically for this purpose.
You can use the standard version of the firmware, and if it supports the self-updating function, this may be enough for full operation. But if an independent update does not occur or there are some system failures in the operation of the gadget, it is quite appropriate to replace the firmware version yourself with some other one.
There are two ways to install new firmware on the Lenovo a536: either through an additional program from a computer, or through the Recovery system on the phone itself. You will be pleased with the results in both cases if you follow the instructions below.
Preparing for firmware
Before you learn how to reflash a Lenovo phone, it is important to understand what preliminary steps you should definitely take:
- Download the firmware version you need. As a rule, it is downloaded as an archive, so unzip the file and place it in a convenient place:
- Official firmware A536 S186 150813 (892MB).
- Charge the battery to at least half of its total capacity. It is best to have the battery fully charged.
- Check for the latest USB drivers on your computer to connect your phone to it:
- Driver for advanced operation of a smartphone with a PC (modem mode, USB debugging mode, etc.) - Download Lenovo Usb Driver x86/x64 Autorun v1.0.10.zip;
- Special mode driver - smartphone firmware mode driver from PC (auto-installer) x86/x64 - Download Driver Auto Installer v1.1236.00.zip.
Step-by-step firmware instructions
First, let's see how to flash a 536 A smartphone using the FlashTool program:
Download the program SP_Flash_Tool_v5.1352.01.zip
- We take out the battery from the phone and connect it, switched off, via USB to the computer.
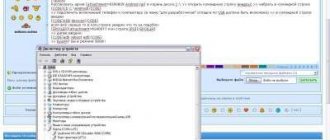
- In the task manager, you will see the phone as an unidentified device. Click on it to update the drivers.
- We activate the firmware mode. After that you will see Mediatek Preloader.
- Disconnect the phone from the computer and launch the exe application.
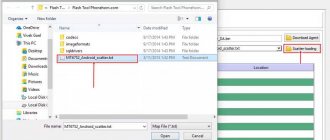
- Click on the scatter-loading button and select the appropriate file in the scatter format.
- Place a checkmark next to the item DA DL ALL WITH Cheksum that appears. This is necessary so that after the system update you can turn on the phone.
- Click on the DOWNLOAD button to start downloading files.
- If you did everything correctly, then after the successful completion of the procedure you will see a green check mark on the screen.
- Now you can turn on the phone and carry out its initial setup.
Installation
- Disconnect your smartphone from your PC.
- Run the Flash_tool.exe program (UpgradeTool folder). In it, click the Scatter-Loading button and in the target_bin folder select the MT6577_Android_scatter_emmc.txt file.
Check the box next to “DA DL ALL WITH Cheksum” (a phone flashed without this checkbox will not start. You will need to do everything again).
Click the Firmware Upgrade button.
- The archive integrity check will begin. The program will then go into standby mode.
An error message may pop up. If you are sure that the archive has been downloaded completely and unpacked without errors, close the program and delete the Checksum.ini file. Then repeat step 2.
If, instead of starting the firmware, the charging process is shown on the device screen, disconnect the cable from the phone, wait about thirty seconds and connect it again.
Often the firmware program cannot find one of the images. In this case, there will be no check mark next to such an image. Double-click on this image, in the explorer that opens, find the file with the same name and double-click on it.
- Connect the switched off smartphone with the battery inserted to the PC. The firmware will start on its own. Please be patient - this process is quite long.
- When the firmware is completed, disconnect the device from the computer.
Firmware via recovery
There is an alternative option to flash your phone, and you don’t need a computer to implement it. This is done like this:
- Turn off the smartphone.
- Press and hold the volume up and power buttons at the same time.
- We see the Lenovo logo on the screen. This means that we get access to the recovery system. As soon as this happens, you can release the previously held buttons.
- Click on the “Wipe” button, selecting the first three items from the list that appears.
- Click on “Install” to start updating your phone.
- We wait until the phone reboots and it can be configured.
The advantage of the second method is that the update is carried out without additional software. But, unfortunately, it won’t be possible to change the standard firmware to custom firmware this way.
Don’t be afraid to make changes to the installed smartphone software platform yourself. This is not difficult at all and can be done by any mobile device user. The main thing is to strictly follow the instructions and act carefully. Then any risk of disruption of the smartphone as a result of updating or replacing the firmware can be eliminated.
Lenovo a536 is one of the most decent mobile phones that also needs regular updates. To do this, they traditionally use special firmware, presented by experienced developers and modified by advanced users of mobile technology.
Features of firmware on Lenovo a536
Modern Lenovo a536 firmware should delight you with a high level of functionality and maximum security. At the same time, numerous variations of additional software created specifically for mobile phones are available.
Each Lenovo A536 user can find exactly the program that fully meets his needs. Another important aspect is the ability to make sure that the application provides the maximum level of benefit.
Welcome to Ideation!
Ideation sections have been created for customers to engage with us by discussing and promoting ideas and improvements relating to Lenovo's products and services.
As a reminder, your participation in Ideation is governed by Lenovo's website Terms of Use [link] and by Lenovo's Forums Community Guidelines. Additional terms governing the Ideation Program are included in the Ideation Terms and may be found here. For your convenience, here's a
Quick summary of the highlights:
- This area is for ideas – improving our products or suggesting entirely new products – please keep technical support issues on the other boards designated for that purpose
- You're giving your ideas freely for us to use so we can improve our offerings to you
- The ideas you give us are your own and are not confidential
- If we decide we want exclusive use of your idea, you're agreeing to sell it to us at a fixed price
By clicking on “Yes” below you certify that you have read and agree to the Community Guidelines and the Ideation Terms, and acknowledge that by submitting any ideas, material, or information on the Ideation site you grant Lenovo the right to use any such submissions by you in any way without acknowledging, notifying, or compensating you, as described in those documents.
FlashTool program
To update your smartphone, you can use the FlashTool program. This requires correctly installed mobile phone drivers.
- At the very beginning, you need to select the appropriate firmware option, which should be downloaded and unpacked.
- The battery must be removed from the smartphone.
- The turned off mobile phone is connected to the computer. An unidentified device will appear in the manager for a couple of minutes. You need to click on it to update the driver, and then activate the firmware mode. If everything is done correctly, Mediatek Preloader will appear.
- The mobile phone is disconnected from the computer.
- The Flash_tool.exe application now starts.
- You need to click on the scatter-loading button, selecting the appropriate scatter format file. This determines how successful the mobile phone update will be.
- The next step is to check the box next to DA DL ALL WITH Cheksum. Otherwise, after the update, the mobile phone will not be able to turn on.
- To update, click on DOWNLOAD while downloading files.
- The smartphone must be connected to a personal computer.
- If everything is done correctly, multi-colored stripes will run at first. In this case, the successful completion of the process will be confirmed by a green tick.
Lenovo a536 firmware (Lenovo a536) ensures that the mobile phone will be updated quickly and successfully.
Welcome to Ideation!
Ideation sections have been created for customers to engage with us by discussing and promoting ideas and improvements relating to Lenovo's products and services.
As a reminder, your participation in Ideation is governed by Lenovo's website Terms of Use [link] and by Lenovo's Forums Community Guidelines. Additional terms governing the Ideation Program are included in the Ideation Terms and may be found here. For your convenience, here's a
Quick summary of the highlights:
- This area is for ideas – improving our products or suggesting entirely new products – please keep technical support issues on the other boards designated for that purpose
- You're giving your ideas freely for us to use so we can improve our offerings to you
- The ideas you give us are your own and are not confidential
- If we decide we want exclusive use of your idea, you're agreeing to sell it to us at a fixed price
By clicking on “Yes” below you certify that you have read and agree to the Community Guidelines and the Ideation Terms, and acknowledge that by submitting any ideas, material, or information on the Ideation site you grant Lenovo the right to use any such submissions by you in any way without acknowledging, notifying, or compensating you, as described in those documents.
TWRP
In this case, an easy and quick process for updating your mobile phone is provided:
- Initially, the smartphone should be turned off.
- It is recommended to hold down the volume up and down buttons.
- At the same time, the power button is pressed and the brand logo appears.
- The main goal is to enter recovery mode, after which you can release both volume buttons.
- Now you should press wipe and select the first 3 items.
- It is mandatory to click install to update your smartphone.
- The mobile phone reboots.
The second method is amazingly fast and easy if regular updates are provided.
Benefits of Lenovo A536 Upgrade
In each case, the Lenovo a536 firmware allows you to successfully update your mobile phone, so that its performance and functionality will meet all user expectations. Correct implementation of the procedure guarantees successful use of the smartphone.
Recommended articles:
- 22-08-2017, 15:11
- 84 205
Firmware / Lenovo Firmware
Lenovo A536 firmware official firmware (Restoring a brick) Remember, before doing anything, carefully watch the video instructions, as well as the description! And remember, you do everything at your own peril and risk.Instructions for flashing the A536 phone (official)1) Charge our phone.2) For flashing, use an original or verified microUSB cable.3) Download the necessary files for flashing (firmware, drivers, Flashtool) links to files at the bottom of the instructions 4) Unpack everything into one folder for convenience and for proper operation 5) Install the driver 6) Launch Flashtool and select the scatter file 7) Select the firmware upgrade !!! and press start8) We connect our switched off Lenovo A536 and wait for the process to finish!!! A green OK message will appear.9) We start our phone, the first startup will take a long time! Firmware for our Lenovo:
A536: A536_S186_150813_ROW.7z 893 MB: FIRMWARE
Driver:
https://yadi.sk/d/Qk-zMEH537A2Jv or driver_auto_installer_v1.1236.00.zip [9.57 Mb] (downloads: 18050)
Flashtool firmware program:
https:// goo.gl/FGPT7V or sp_flash_tool_v5.1352.01.rar [31.67 Mb] (downloads: 20856)
FlashTool has been around for several years and is constantly updated to support new devices and firmware methods. But after a number of fundamental changes, the fifth version was released immediately after the third version. It is still used for flashing phones or tablets; the main changes have affected the interface, and accordingly, support for newer devices and functions has appeared. The programs are interchangeable, but in general, it is recommended to use the program of the third version for older phones, and the last fifth for more modern smartphones . But it is also necessary to take into account the recommendations, since with support for new devices, old devices may not be supported correctly. FlashTool5 FlashTool3
Before installing the firmware you need to prepare:
A phone with at least 50% charged battery. A high-quality and not very long USB-MicroUSB cable for connecting to a PC. A computer with Windows XP/7/8 x86 or x64 pre-installed.
Instructions for flashing a Lenovo smartphone/tablet with an MTK processor using FlashTool 5.xx:
1. Download and install drivers on your computer Drivers and instructions for installing them2. Download the program itself from the FlashTool page and run it.3. Click the “Scatter-loading” button and select the scatter file, usually it is located in the target_bin folder, with all the firmware files and has a name like MT6592_Android_scatter.4. In the Option menu in the Download line, check the box DA DL All with Checksum5. On the Download tab, select Download Only or Firmware Upgrade and click the big green button to start the process.6. First, we distort the battery and connect the switched off phone.7. At the end, we will see a huge green jackdaw. Now we can remove the phone.
: Firmware instructions
Information
Visitors in the Guests
, cannot leave comments on this publication.
Most popular messages
(Last 7 days)
- Useful videos from Lenovo 1
- Re: Low CPU frequency under load. (L340-15IRH Gaming Laptop) 1
- Video driver for GTX 1650 laptop l340 Gaming 1
- Username
- Match exact username (no wildcards)
- User ID
- Email address
- Match exact email address (no wildcards)
- IP address
- Match any of the above criteria
- Duration of ban(Days)
- Duration of ban(Hours)
- Duration of ban(Minutes)
- Make ban permanent
- Internal reason for ban
- Public reason for ban
Preparing for firmware
Before you learn how to reflash a Lenovo phone, it is important to understand what preliminary steps you should definitely take:
- Official firmware A536 S186 150813 (892MB).
- Charge the battery to at least half of its total capacity. It is best to have the battery fully charged.
- Driver for advanced operation of a smartphone with a PC (modem mode, USB debugging mode, etc.) - Download Lenovo Usb Driver x86/x64 Autorun v1.0.10.zip;
- Special mode driver - smartphone firmware mode driver from PC (auto-installer) x86/x64 - Download Driver Auto Installer v1.1236.00.zip.
Step-by-step firmware instructions
First, let's see how to flash a 536 A smartphone using the FlashTool program:
- We take out the battery from the phone and connect it, switched off, via USB to the computer.
- In the task manager, you will see the phone as an unidentified device. Click on it to update the drivers.
- We activate the firmware mode. After that you will see Mediatek Preloader.
- Disconnect the phone from the computer and launch the exe application.
- Click on the scatter-loading button and select the appropriate file in the scatter format.
- Place a checkmark next to the item DA DL ALL WITH Cheksum that appears. This is necessary so that after the system update you can turn on the phone.
- Click on the DOWNLOAD button to start downloading files.
- If you did everything correctly, then after the successful completion of the procedure you will see a green check mark on the screen.
- Now you can turn on the phone and carry out its initial setup.
Firmware via recovery
There is an alternative option to flash your phone, and you don’t need a computer to implement it. This is done like this:
- Turn off the smartphone.
- Press and hold the volume up and power buttons at the same time.
- We see the Lenovo logo on the screen. This means that we get access to the recovery system. As soon as this happens, you can release the previously held buttons.
- Click on the “Wipe” button, selecting the first three items from the list that appears.
- Click on “Install” to start updating your phone.
- We wait until the phone reboots and it can be configured.
The advantage of the second method is that the update is carried out without additional software. But, unfortunately, it won’t be possible to change the standard firmware to custom firmware this way.
Don’t be afraid to make changes to the installed smartphone software platform yourself. This is not difficult at all and can be done by any mobile device user. The main thing is to strictly follow the instructions and act carefully. Then any risk of disruption of the smartphone as a result of updating or replacing the firmware can be eliminated.
How to install recovery without a computer
To install TWRP or Philz Touch, a computer is not required if the phone has root rights. To get root, use Framaroot or 360 root programs. If it works, then download Flashify or Rashr. Give the program root access, and then flash recovery.
Detailed installation instructions are described using the example of Xiaomi Mi 4C. The instructions are universal and suitable for any smartphone.
Important! Flash only the specified recovery - TWRP or Philz Touch. Do not download recovery from the Flashify or Rashr application, since flashing the wrong recovery will result in a brick.
Preparatory procedures
If a Lenovo A536 user is concerned about the possibility of serious interference with the device's software, it is recommended that all preparatory procedures be completed. This will restore the functionality of the smartphone in critical cases and manifestations of various failures and will save a lot of time if you need to return the device to its original state.
Step 1: Install drivers
A completely standard procedure before working with almost any Android device adds drivers to the operating system of the personal computer used for manipulation, allowing you to correctly pair the device and programs designed to store information in memory sections. The Lenovo A536 is a Mediatek-powered smartphone, which means you can use an app to install the SP Flash Tool software on it, which in turn requires a specialized driver to be installed on the system.
The process of installing the necessary components is described in detail in the article:
Lesson: Installing drivers for Android firmware
If you have difficulty finding drivers for the Lenovo A536 model, you can use the link to download the necessary packages:
Download Lenovo A536 Firmwares.
Step 2: Get your route license
When the purpose of manipulating the A536 software is to regularly update the official software or return the smartphone to its out-of-the-box state, you can skip this step and move on to one of the ways to install Lenovo firmware on your device.
If you want to try to customize the device software and add some features to the phone that are not provided by the manufacturer, you need to get root rights. Additionally, you will need root privileges on your Lenovo A536 to create a full backup, which is highly recommended before tampering with the software any further.
This smartphone can be easily unloaded with the KingRoot application. To obtain superuser rights for the A536, you must use the instructions in the article:
Lesson: Getting root rights using KingROOT for PC
Step 3: Backup your system, backup your NVRAM.
As with many things, before you write software to memory when working with the Lenovo A536, you need to clear the partitions of the information they contain, which means that you will need a backup or a full system backup later. . Manipulations that allow you to save information from memory sections of an Android device are described in the article:
Tutorial: How to Backup Android Devices Before Flashing
In general, the instructions in this lesson are sufficient to ensure that the information will be retained. As for Lenovo A536, it is highly advisable to backup the “NVRAM” partition before installing the Android device.
The fact is that deleting this section in the model under consideration is a fairly common situation that leads to the failure of wireless networks. Restoring without a backup can take a long time and requires in-depth knowledge of working with the memory of MTK devices.
Read also: Download the latest version of the barcode descriptor
Let's take a closer look at the process of creating a copy of the “NVRAM” partition.
- The easiest way to bookmark a section is to use a specially created script, which you can download by clicking the link:
- After downloading, the files from the archive must be extracted into a separate folder.
- We obtain rights to the track on the device as described above.
- Connecting a device with USB errors to the computer even after the device is detected by the system, run the file nv_backup.bat .
- Upon request, on the device screen, we give rights to the application.
- The process of reading data and creating the necessary archive takes a lot of time.
Within 10-15 seconds, the image nvram.img script - this is the sentence in the section.
- Additionally: Restoring the “NVRAM” partition is performed by following the above steps, but in step 3, selecting the nv_restore.bat script.
Most popular messages
(Last 7 days)
- Useful videos from Lenovo 1
- Re: Low CPU frequency under load. (L340-15IRH Gaming Laptop) 1
- Video driver for GTX 1650 laptop l340 Gaming 1
- Username
- Match exact username (no wildcards)
- User ID
- Email address
- Match exact email address (no wildcards)
- IP address
- Match any of the above criteria
- Duration of ban(Days)
- Duration of ban(Hours)
- Duration of ban(Minutes)
- Make ban permanent
- Internal reason for ban
- Public reason for ban
Official firmware version
Although the software created by Lenovo programmers and developed by the manufacturer to use the A536 is no different, the factory firmware generally meets the needs of many users. In addition, installing official software is the only effective recovery method in case of problems with the software part of the device.
There are three main ways to update/reinstall official Android versions for Lenovo A536. The choice of method is made depending on the state of the device’s software and the goals set.
Method 1: Lenovo Smart Assistant
If the purpose of manipulating the A536 smartphone is to simply update the official software, perhaps the easiest way is to use Lenovo's own MOTO Smart Assistant utility.
Download Smart Assistant for Lenovo A536 from the official website
- After downloading, install the program following the installer prompts.
- Immediately after launching the application, you need to connect your smartphone to a USB port.
To correctly detect Smart Assistant on A536, the “USB Debugging” feature must be activated.
- If an updated version of the software is available on the manufacturer's server, a corresponding message is displayed.
- You can continue installing the update. To do this, use the “Update ROM” button in the program.
- After clicking the button, the necessary files will be downloaded,
and then install the update automatically.
- The smartphone will automatically reboot into installation mode for the update; there is no need to interrupt this process.
- The update takes a long time to install, and once the operation is completed, the updated Android will reboot again.
- Moreover: Unfortunately , Lenovo MOTO Smart Assistant is not stable and efficient in its functions.
If you encounter difficulties in working with the program, the ideal option is to choose another method of installing the required package, without wasting time searching for a troubleshooting method.
Method 2: Natural Recovery
You can install official system updates and full firmware using Lenovo A536 Factory Recovery Environment. In general, this may be easier than using the Smart Assistant described above, since it doesn't even require a computer to implement.
- Download the Lenovo A536 factory installation package and place it in the root of your MicroSD. Several versions of software for updating the device using the factory recovery environment are available for download at:
- We charge the smartphone completely and go for a return.
To do this, turn off the device completely by simultaneously holding down the “Volume +” and “Volume -” buttons, then hold them, press and hold the “Power” button on the screen until the Lenovo logo appears on the screen, and then release the latter. The “Volume” and “Volume” keys should be held until the Android image is displayed. - To see menu options, press the Power button again.
- Additional manipulations are performed in accordance with the steps of the instructions in the article:
- We recommend formatting the “data” and “stash” sections before installing the zip package with the update, although if the smartphone is working normally, you can do without this step.
- The selection of the installation mail package copied to the memory card is available through the menu item “apply update from sdcard2”.
- After waiting for the “Installation from sdcard2 completed” message, restart your A536 by selecting “reboot system now” from the main screen of the recovery environment.
- We are waiting for the updated version of the operating system to download.
- The first launch after the update, if you used the “data” and “stash” cleaning, may take up to 15 minutes.
Read also: Download Powers Point for Windows 7
Method 3: SP Flash Tool
Like many other smartphones, flashing Lenovo A536 with SP Flash Tool is the most radical and versatile way to flash system software, roll back and update, and importantly, recover MTK devices after software failures and much more. Problems.
- The relatively good hardware version of the A536 allows you to use the latest versions of the SP Flash Tool to work with it. The archive of application files from the example below can be downloaded from the link:
- MTK smartphones using Flashtool usually require the same actions. To download the software on Lenovo A536, you need to follow the step-by-step instructions in the article:
- The example below uses an improved version of ClockworkMod Recovery - Filtzouch.
Download. For Lenovo A536 - If you want to use TeamWin Recovery, you can use the link:
Download TWRP for Lenovo A536And the instructions in the article:
- After launching Rashr, giving the program superuser rights, select “Restore from directory” and set the path to the image with the modified recovery environment.
- Confirm your choice by clicking on the “yes” button in the request window, after which the installation of the environment will begin and upon completion, the window offer will be restarted in the modified recovery.
- Before rebooting, you need to copy the firmware zip file to the microSD slot installed on the device. In this example, the solution is MIUI 7 for Lenovo A536 from the miui.su team. Download the latest stable or weekly custom releases from:
- We restart the modified recovery in the same way as in the factory recovery environment or from Rashr.
- We make scarves, i.e. clean all parts of the storage device. When restoring PhilzTouch, you must select “Clean and format options”, then “Clean to install new ROM”. Confirmation of the start of the cleaning procedure is the selection of the element. “Yes - pure user and system data.”
- After the wipes, we return to the main recovery screen and select “Install Zip”, then “Select zip from storage / sdcard1”. And specify the path to the firmware file.
- After confirmation (“Yes - installation...”), the installation of the modified software will begin.
- All that remains is to monitor the progress indicator and wait for the installation to complete. When the process is completed, “press any key to continue” is displayed. We execute the system instruction, i.e. pressing the display back to the PhilzTouch home screen.
- Rebooting the updated Android is done by selecting “Reboot the system now”.
- After a long wait for the charging system (about 10 minutes) - MIUI 7 is ahead of us with all the advantages!
Read also: How to install Photoshop
Step 2: Install Lollipop 5.0
The next stage of Lenovo A536 firmware is installing the custom Lollipop 5.0 model. It is worth noting that in addition to installing the firmware itself, you will need to install a patch that corrects some of the shortcomings of the original solution.
- The necessary files are available for download at the following link:
- Install Lollipop 5.0 via SP Flash Tool. After downloading the scatter file, select the “Firmware Update” mode, click “Download” and connect the turned off smartphone to USB.
- Install the patch_for_lp.zip , following the steps in the instructions from the article:
- Reboot into the new Android.
Step 3: CyanogenMod 13
The latest Android version recommended for use on the A536 is 6.0 Marshmallow. Custom firmware based on this version is based on the updated kernel 3.10+, which provides a number of undeniable advantages. Despite the large number of solutions, we will use a proven port from the CyanogenMod team.
Download CyanogenMod 13 port for Lenovo A536
To upgrade to the new kernel, you must first install Lollipop 5.0 using the previous method!
- Install CyanogenMod 13 via SP Flash Tool in Download Only mode. After downloading the scatter file, click “Download” and connect the device to USB.
- We are waiting for the process to complete.
- After the initial download of the firmware, we receive a fresh version of the OS, which works almost perfectly, with the exception of minor flaws.
Step 4: Google Apps
Almost all modified solutions for Lenovo A536, including the three options described above, do not contain applications from Google. This somewhat limits the usual functionality of the device, but the situation can be solved by installing the OpenGapps package.
- Download the zip package for installation via a modified recovery from the official project website:
- Preliminary selection of “ARM” in the “Platform:” field and determination of the required version of Android, as well as the composition of the downloaded package.
- We place the packaging on the memory card installed in the device. And install OpenGapps via custom recovery.
- After the reboot, we have a smartphone with all the necessary components and functions from Google.
Thus, all the possibilities for manipulating the software part of the Lenovo A536 smartphone are discussed above. If problems arise, do not be discouraged. Restoring a device if you have a backup is easy. In critical situations, simply use method No. 3 from this article and restore the factory firmware using the SP Flash Tool.